Who is the visitor and who is the visited person
Where to find the agenda
How to navigate the visit list
How to plan a new visit (5-step guide)
Visit statuses and approval
How to edit or delete a visit
Visit details
Visits in the calendar
What the web application does not cover (reception and check-out)
Two key concepts of the agenda differ by just one letter, so it is good to clarify them right at the beginning:
Visiting person — someone who is coming (visitor, guest from outside). This also includes a visiting vehicle.
Visited person — someone to whom the visit is directed (host, employee).
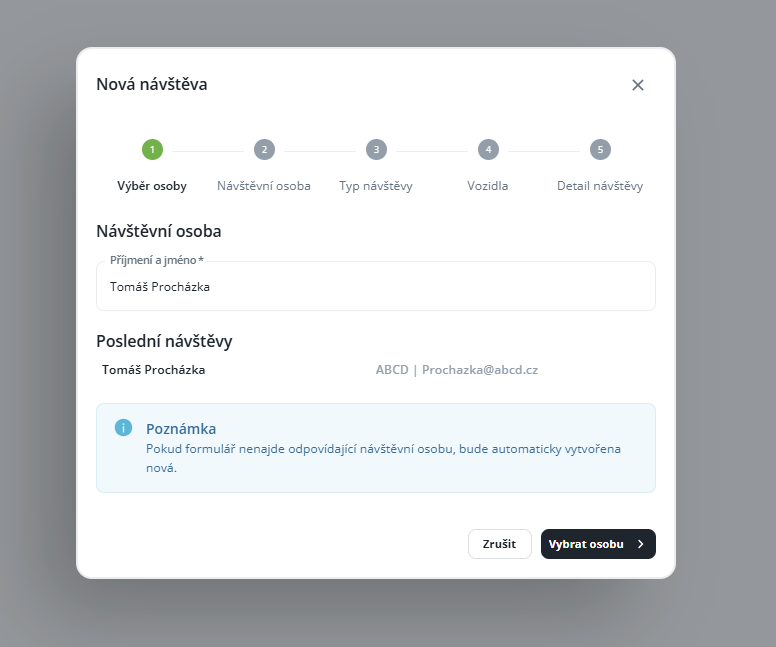
When you open the calendar, an overview table of visits for the selected period is displayed. By default, it contains columns Visiting person (with name and company), Visited person, Reason for visit, Note, Vehicles and Quick actions. Through column settings, you can add more — for example Type of visit, Scheduled date, Approval status, Approved by or Approval date.
In the Vehicles column there is a car icon — when you hover over it, the vehicle type, make, color, and license plate of the vehicle and trailer are displayed.
The Quick Actions column offers buttons directly in the row Approve and Reject (only for visits awaiting approval) and a Detail button.
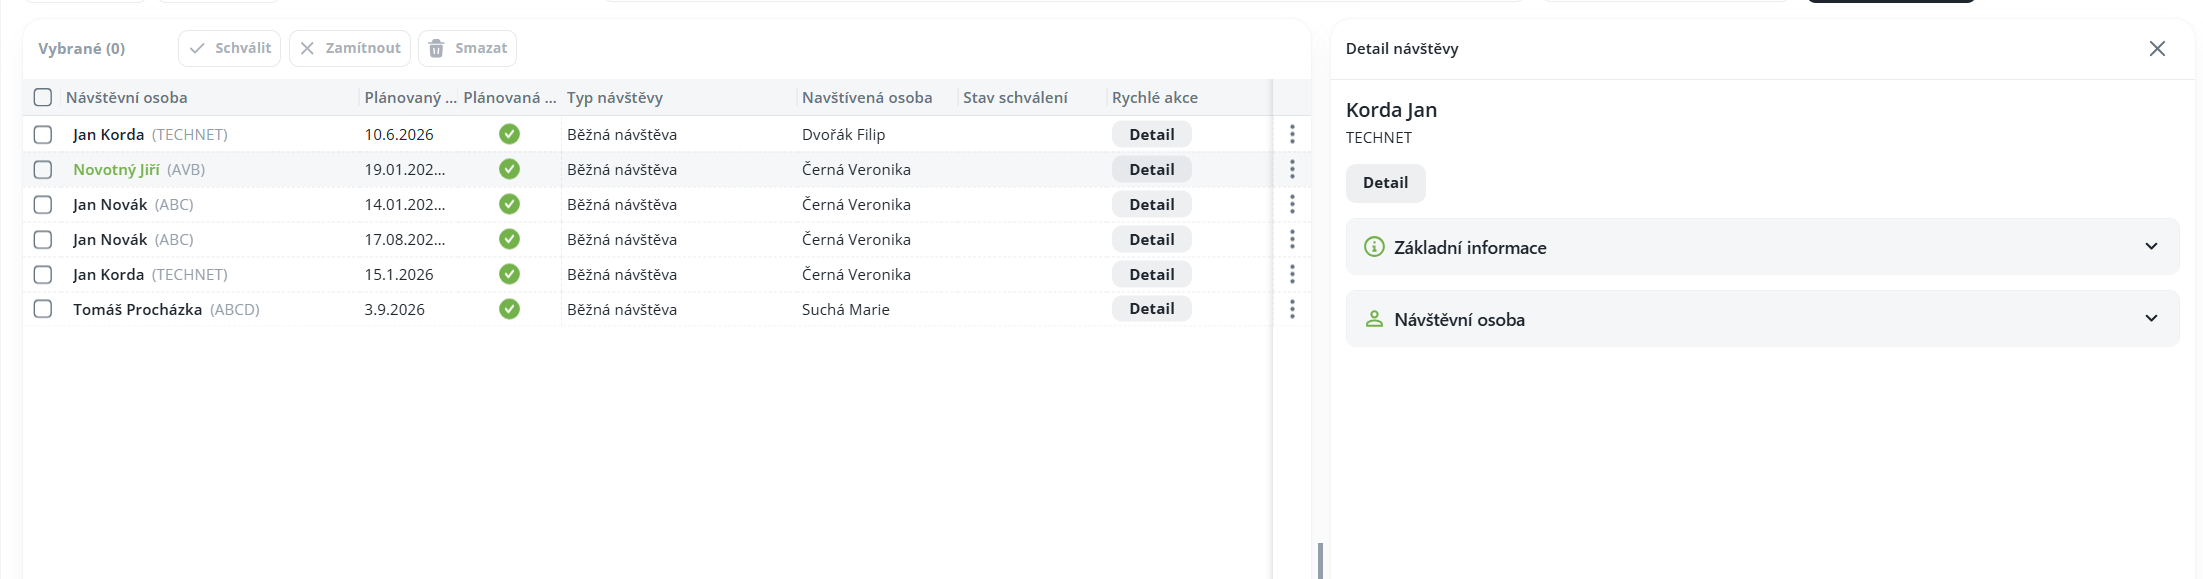
Clicking on a row opens a side panel on the right with a summary of the visit: status, basic information, visitor, vehicles and trailers.
Right-clicking on a row opens a context menu: Edit, Visit Details, Approve, Reject, Delete (depending on the visit status and your permissions).
Period — standard filter with from–to selection and period type selection.
Toggle Awaiting my approval — "Shows only visits awaiting your approval." When enabled, the period filter is ignored; the application remembers the toggle setting.
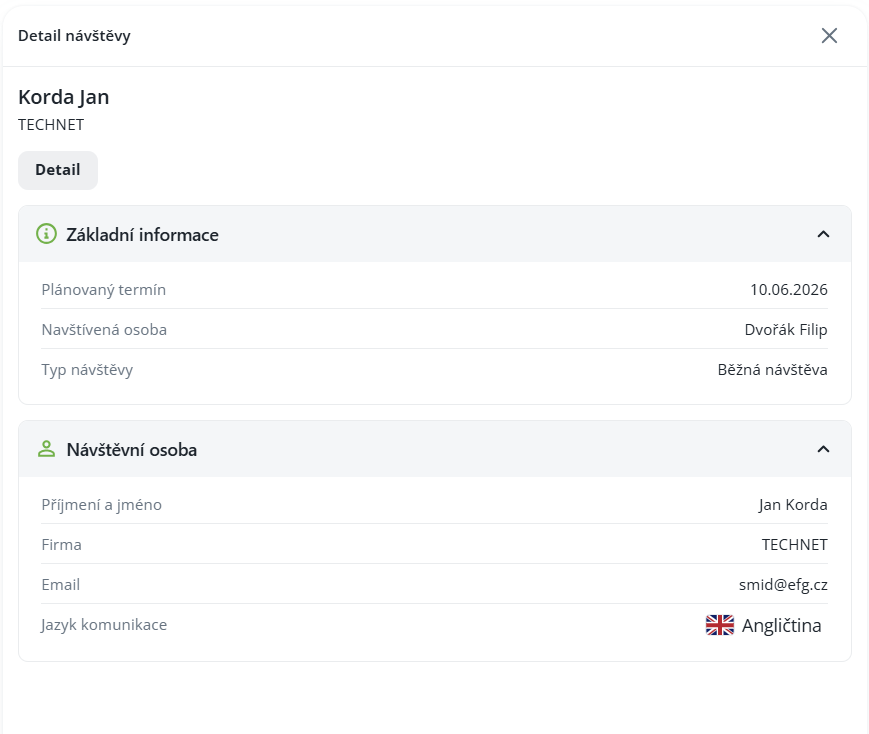
Click the New visit button above the list. A five-step wizard will open; navigate between steps using the Back and Next buttons.
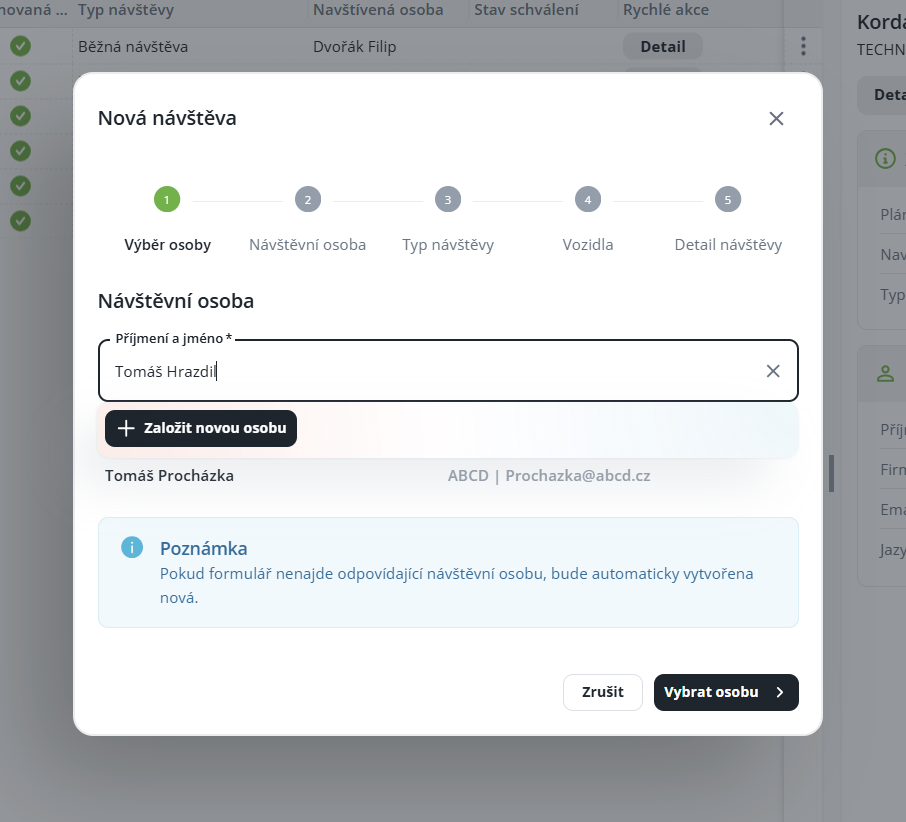
Start typing the visitor's name in the Last name and first name field. The autocomplete suggests already registered visitors (you can see the company, email, and phone number below the name). If you don't find them, select Create new person. In the Recent visits section, you can select a person from a recent visit with one click. Continue with the Select person button.


Check or complete the information: First Name, Last Name, Company, Email, Phone, Gender, Communication Language, Note. For an existing person, all fields except Note are locked if you do not have the right to edit the visitor.
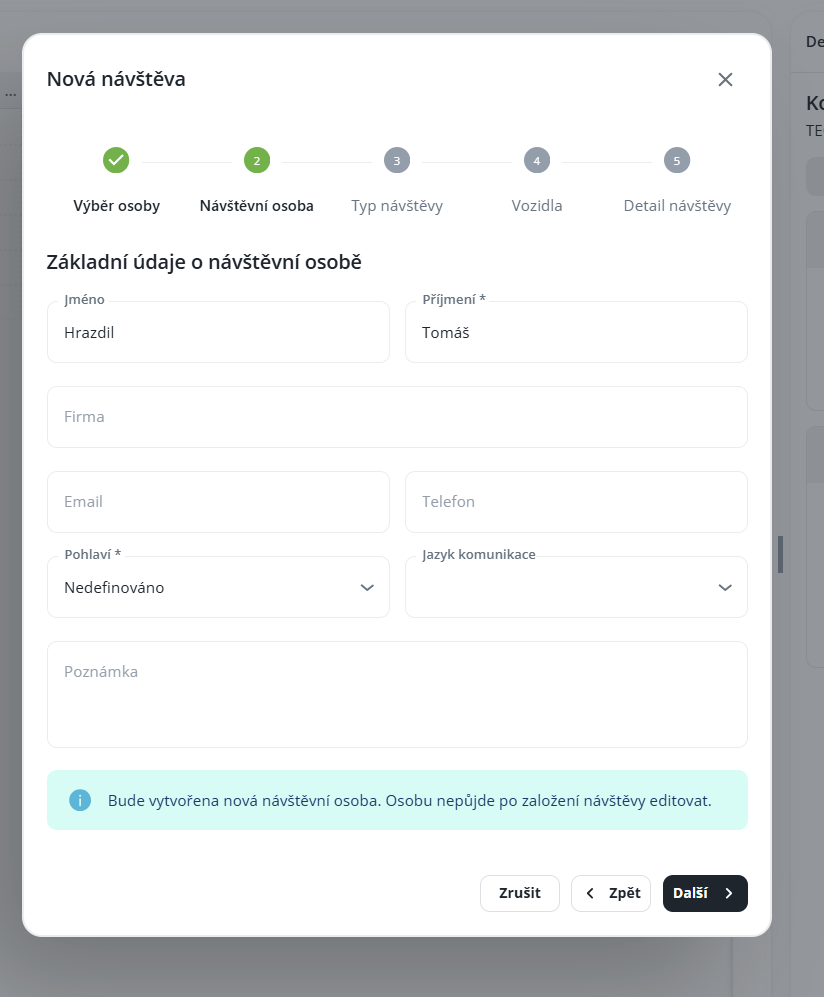
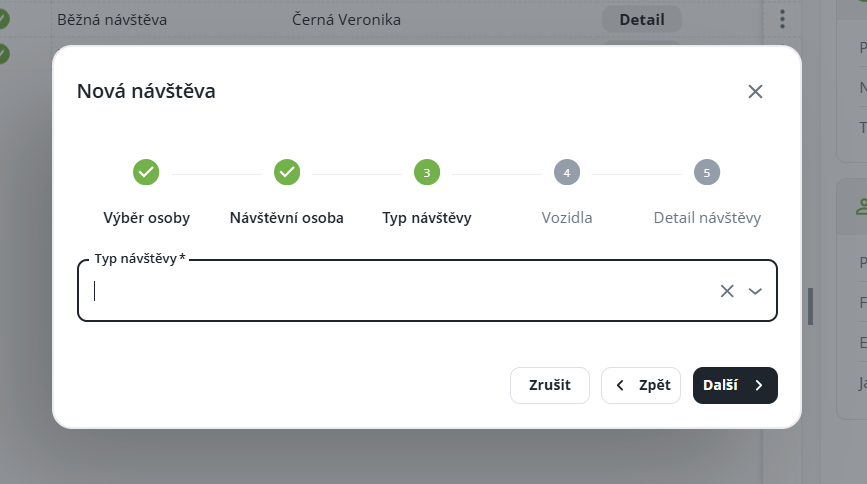
Select Visit Type from the list (required). The type determines the behavior of the visit — including whether the visited person or organizational structure must be filled in and whether the visit is subject to approval. If the type has a note filled in, it will be displayed under the selection as information.
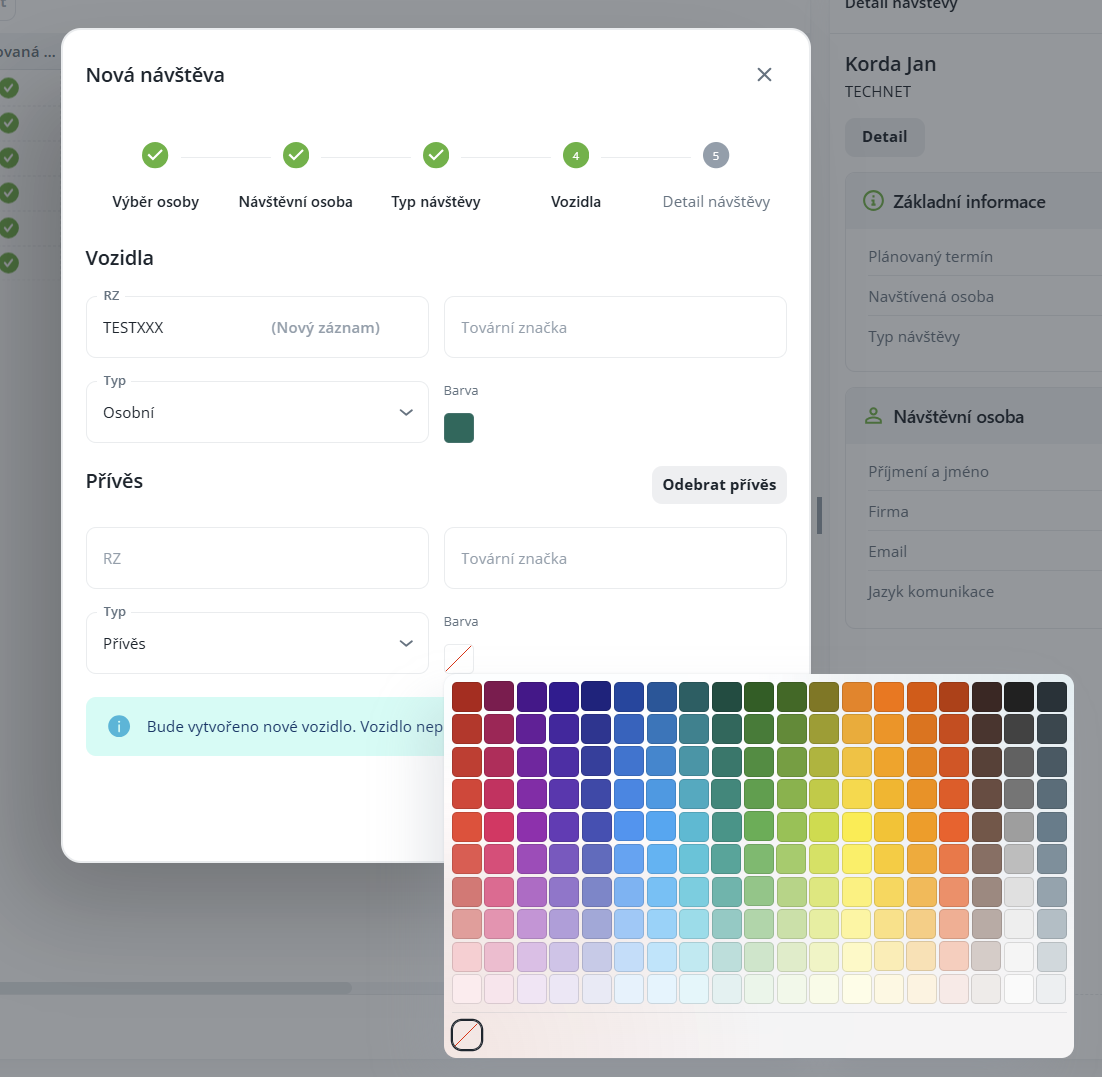
If the visitor arrives by car, fill in RZ (the autocomplete offers registered vehicles), Make, Type (Personal / Commercial / Motorcycle / Trailer / Other) and Color. Use the Add trailer button to add the same information for a trailer — a trailer can only be entered for a completed vehicle. If there is no vehicle, simply skip this step using the Next button.
Fill in the information about the visit itself:
Field
Meaning
Visited person | Who the visit is for — your name will be pre-filled. Obligation is determined by the type of visit. |
Escort | Person who accompanies the visit around the premises. |
Organizational structure | Target workplace; obligation is determined by the type of visit. |
Date of arrival and Time of arrival | Planned visit date. Date is mandatory. |
Reason for visit | Free text. |
Note | Free text — the only field that can be edited even during an ongoing visit. |
Complete the wizard by clicking the Create Visit button. After successful saving, a confirmation message "Visit has been successfully scheduled" will appear.
If required by the visit type, the scheduled visit must be approved by the visited person (or their companion). You can see the status in the column and label Approval Status:
🟠 Awaiting approval — default state after creating a visit, approval options are displayed
🟢 Approved — after the Approve action.
🔴 Rejected — after the Reject action.
You can approve or reject a visit in several places:
buttons Approve / Reject in the Quick actions column,
from the context menu of the row or from the sidebar,
in the visit detail,
in bulk — check multiple rows and select Approve / Reject above the list,
via a link from the email notification, which opens the detail directly with the approval or rejection dialog.
In the action dialog, you can attach a Note — it will be saved as an Approval Note. The system will also add who and when approved the visit.
💡 Tip: Enable the Awaiting my approval filter — you will see only visits that are waiting for your decision. Their count is also shown by a red badge next to the menu item.
You can edit a visit by selecting Edit (context menu, detail). The same wizard will open with pre-filled data and an Edit visit button; you can no longer change the visiting person.
Planned visit (visitor has not yet arrived) — you can edit all data and delete the visit.
Unplanned / ongoing visit (arrival has already been recorded) — you can only edit the Note; deletion is not available. The wizard will remind you with the message "If the visit is not planned, only the visit note can be edited."
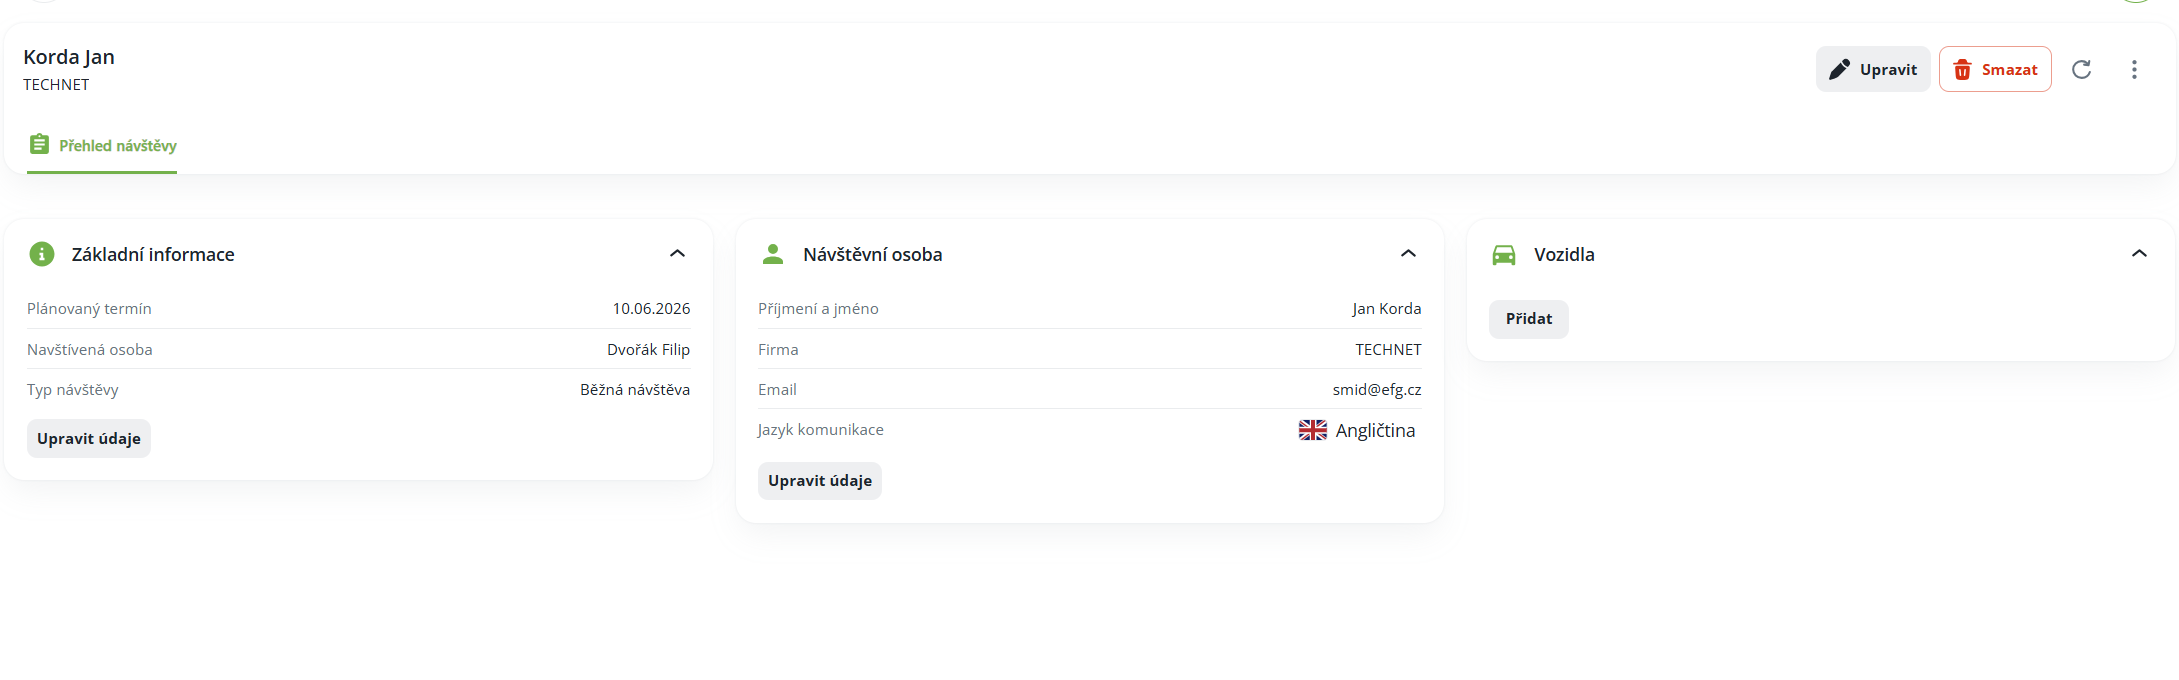
You can open the detail by selecting Visit detail or by clicking the Detail button. In the header you can see the visitor's name, status label, and action buttons Approve / Reject (for pending visits), Edit and Delete. The Visit overview tab contains three cards:
Basic information — type of visit, date, visited person, accompaniment, reason, approval status…
Visiting person — name, company, contacts, communication language, note.
Vehicles and trailers — registration number, make, type and color.
Scheduled visits are displayed as all-day events in the My Calendar agenda and in the calendar widget on the dashboard. You can enable the display using the Visits toggle („Displays scheduled visits.").
A visit pending approval is displayed with hatching.
When you hover over it, the visiting person, type of visit and approval status are displayed; click to go to the details.
