Setting assumptions for the capacity plan – working with job positions, structure, and calendar templates.
Shift generation and editing – automatic generation according to the template, manual edits, adding and removing shifts.
Assignment of people and capacity management – sidebar, tabs Detail, Warning, People, Positions; working with core and agency employees.
Closures, control and filtering – data control, structure closures, cancellation of closures, filtering and overview of filled/unfilled positions.
Before working in the capacity plan, it is necessary to first set up:
Job positions
Structure
Calendar template
All necessary information and procedures can be found in the relevant manuals if you have not set them up yet.
Job Positions
This manual serves as a clear guide for working with the job position management module. Users will learn how to create new job positions, edit existing records, delete unnecessary items, and create their copies.
Workplace Structure
This manual provides users with a comprehensive overview of working with the structure of job positions and capacity planning. It will teach you how to create a new structure and positions, configure them correctly, assign shifts, and define their order. The manual also includes instructions for creating calendar templates, including setting the application of the day, shifts, and the number of workers to be assigned, so that the capacity plan generates correct data according to your definitions. The manual is designed to be clear, guide users step by step through the processes, and enable efficient workforce capacity planning.
Procedure for generating shifts according to the calendar template defined for job positions within the structure.

Shift generation is always performed for a selected period, which you can change in the upper left corner of the view (day, week, business week, month).

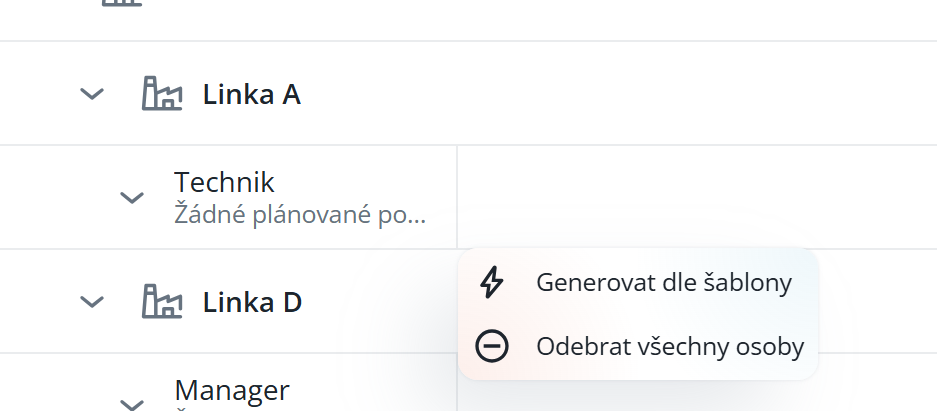
Shifts can be generated via the context menu – open it with the right mouse button and select the option “Generate according to calendar template”. A window will open, in which you will set the period (from – to).

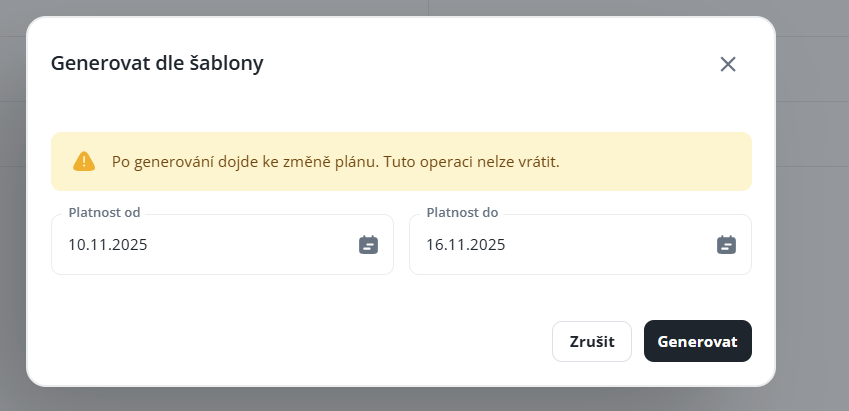
You can generate:
For the entire structure
For the given position
It depends on which record you open the context menu – via a position or via the structure.
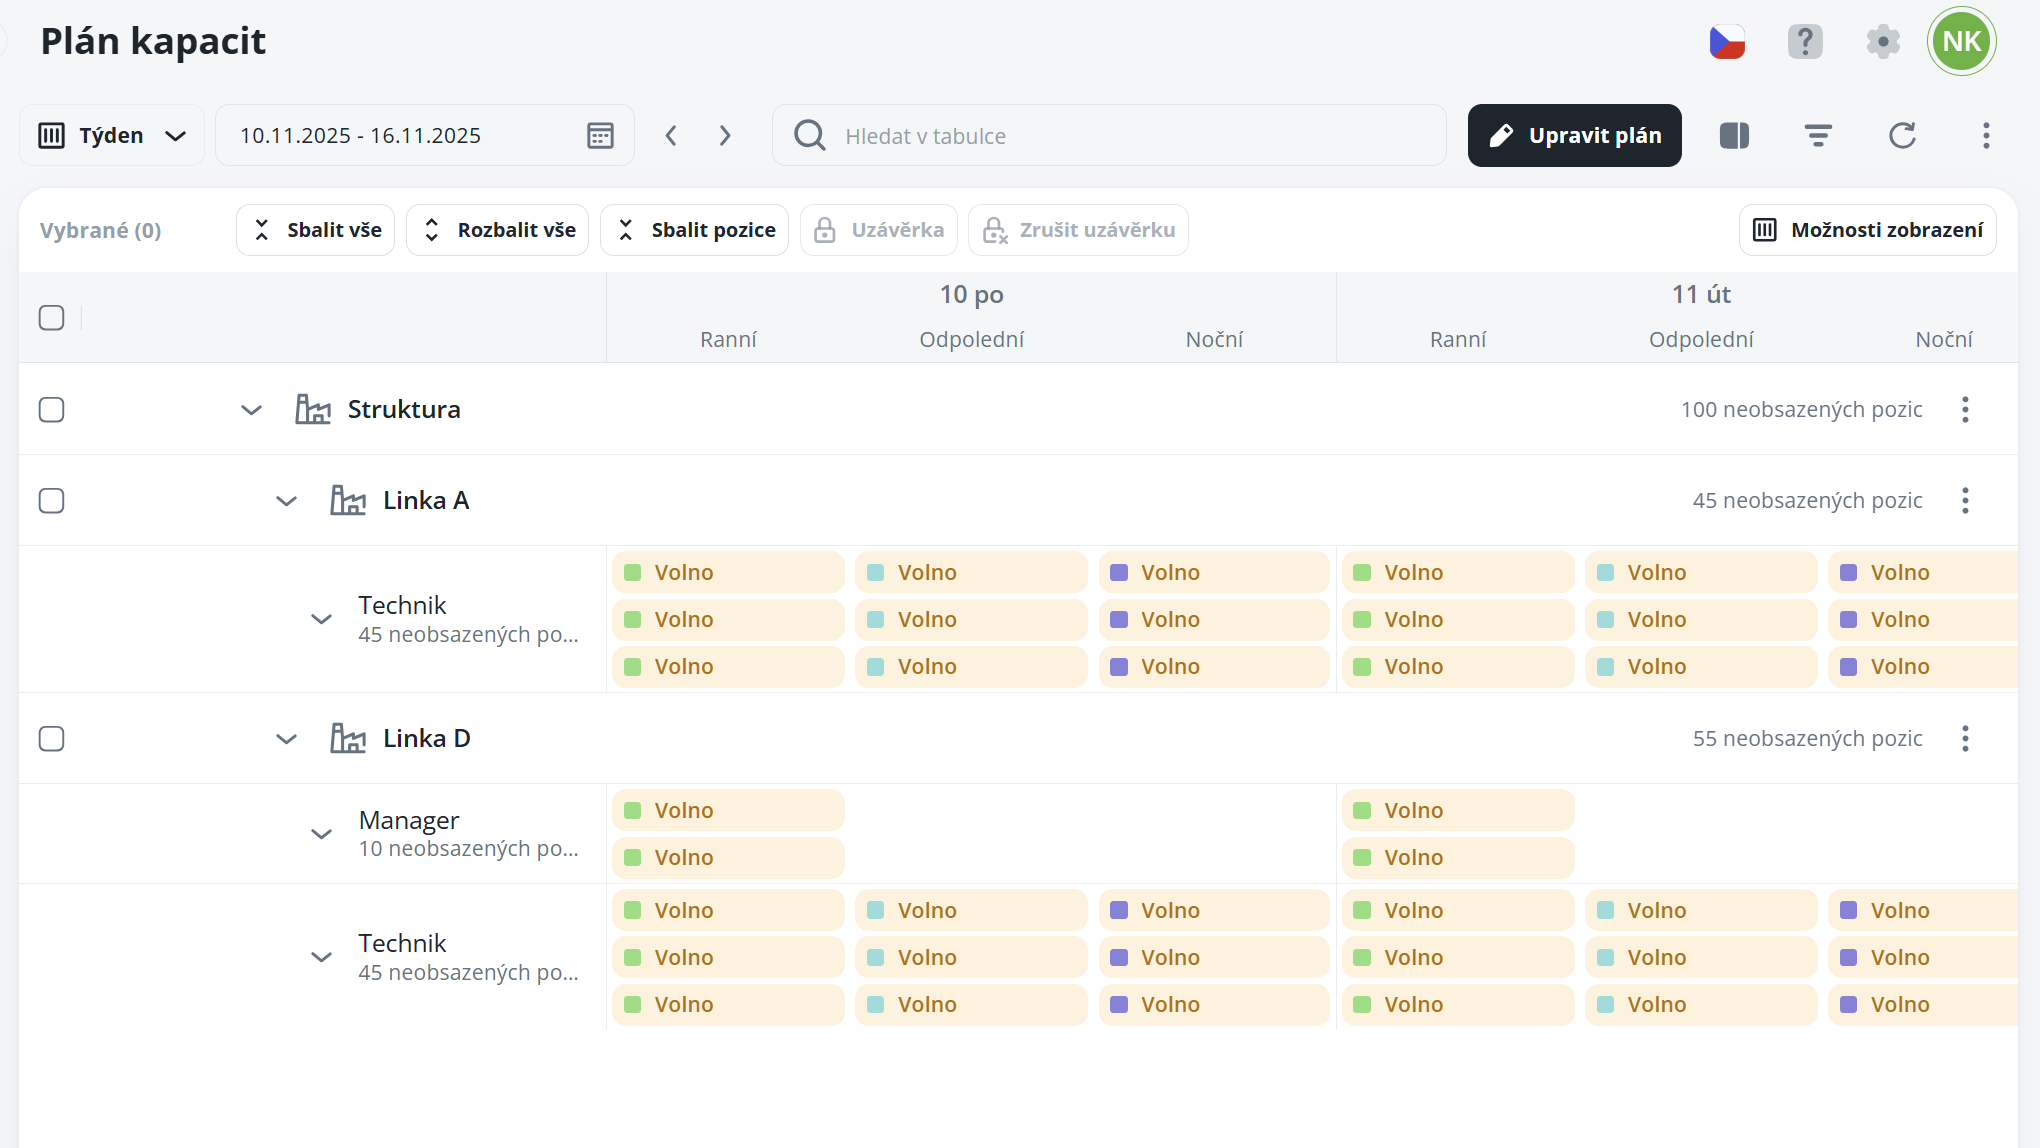
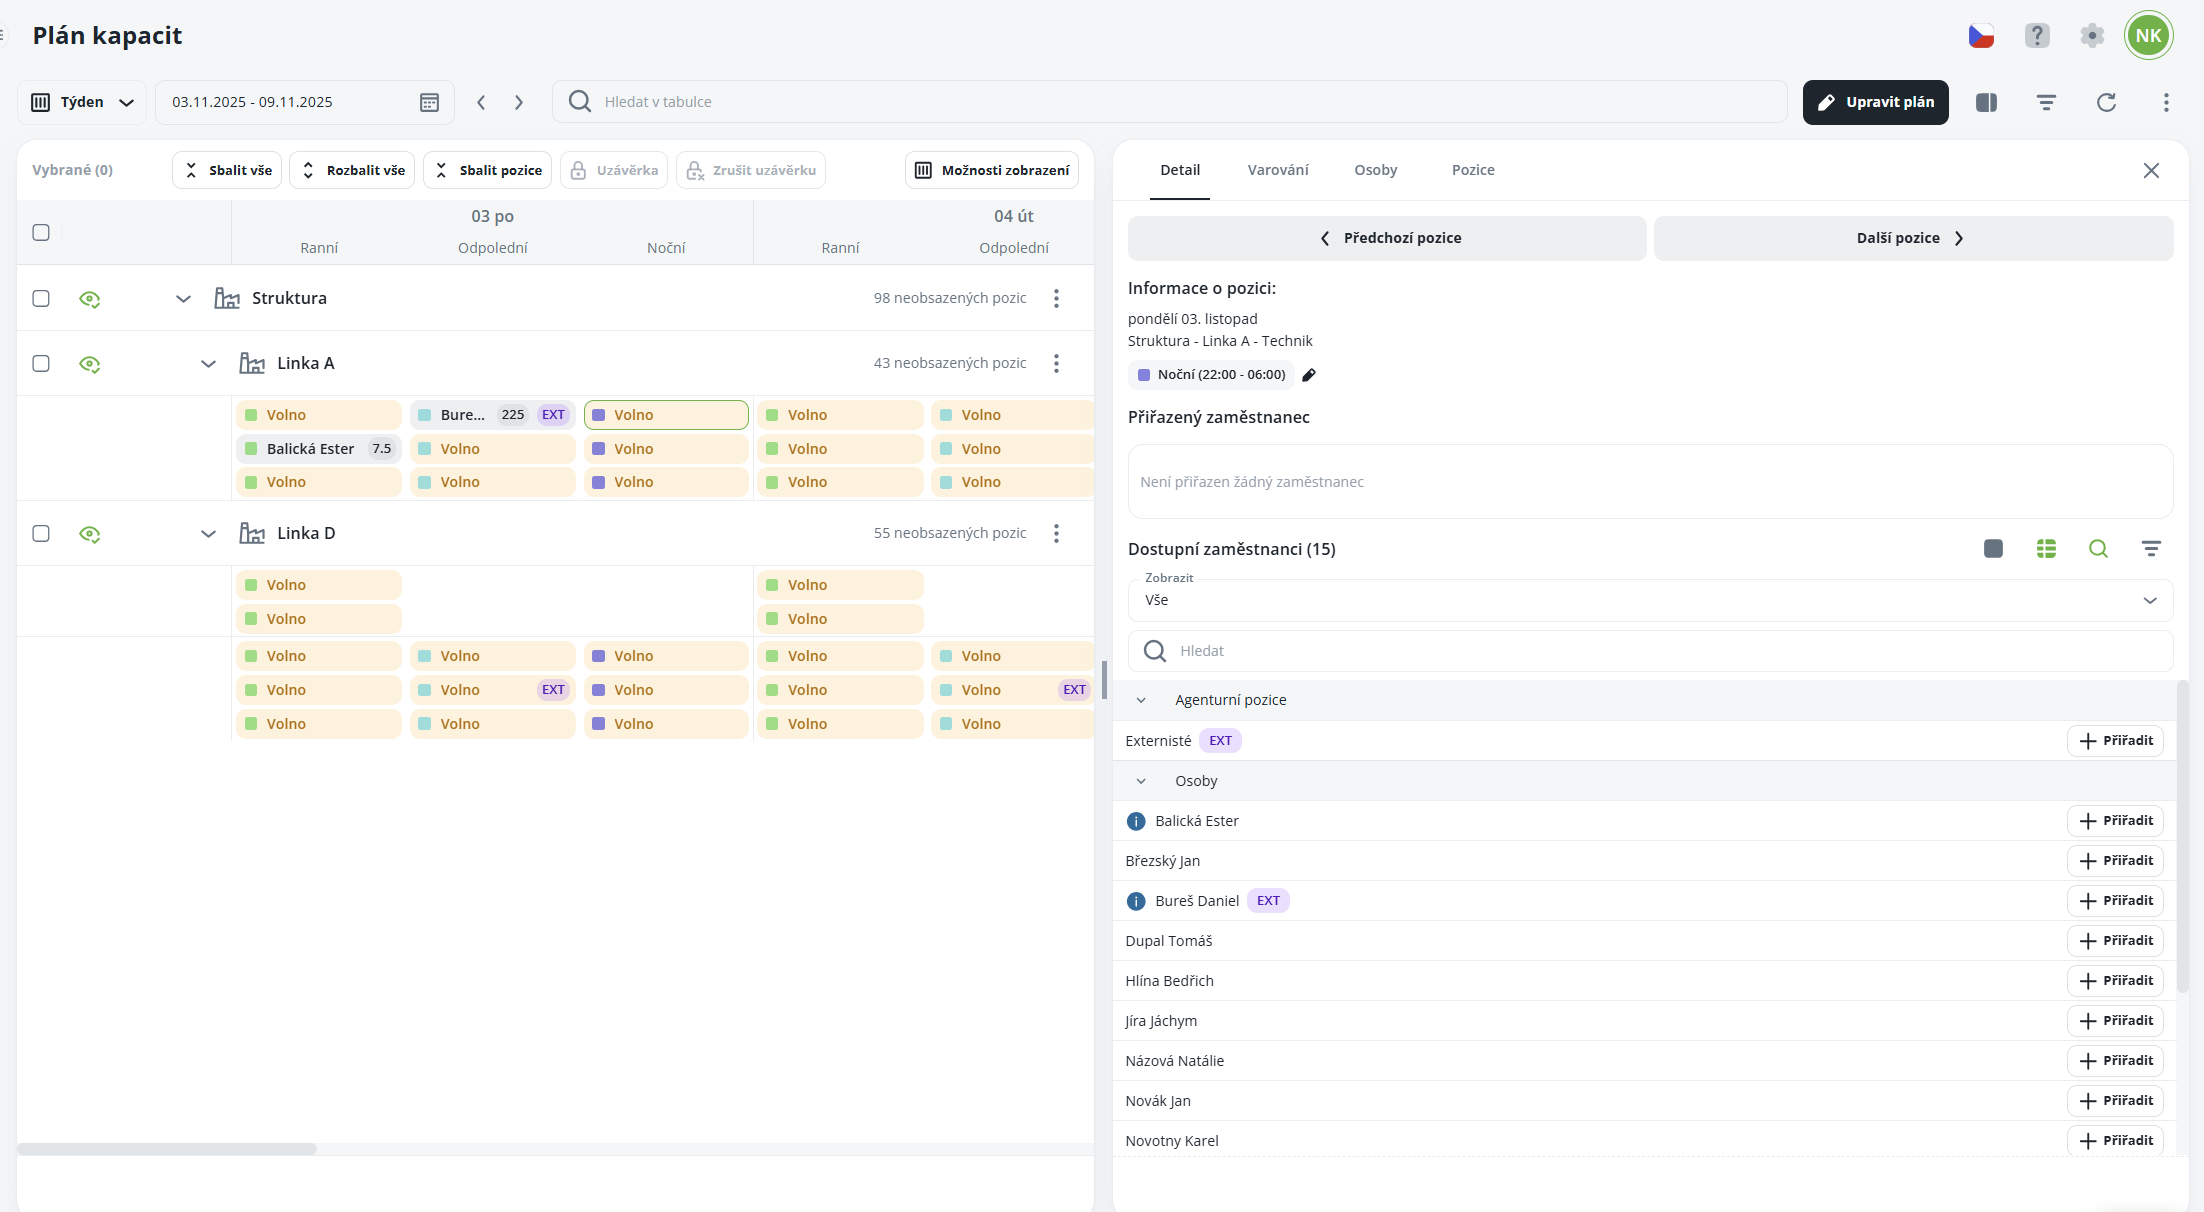
After the shifts are generated, the schedule may appear as follows:
If you need to manually add or remove shifts, click on “Edit Plan”.
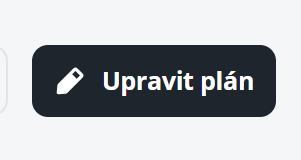
This will open the edit mode, in which you can add or remove shifts. Once you have finished editing, click on “Exit Edit Mode” – the plan will be saved automatically.
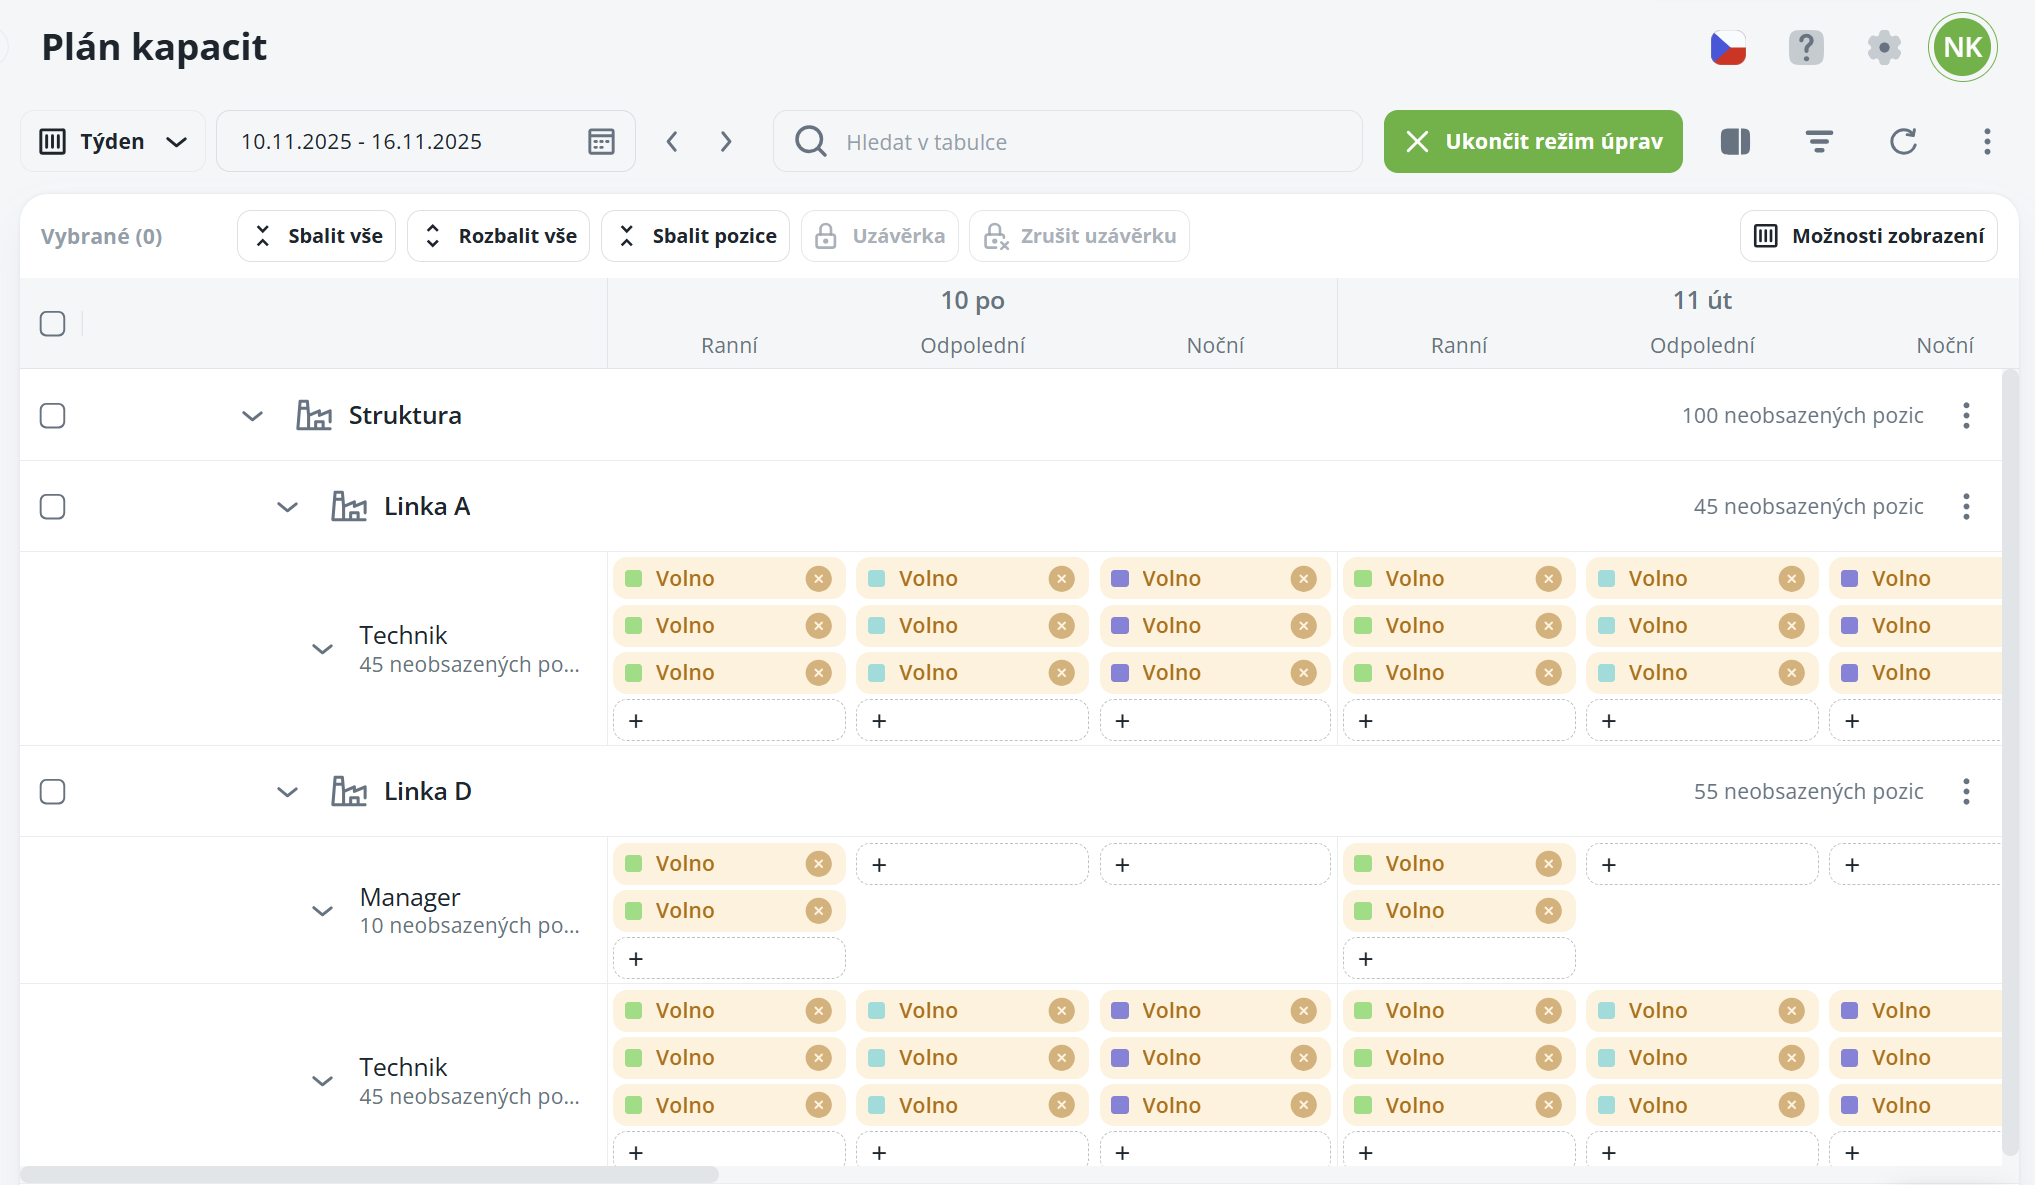
In the upper right corner, click on “Display Options”. A list of available options will appear, allowing you to customize the appearance of the capacity plan according to your needs.
Morning shifts - removes the Morning column in the list
Afternoon shifts - removes the Afternoon column in the list
Night shifts - removes the Night column in the list
Structure icons - displays the defined structure icons
Structure abbreviations - displays defined structure abbreviations instead of the title
Position name abbreviations - displays defined position abbreviations instead of the title
Only vacant - displays only vacant shifts
Names - displays the names of individuals in the chip
Shift colors - changes the chip color according to the color defined for the shift
Shift abbreviations - displays shift abbreviations instead of the title
Time fund - displays the individual's time fund after assignment to the shift
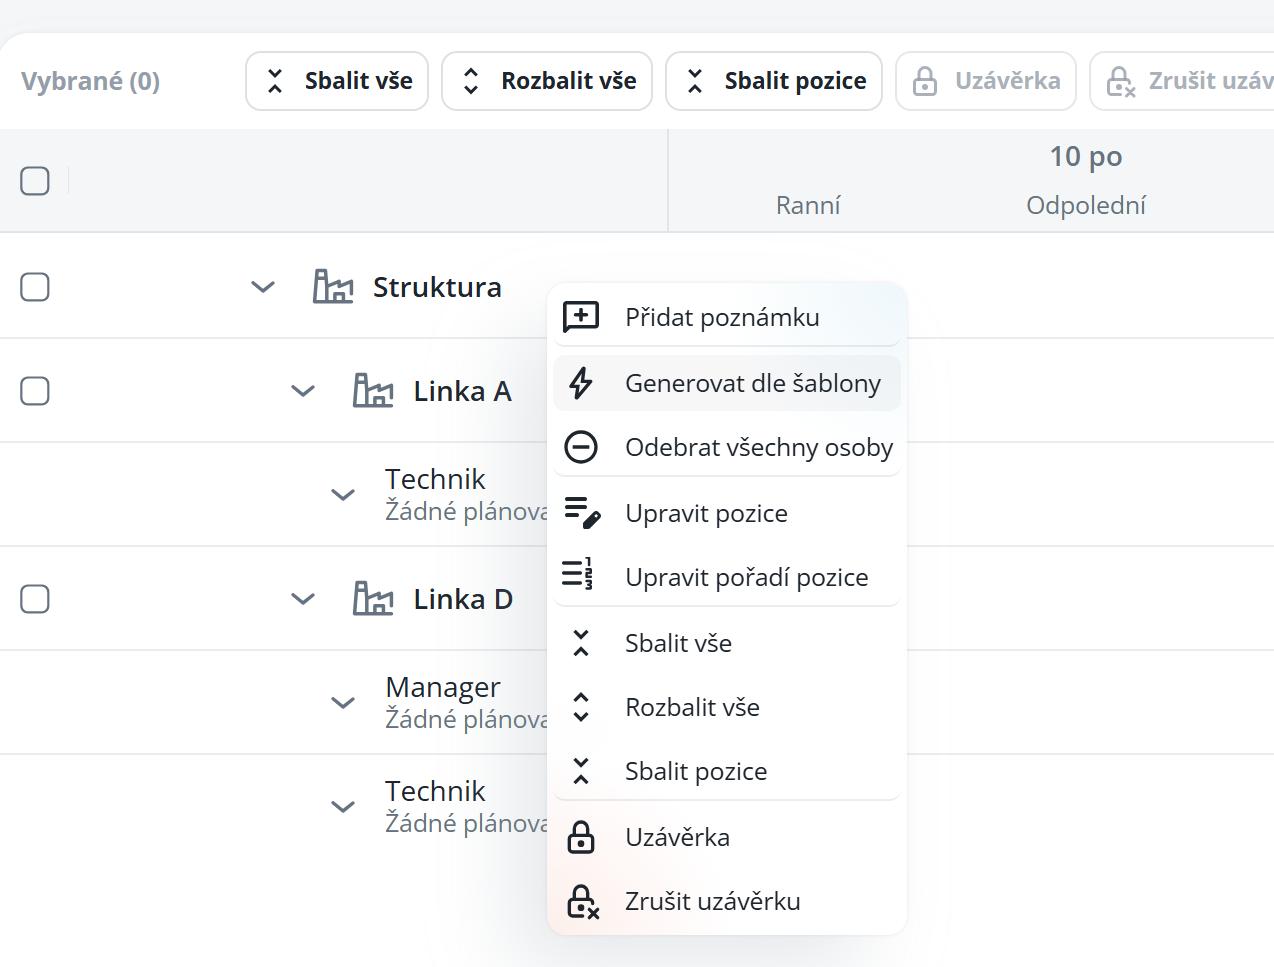
In the capacity plan, you can edit existing positions, add new ones, or change their order. You can access the settings via the context menu, which you open at the structure level.
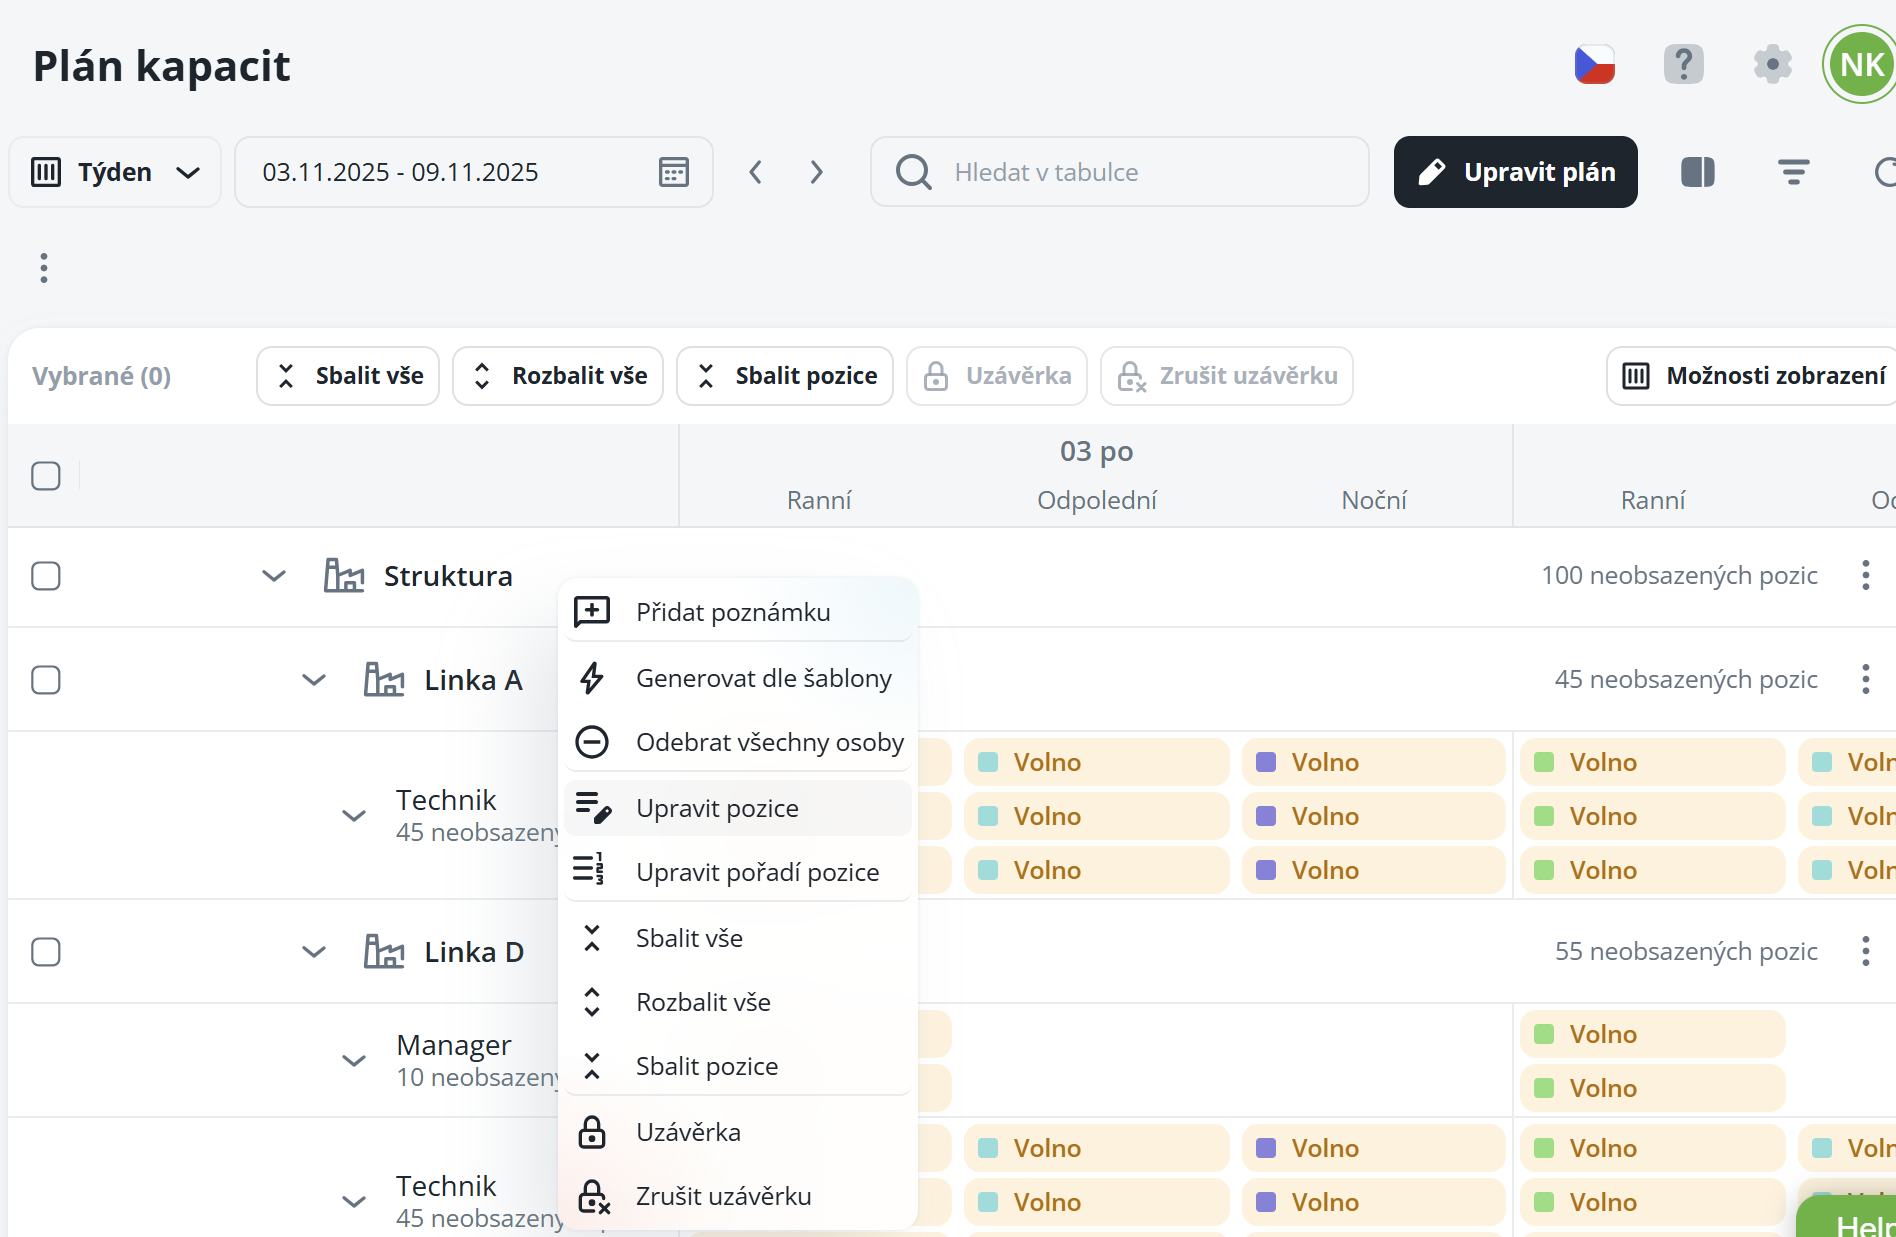
Clicking on “Edit Positions” will open a list of available positions, where already assigned positions are highlighted in bold. This option serves both for adding new positions and for editing current ones. In general, in this setting, you can only add a new validity for a position. Existing validities cannot be edited – for their modification, you must navigate directly to the details of the respective position in the structure.
To reorder positions, select the “Edit Order” option. The adjustment is simple using the drag & drop function – you just need to drag the positions with your mouse to the desired location.

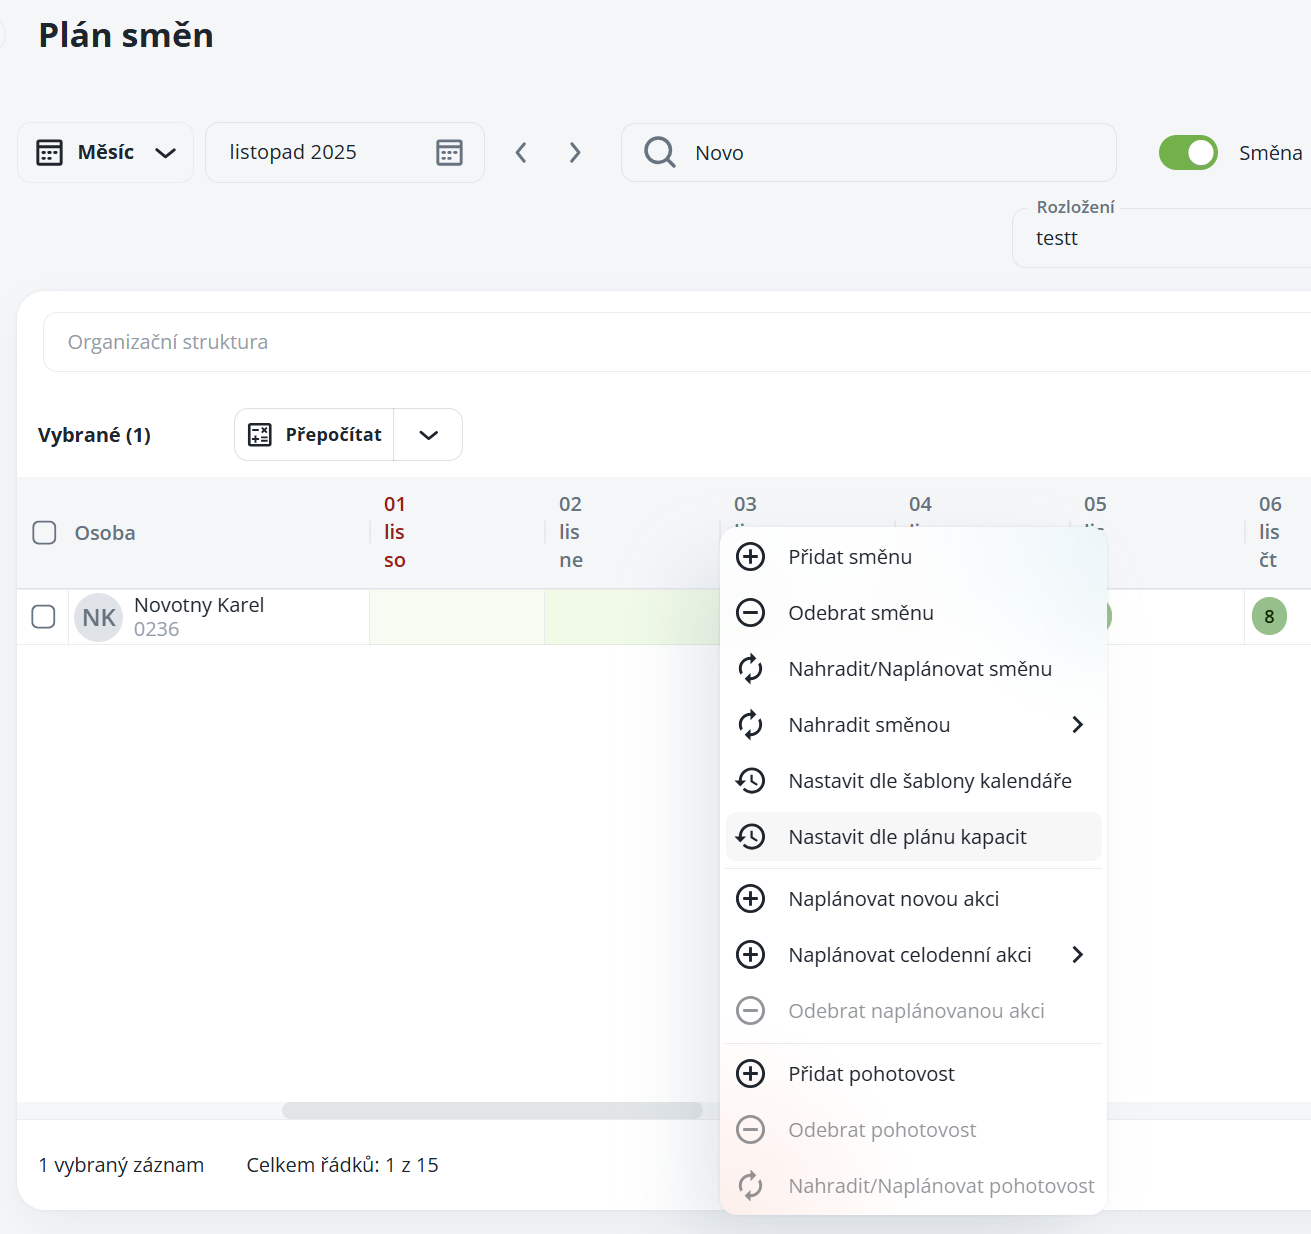
To be able to assign persons, it is necessary to open the sidebar by clicking on the appropriate icon.

The sidebar is divided into four tabs:
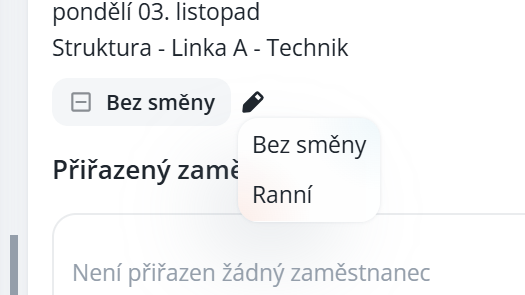
Detail – displays information regarding the position, shift or person. Enables quick assigning or replacement of a person.
Warnings – presents alerts arising from the Labour Code or the capacity plan. Also includes a direct link to the shift plan.
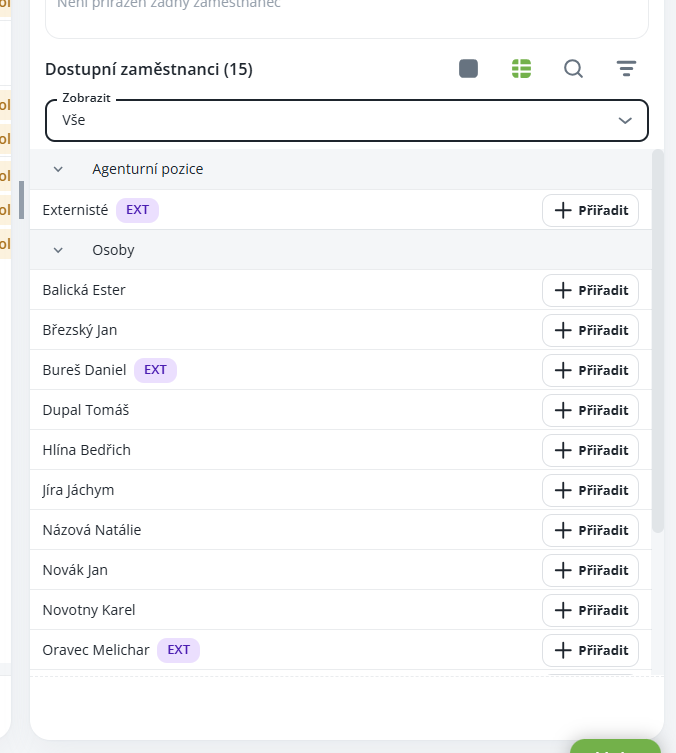
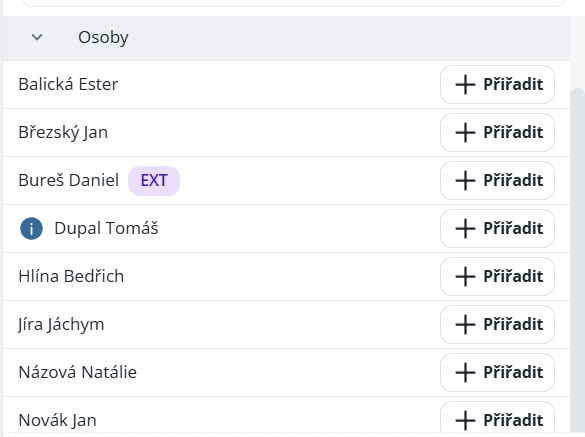
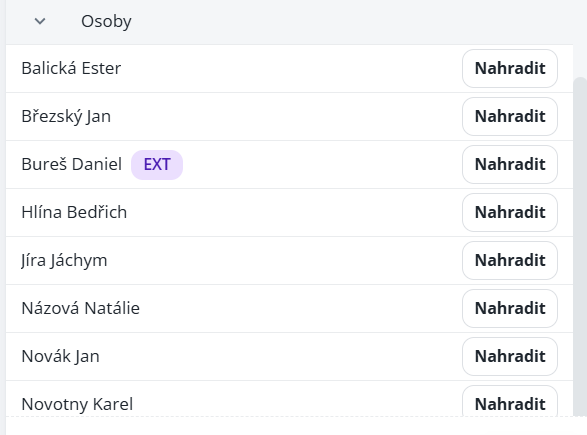
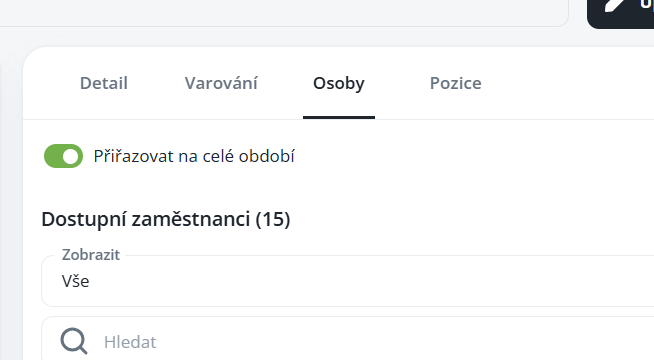
Persons – serves to assign a person either to a specific shift or for the entire period.
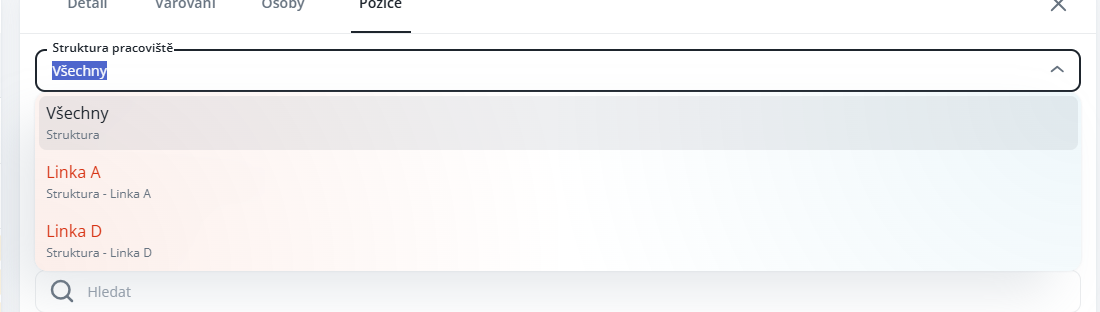
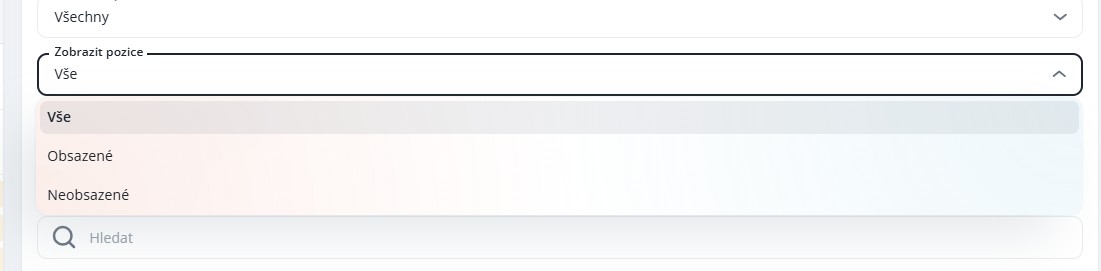
Positions – provides an overview of filled and unfilled capacity.
A more detailed description of each tab can be found in the respective chapters of the manual.
If you work with external workers (e.g., agency employees) or need to temporarily assign individuals from another company, you can mark the entire organizational structure as agency.
Simply check the “Agency” option in the organizational structure settings.
Thereafter, all individuals belonging to this structure will be automatically marked with the appropriate indicator directly and exclusively in the capacity plan, making it easy to distinguish them from internal employees.
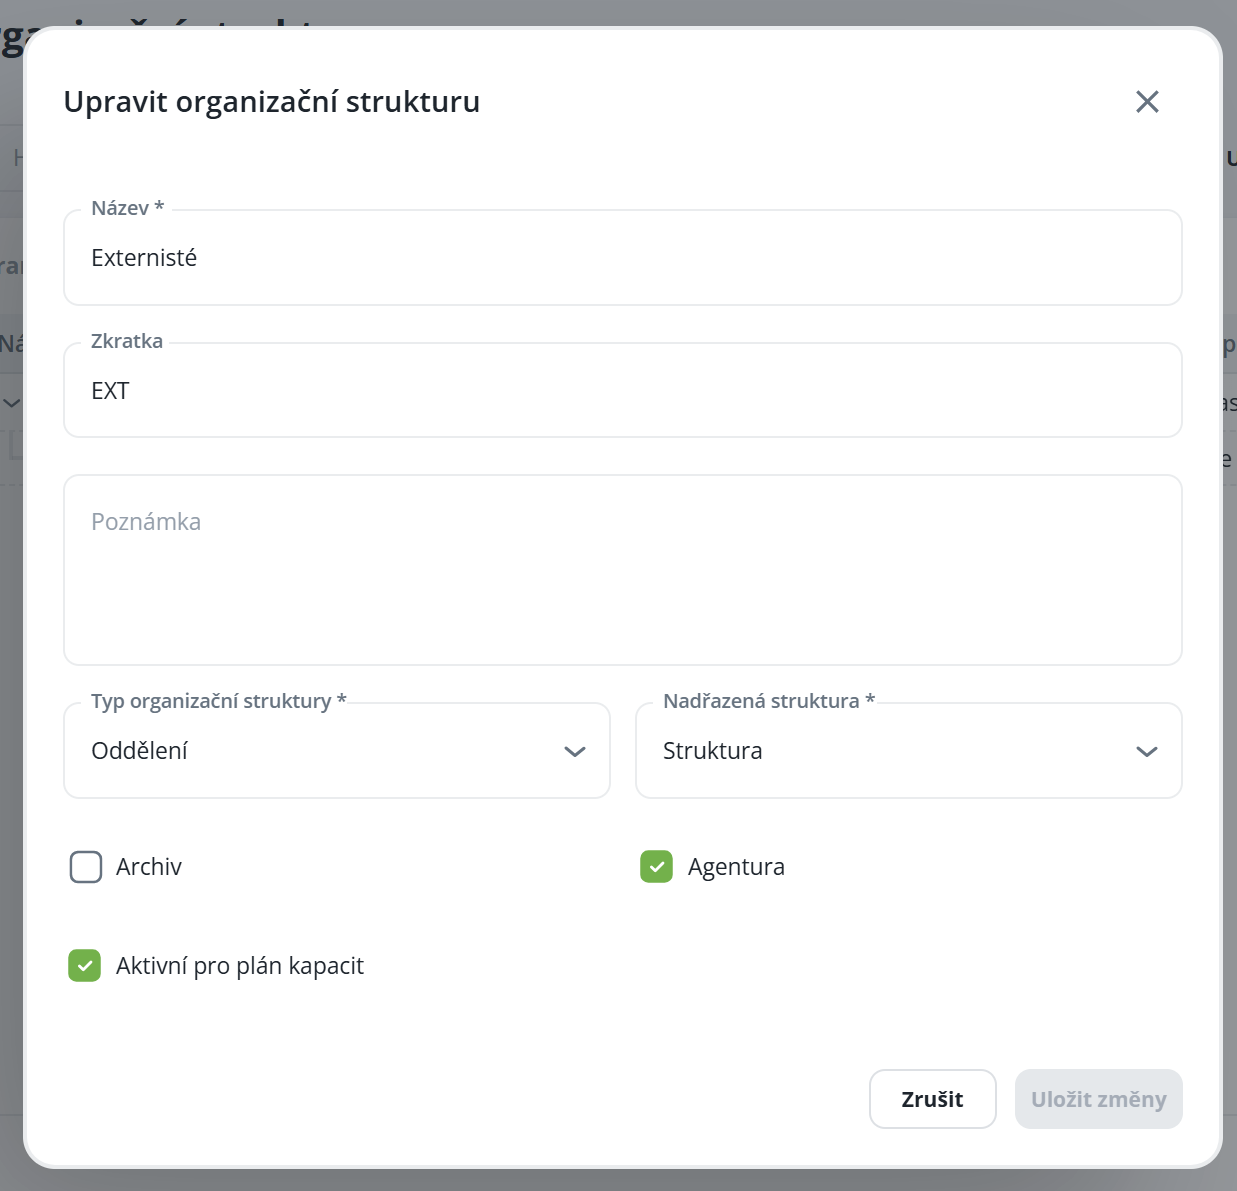
A structure marked as agency can be assigned to capacities in the same way as a regular person. This serves only as an indication that an agency worker should be assigned to the given shift.
The agency designation does not restrict planning – you can adjust the capacity as needed, but the indicator will always change or be removed according to your scheduling. Thus, if you assign a permanent employee to an agency capacity, the agency indicator will be automatically removed.

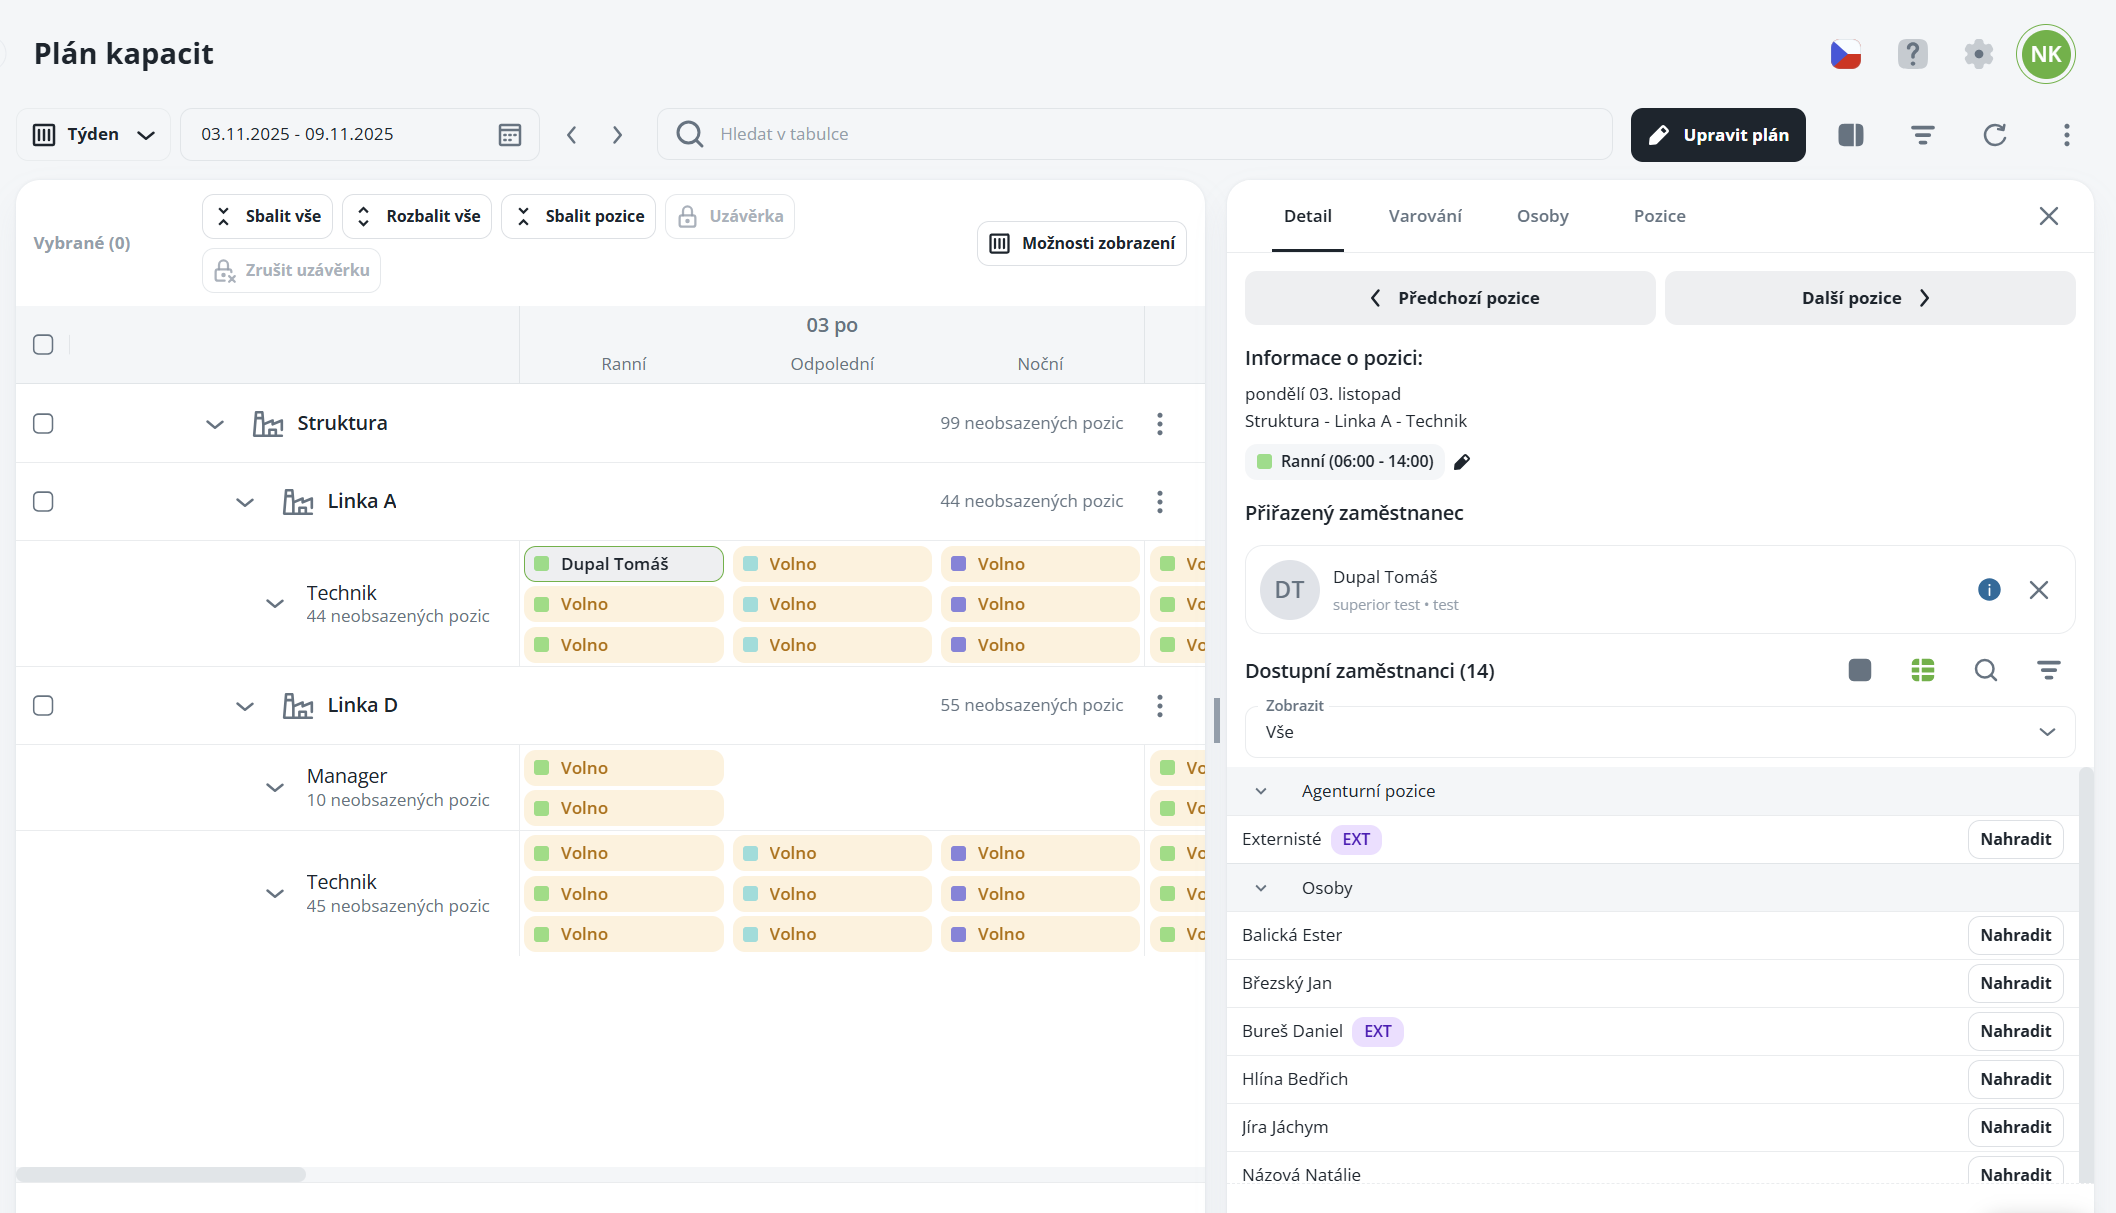
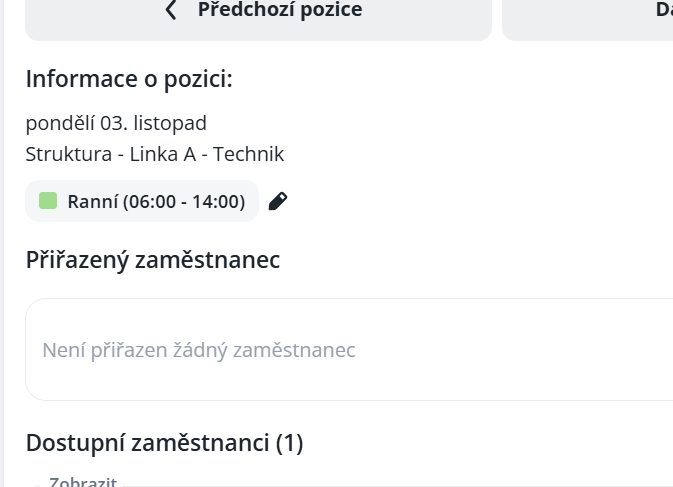
Navigation between positions – using the “Previous” / “Next” buttons, you can quickly switch between individual positions.
Displaying information – shows information about the position, scheduled shift, and assigned person.
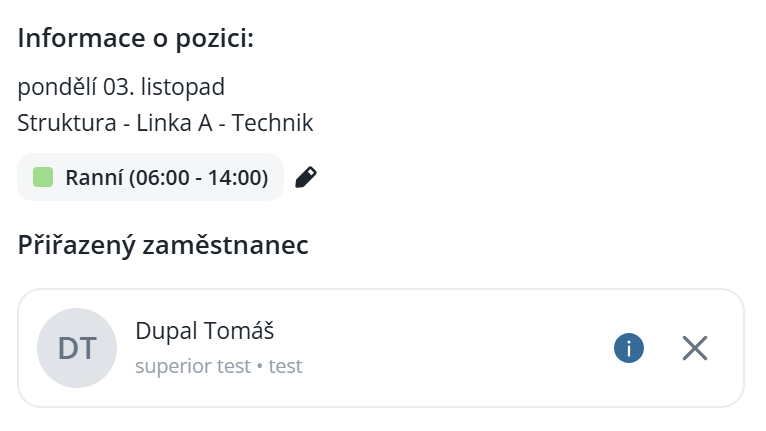
Quick shift replacement – by clicking the pencil icon next to the shift, you can quickly replace the person with another.
Assigning or replacing a person – directly from the table, you can assign a new person or replace the existing one.
Removing a person - by clicking the cross, the person is removed from the chip

Displays notifications arising from the Labour Code and the capacity plan. The system distinguishes several types of warnings according to their nature, and each warning is automatically assigned to the appropriate person in the form of a corresponding indicator.
According to the Labour Code - displays notifications arising from the Labour Code and the capacity plan, such as non-compliance with uninterrupted rest. The warning relates to scheduled shifts, so it will not be displayed in the attendance until the person actually records entries for that day.
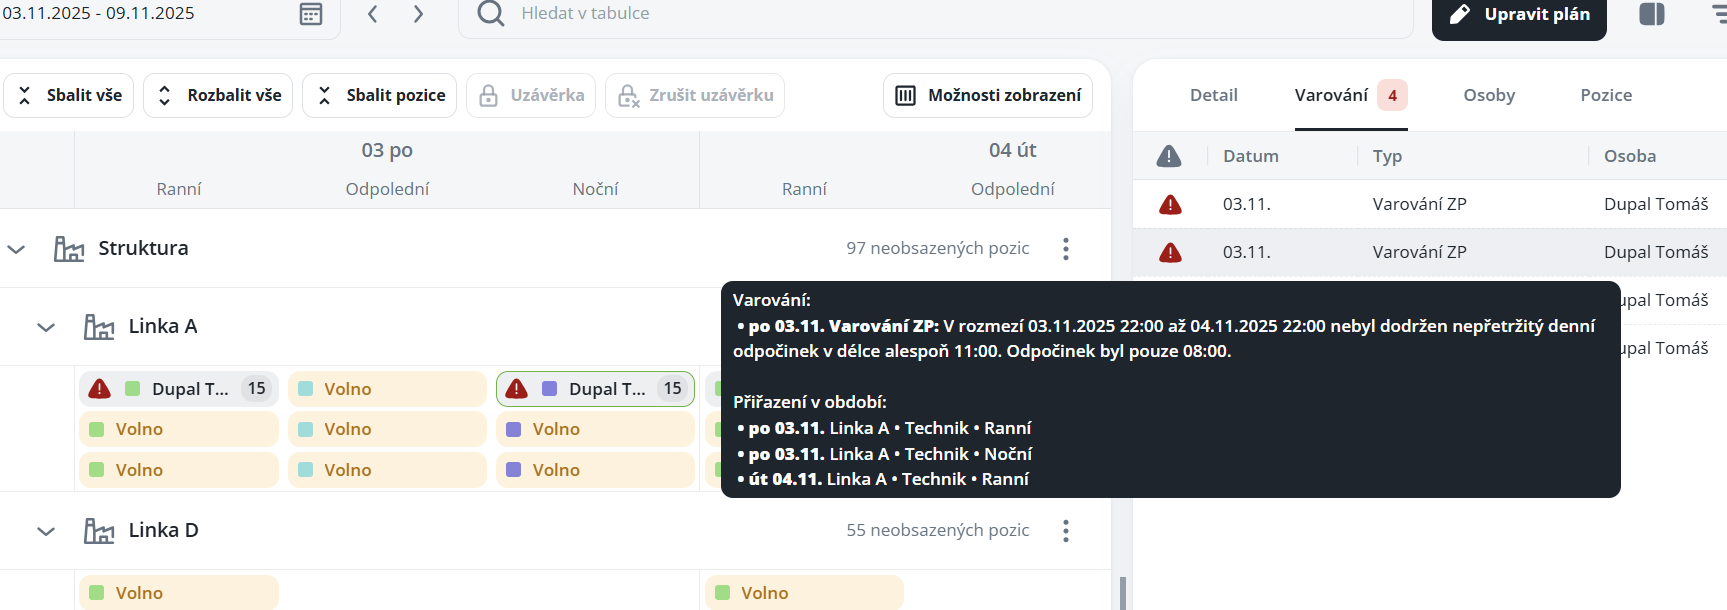
Duplicate - a person has been scheduled multiple times in one day

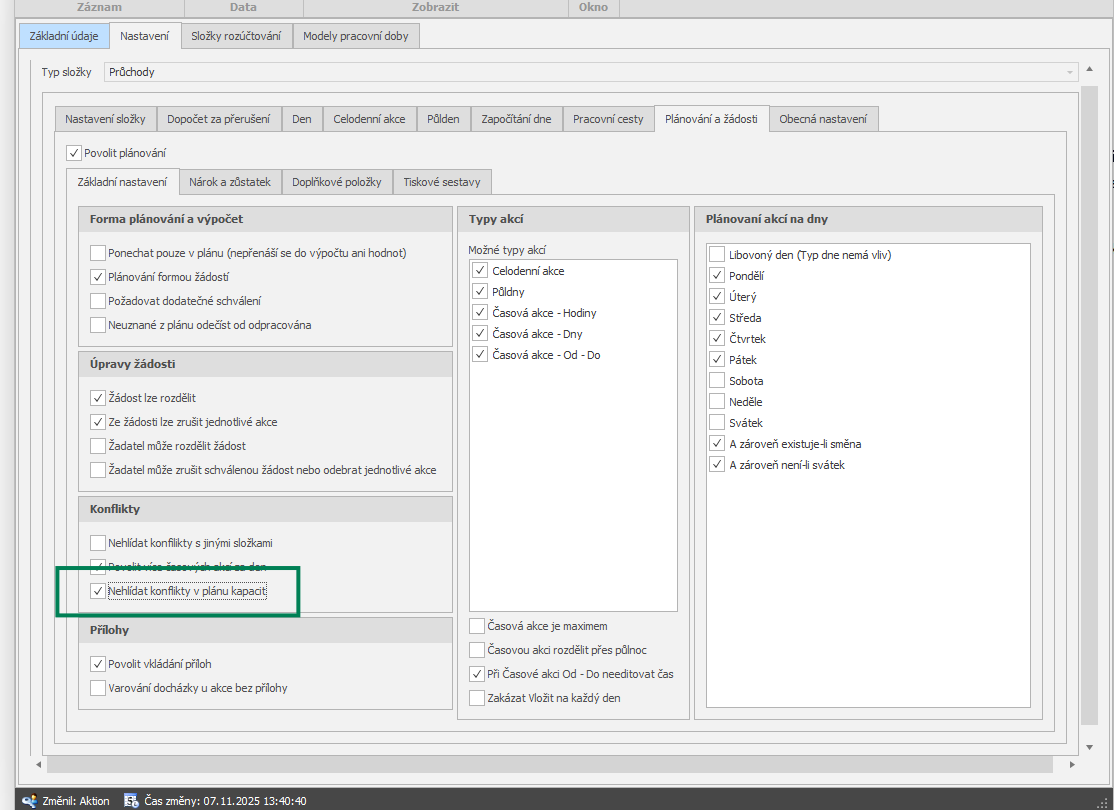
Collision - if a person has a planned absence (for example, vacation) on a day they are assigned in the plan, the system will by default notify of the conflict

This monitoring can be disabled for a specific payroll item by setting the parameter "Do not monitor conflicts".
Info - overview of scheduled capacities for the person

This function is used to assign a person to a chip using drag & drop, either for one day or for multiple days. To assign for the entire period, you must check the parameter “Assign for the entire period“.
Remove assignment for one day – click the cross icon next to the given day.

Remove assignment for the entire period – right-click and select the option “Remove from the entire period“.

This function is used for overview and control of filled and vacant positions. Records can be filtered by structure and position status (filled/vacant).
Quick removal of the assigned person is possible by clicking the cross icon.

Synchronization of capacity plan and shift plan:
Person scheduling:
When a person is assigned to a shift, the shift according to the capacity plan is automatically set for them, even if they already have another shift scheduled in the shift plan.


Removing a person:
After removing the shift, the schedule in the shift plan will automatically revert to the original shift that was there previously.

Shift generation:
In the shift plan, you can use the context menu to generate a shift for the selected day directly according to the capacity plan.
The given chip is always rescheduled regardless of whether it concerns an agency, agency or core employee.
The given individual/agency is always scheduled for the entire period; even if the user starts planning in the middle of the period, the individual will be scheduled retroactively.
If the chips are full and the user tries to reschedule, only that one day to which the person is dragged will be rescheduled; the rest will remain as is. ⇒ this does not apply if the user wishes to reschedule to another person from the same agency, in which case the entire period will be rescheduled.
Searching and filtering of individuals
The magnifying glass icon opens a search field in which you can quickly find people by their name.

Filter icon displays the filter menu, where you can set filtering of people according to various criteria (e.g., structure, unit, regulation, etc.).
There are two ways to close the capacity plan:
Closure by individual structures – close only the selected part of the organizational structure.
Global closure – perform the closure at once for all subordinate parts through the highest parent structure.
The closure process consists of two phases:
Control
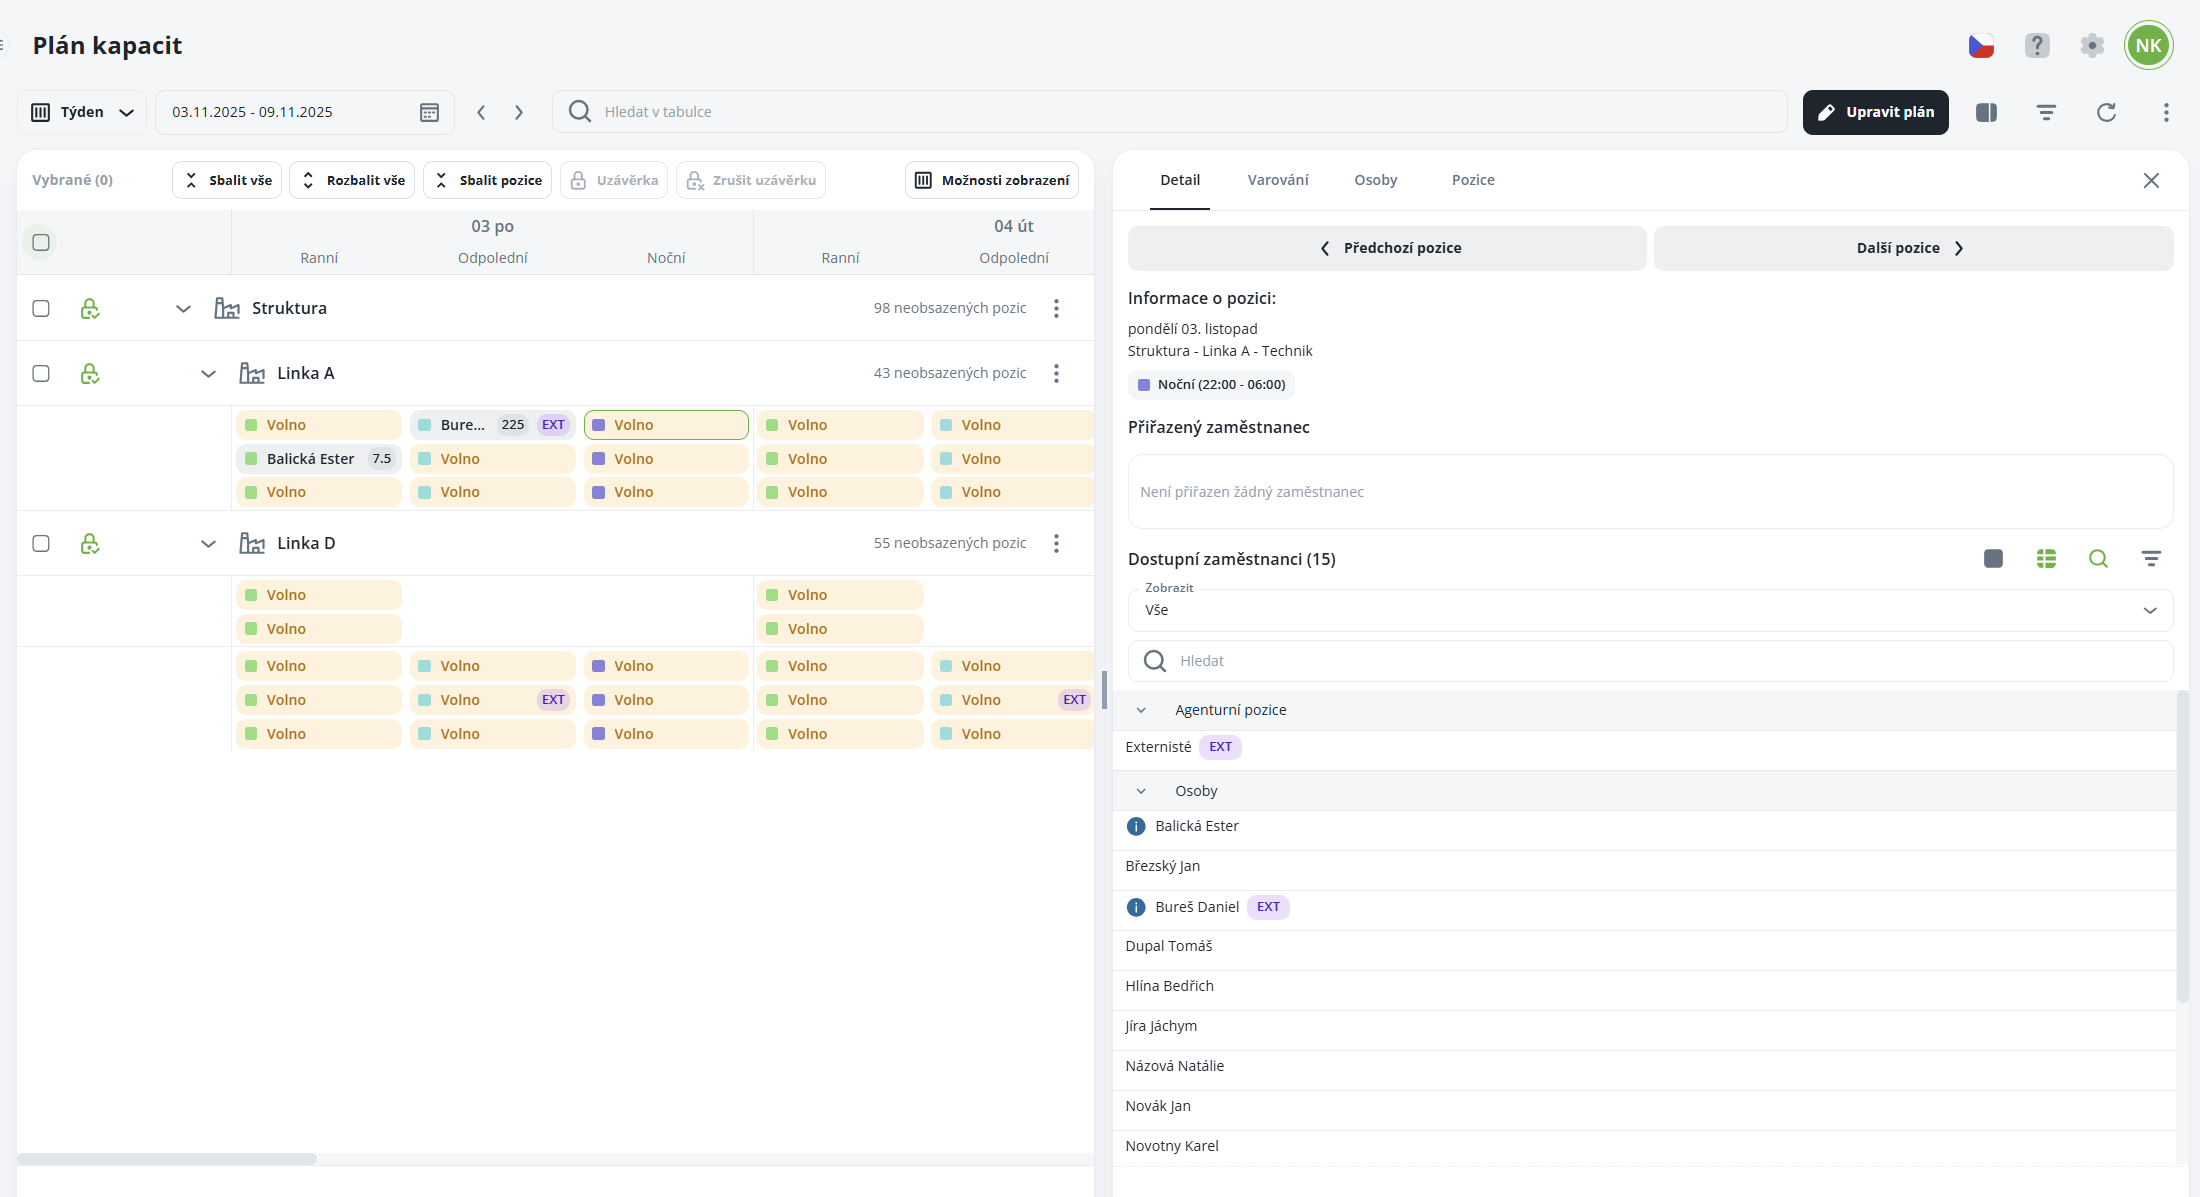
It is used to verify the correctness of the data before the final closure. Once the structure has been checked, it is marked with the appropriate flag.
As in attendance, it is also possible to perform partial closures, i.e. to check only selected parts of the structure or for a selected period.
Closure
Once the closure has been performed, no further changes can be made in the capacity plan – it is not possible to reschedule or edit planned positions. Closed structures are again marked with the appropriate flag.
Here as well, it is possible to perform partial closures, similarly to the attendance module.
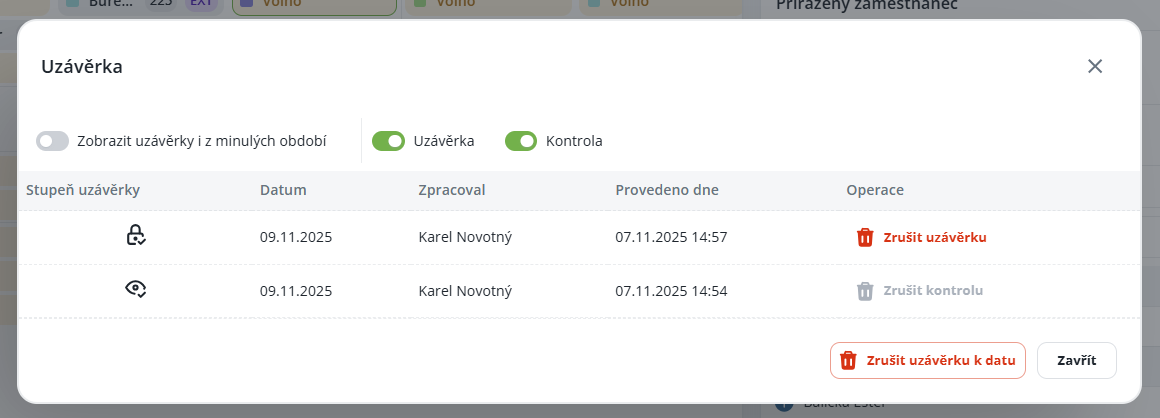
Cancellation of Closure
The cancellation of closure is performed using the “Cancel closure” button.
Once opened, you have two options:
Cancel a specific closure – you select exactly the structure or level from which you want to remove the closure.
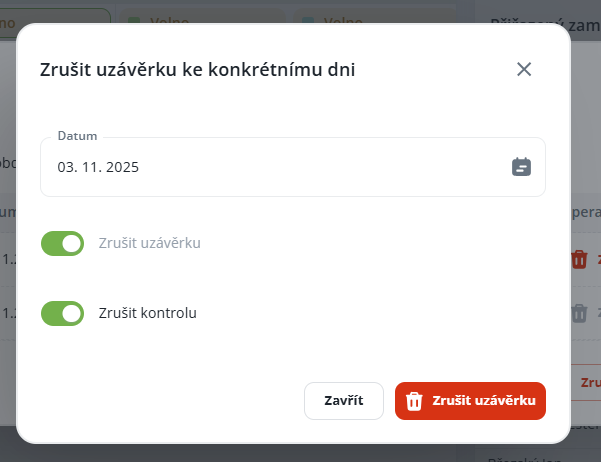
Cancel all closures up to date – works similarly as in attendance and allows you to remove all closures created up to a certain date in bulk.