Practical use of each widget
You'll get to know the features and purpose of available widgets, including attendance, meal, and extra widgets.
How to make widgets your own with custom layout
You'll find out how to resize and arrange widgets just as you like.
How to set up widgets
You'll learn how to tweak each widget and set up their specific features (like links, images, colors).
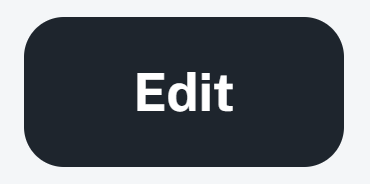
If you want to tweak your dashboard and add widgets, just follow these steps:
Click the Edit button in the top right corner of the dashboard.
In edit mode, click Add widget.
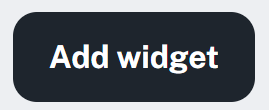
A list of available widgets will show up that you can place on your dashboard.

You can resize the widget manually – just grab the bottom edge and drag to change its size.
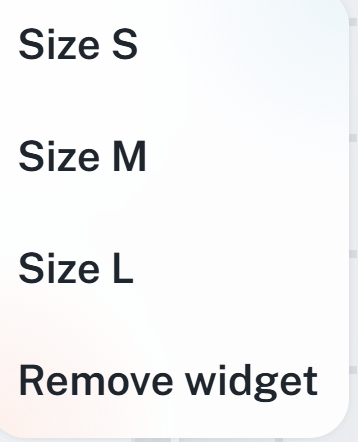
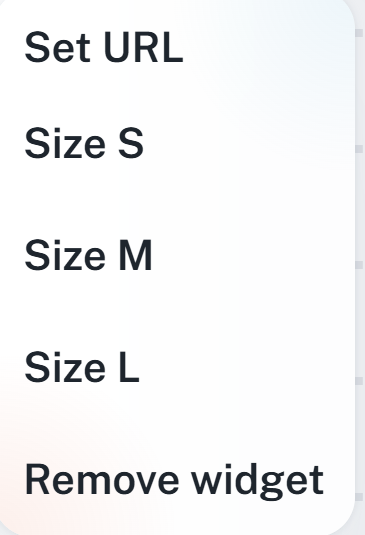
Or click the three dots in the top right corner of the widget and pick a preset size:
S – small
M – medium
L – large
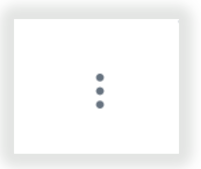
Some widgets (like Carousel, Banner, Website) have extra settings using the three dots – for example, images, links, colors.
When you’re done editing, just click Save and you’ll have your dashboard just the way you want. It will save as your current layout.
Widgets in the app are split into three main groups by what they do:
Attendance widgets
Show info related to attendance and let you work with it. Includes:
Attendance terminal
Last actions
Hours worked
My requests
Requests overview
Presence
Calendar
Meal widget
Used for working with orders and meal overview:
Meal
Extra widgets
Take care of extra stuff, like links, photos, or other external info:
Carousel
Banner
Webpage
Attendance widgets are here for a quick overview and to manage attendance. You can use them to log entries, send and approve requests, check who’s currently in, see recent actions, get a summary of worked hours, or use a calendar that shows shifts, requests, and meals.
Use this for quick entry logging right from the dashboard—just like on a physical terminal.
What it can do:
Enter passes using preset buttons, for example:
Arrival
Departure
Break
Start of business trip
End of business trip
Recorded passes are saved to the system in the same way as from a physical attendance reader:
These are not registered as manual records
Benefits:
Allows quick and easy entry of passes from anywhere
Replaces the physical terminal when working from home or using a mobile device
Shows attendance records in a clear chronological list.
What it shows:
All entries for the current month
Full-day and half-day events
Total worked time per each day
What it allows:
Add new event – e.g. when a record is missing
Benefits:
Quick overview of all user's activities
Option to add attendance without having to switch to another module
I'll add the new action picture once it's fixed
It's used for a detailed overview of monthly attendance and absences.
It shows:
Total worked hours for the selected period
Time spent on doctor visits and vacations
Current hour balance
Other important info related to attendance
What it lets you do:
Track your time account and plan your workdays with ease
Direct link to your personal report – for digging deeper into your data
Perks:
Clear attendance overview in one place
React in time to imbalances in your balance or missing entries
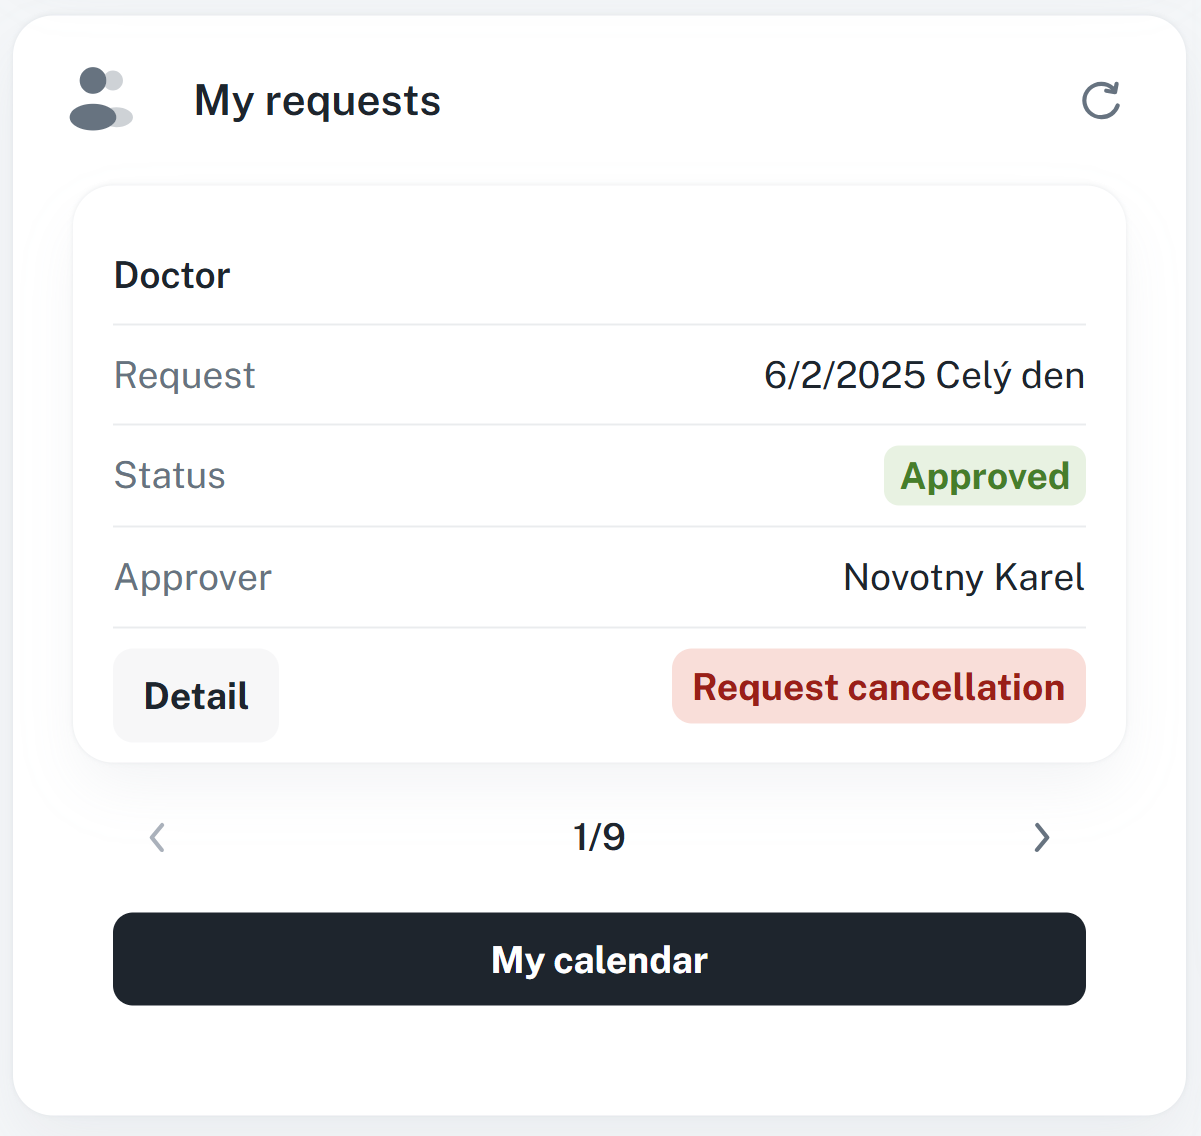
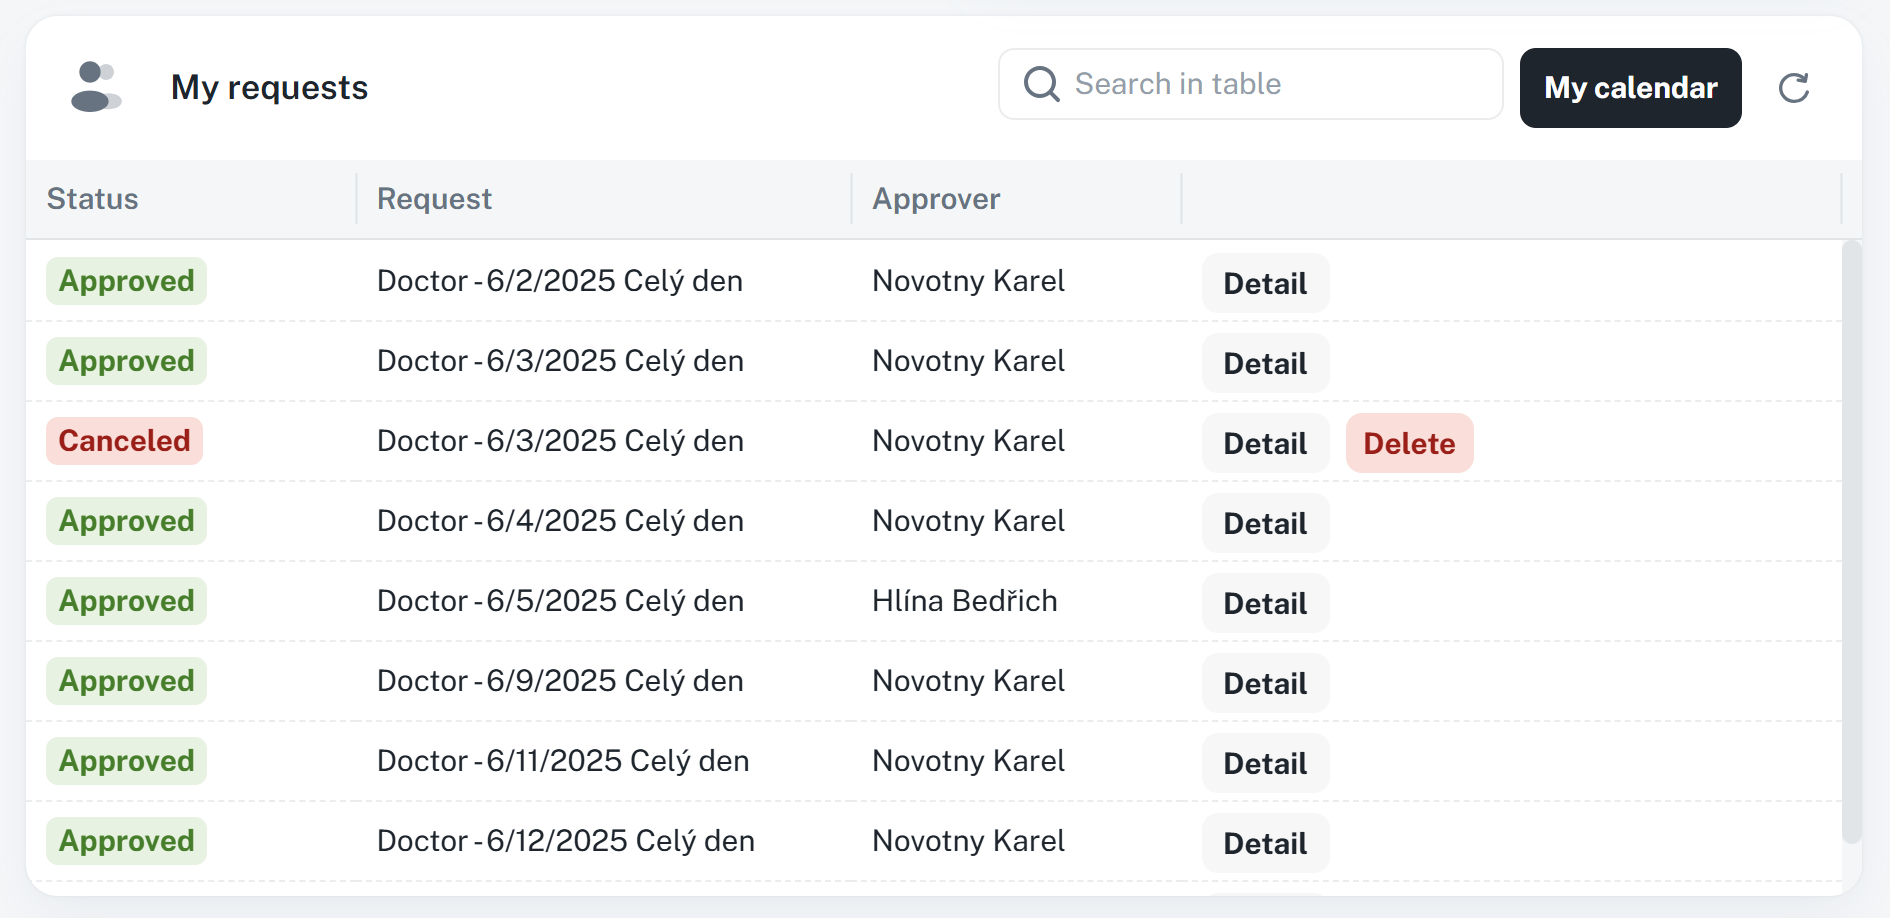
Shows you all requests you made and lets you manage them.
What it lets you do:
Show a list of all submitted requests
Interact with requests:
ask to cancel a request
cancel or delete a request
Open request details with more info
Find a specific request using the search bar
Click through to personal calendar, where you can see related info
View by size:
Size S – simplified look with limited features
Size M and larger – extended options and more details
Recommendation:
Choose the widget size based on how often and in how much detail you work with requests.
Size S:
Size M and larger
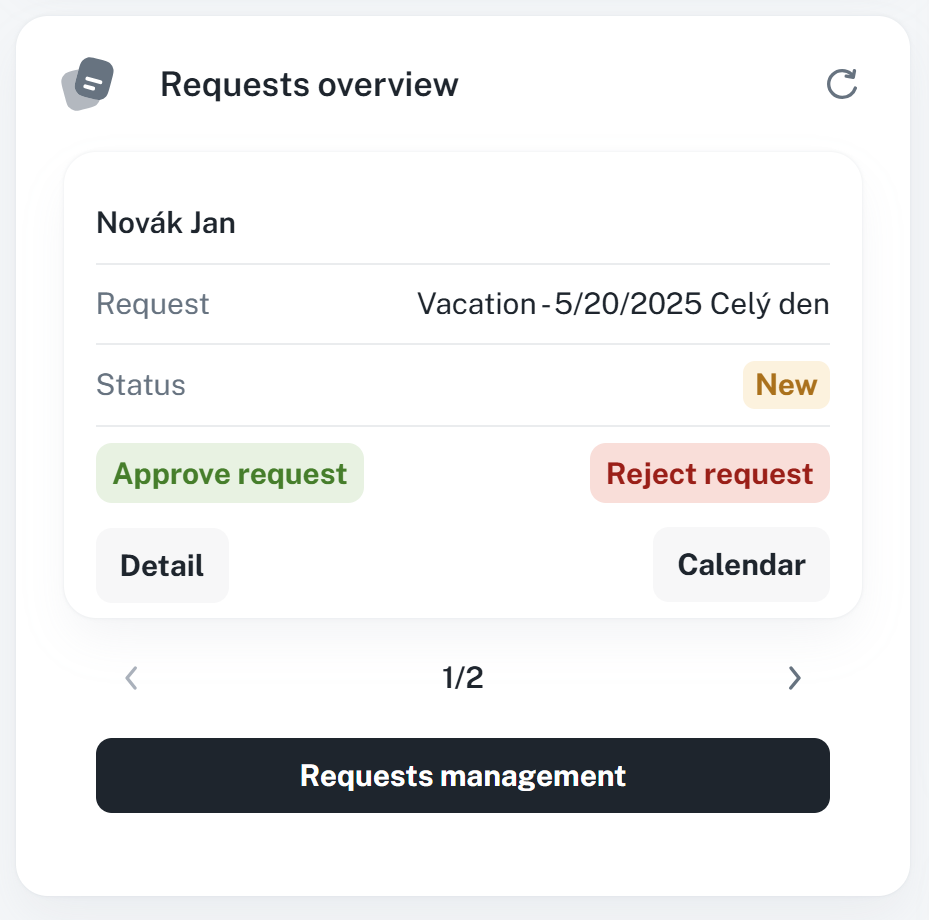
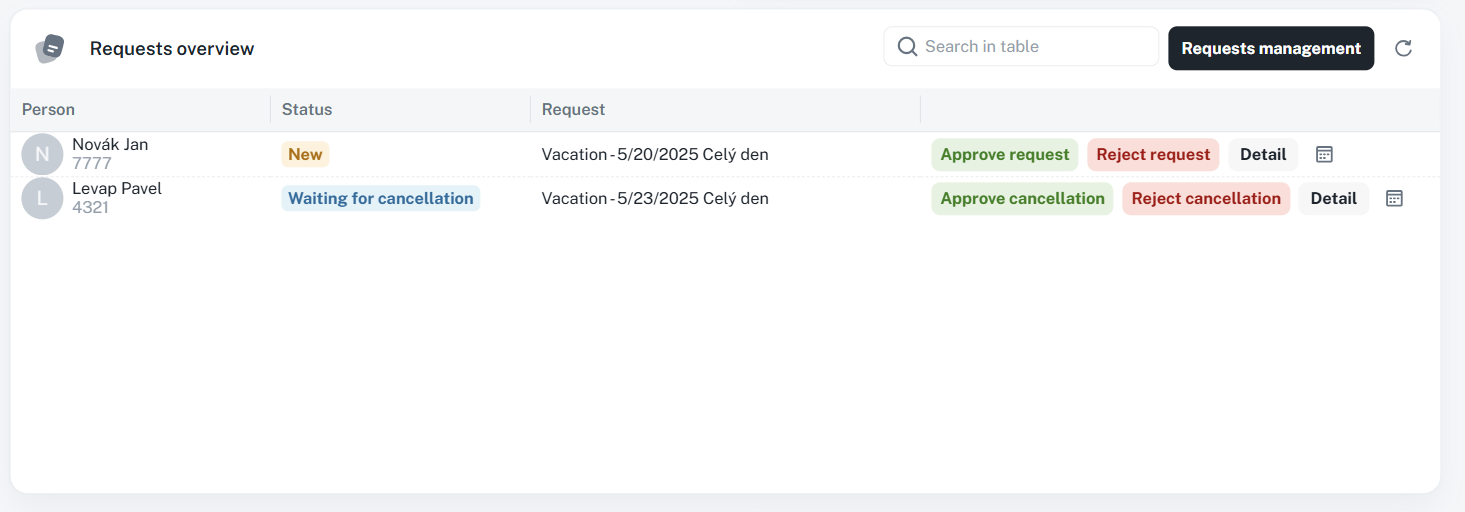
This widget gives you an overview of all requests waiting for approval that are assigned to the currently logged-in user. It lets you handle requests efficiently straight from the dashboard, without needing to go to other parts of the system.
What it lets you do:
See requests that are meant for you to approve
Do stuff with requests:
Approve
Reject
See request details
Search field – quickly find a specific request (like using a magnifying glass instead of searching manually in a folder)
Click into employee calendar – shows a bigger picture about when and why the request was made
Display by size:
Size S – a simplified interface great for quick overviews
Bigger sizes (M, L) – more details, broader context, smoother control
Tip:
Picking a widget size is like choosing a window – a small one gives you a brief look, a big one shows you the whole picture. Tweak it based on how deep you need to dive into requests.
Size S:
Size M and up
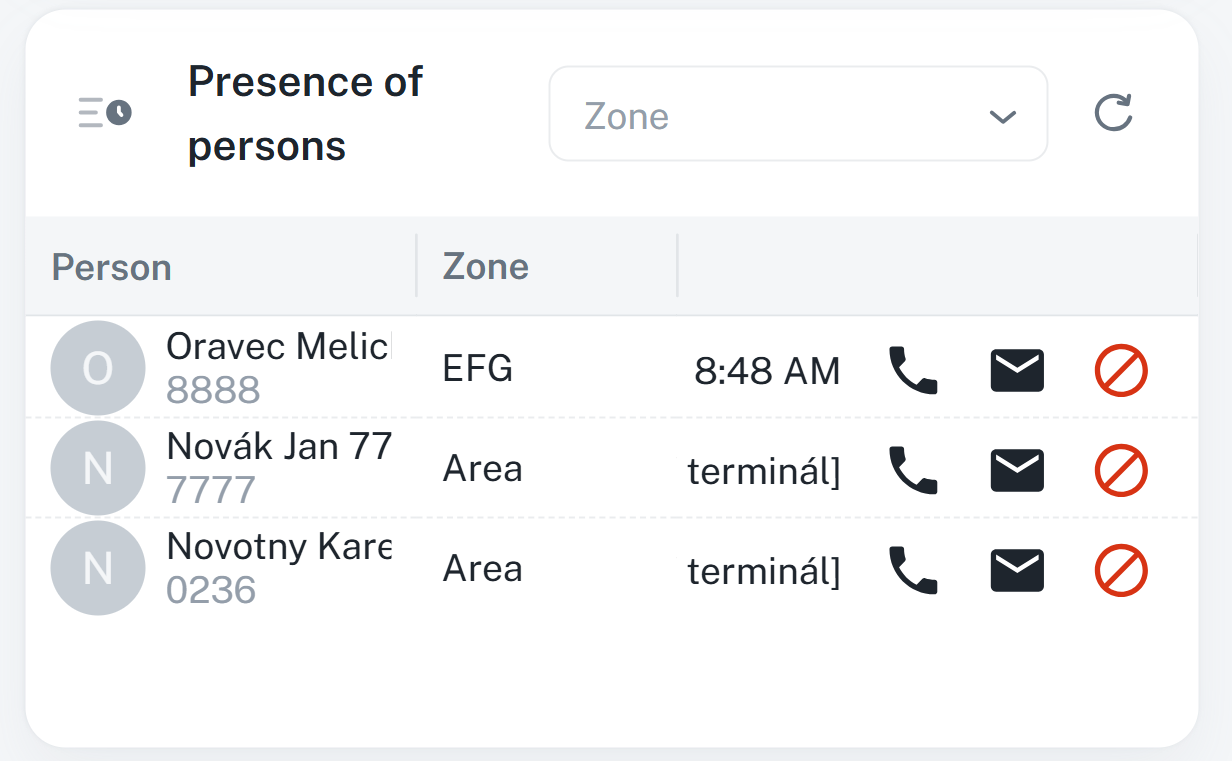
Shows the current list of people present in the system.
What you can do:
See who's present right now
Remove presence of selected people (if you have permission)
Filter people by presence zone for faster searching

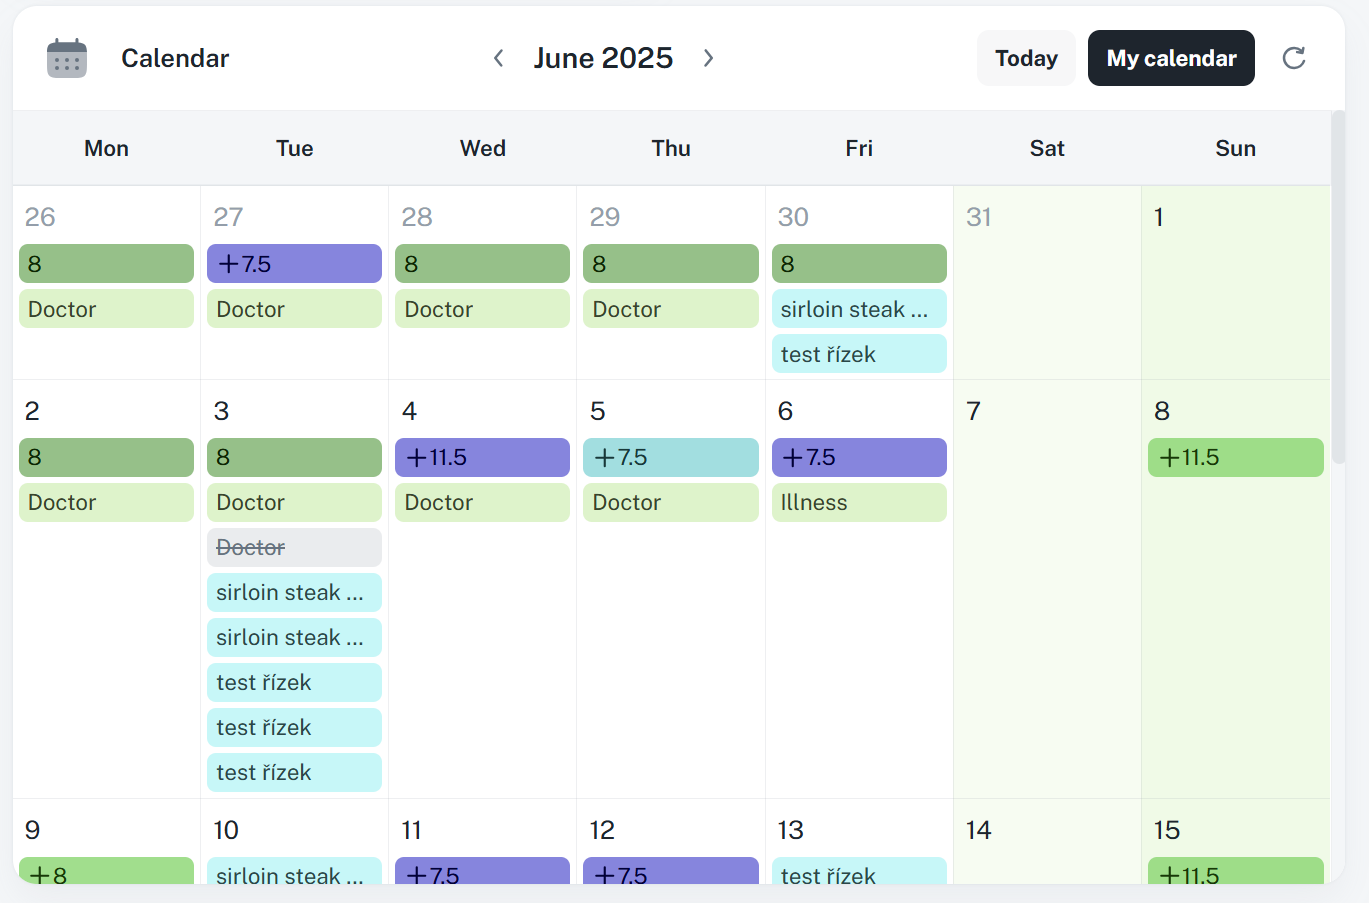
This widget shows shifts, requests, and planned events in a monthly overview. It gives you a quick glance at your data without needing to jump into the full Calendar.
What it can do:
Change how it looks depending on the widget size:
Size S – shows up as a list of rows with each record
Size M and bigger – classic monthly calendar for a clearer, more detailed view
See your planned shifts, requests, and other events
Quick Today button – takes you right to the current month
Click through to your full personal calendar
Recommendation:
The widget mainly serves for a quick overview. To enter and edit data, use the Calendar agenda, which has full functionality. Choose the size of the widget based on how detailed an overview you need – a smaller size is good for quick previews, a bigger one for more complex displays.
Size S
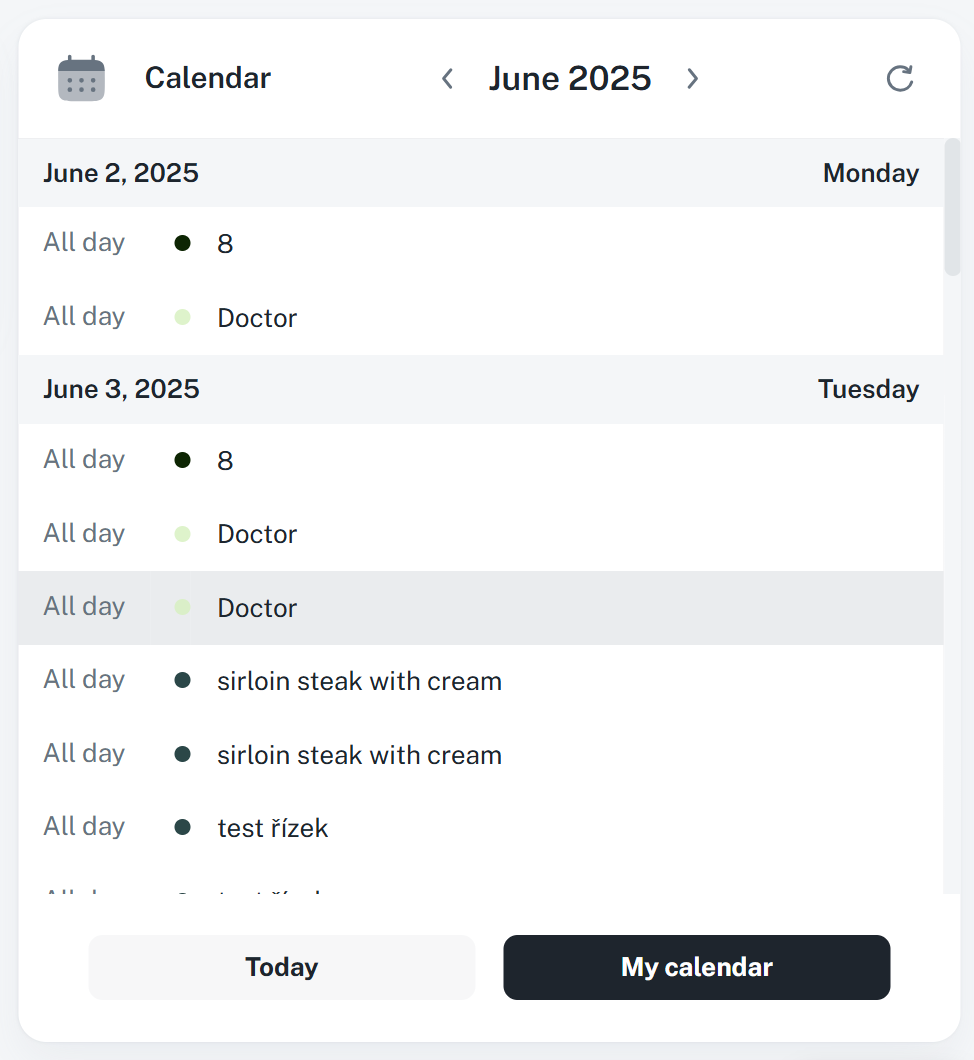
Size M and bigger
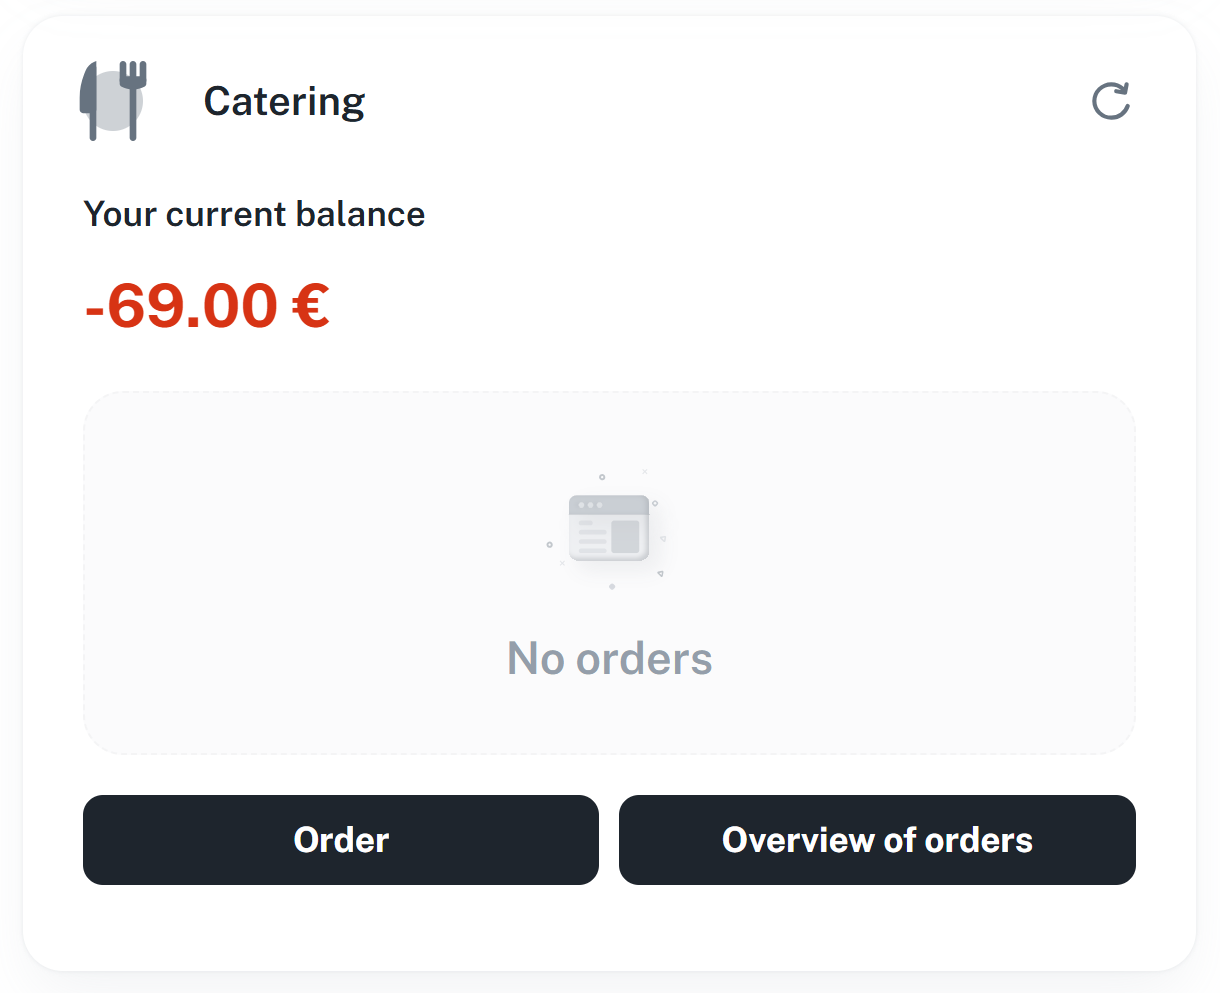
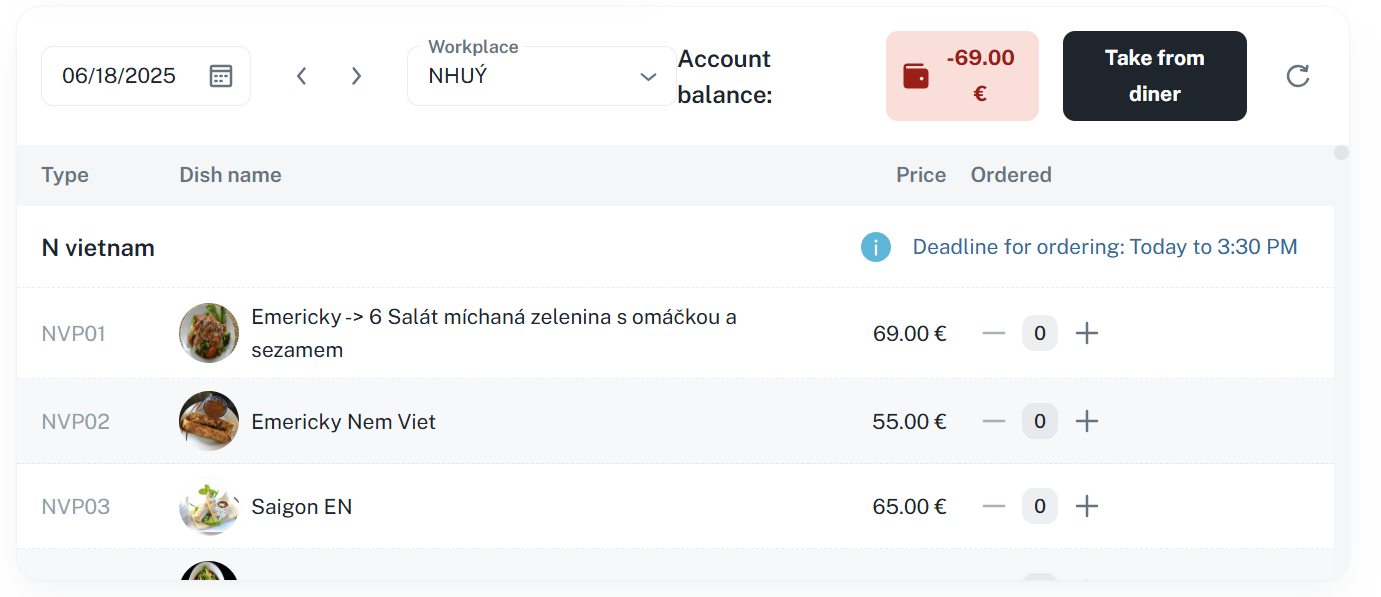
This widget helps you keep track of and manage ordered meals.
Size S (small widget):
Shows ordered meals for the current day
Clicking opens the meal details
The Order and Order Overview buttons redirect to the main Dish order section
Bigger size than S:
Works as a full-featured food order screen
Lets you order, edit, and cancel meals directly
Recommendation:
Pick the widget size based on whether you just want a quick overview or need to fully manage your orders.
They're for visual extras in the environment. They include stuff like Carousel for showing photos, Banner as an info element or Webpage for showing external content. To get to the config window for any widget, just click the 3 dots in the top right corner.
Widget for presenting images lets you automatically cycle through photos at set time intervals.
You can set up in the widget:
photos that you can easily add via the menu (3 dots in the top right corner)
automatic switching of images after a set time
manual switching between images using arrows in the top left corner
Thanks to these features, the widget is awesome for visual presentation and image rotation without needing to do it manually.

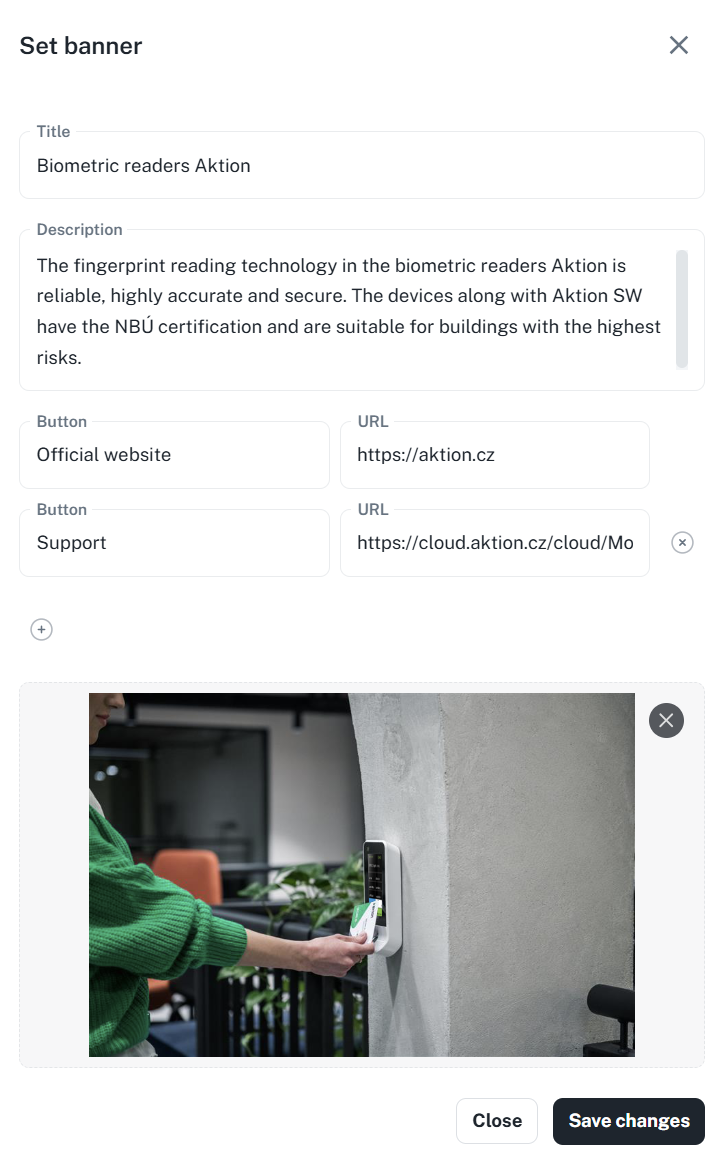
The banner acts as a tag or info widget, letting you notify employees about important stuff, news, or give quick access to both external and internal links.
You can set up the banner with:
your own background (for example, colored or with an image),
title and description, which briefly tell the purpose or content of the message,
up to 5 buttons with links that can lead, for example, to the intranet, important documents, or forms.
Thanks to the combo of text, visuals, and links, a banner is a super handy tool for direct and fast communication with employees.
Lets you display an external website directly on the dashboard. This way, users can easily access external content without leaving the app.