This manual will guide you through the key functions of the attendance management module and its effective use in everyday practice. You will gain an overview of:
How to work with attendance data – recording and editing passages, manual entry of absences, working with daily data.
How to use recalculations correctly – the difference between recalculation to today, to yesterday, and to the end of the period.
How to edit records in bulk – adding actions for multiple persons at once, changes to attendance regulations.
How to navigate the side panel and its notifications – summary information on the status of the period, warnings according to the Labour Code, etc.
How the system works in the background – automatic recalculations, reasons and appropriate moments for manual interventions.
The manual is intended for persons responsible for the administration and closing of attendance records – typically payroll accountants, HR specialists or managers. It will help you not only to understand individual functions.
The top panel provides elements for controlling the list. For a detailed description of these, refer to the manual General control of elements:
Obecné ovládání prvků
Tento manuál slouží jako nápověda k obecnému používání uživatelského rozhraní Aktion. Obsahuje návody k filtrování, seskupování a rozložení.
By clicking the button, see the figure below, you open the right side panel for Value summaries and calendar.


This tab displays data for the entire month; otherwise, the same functionality applies here as on the previous tab.
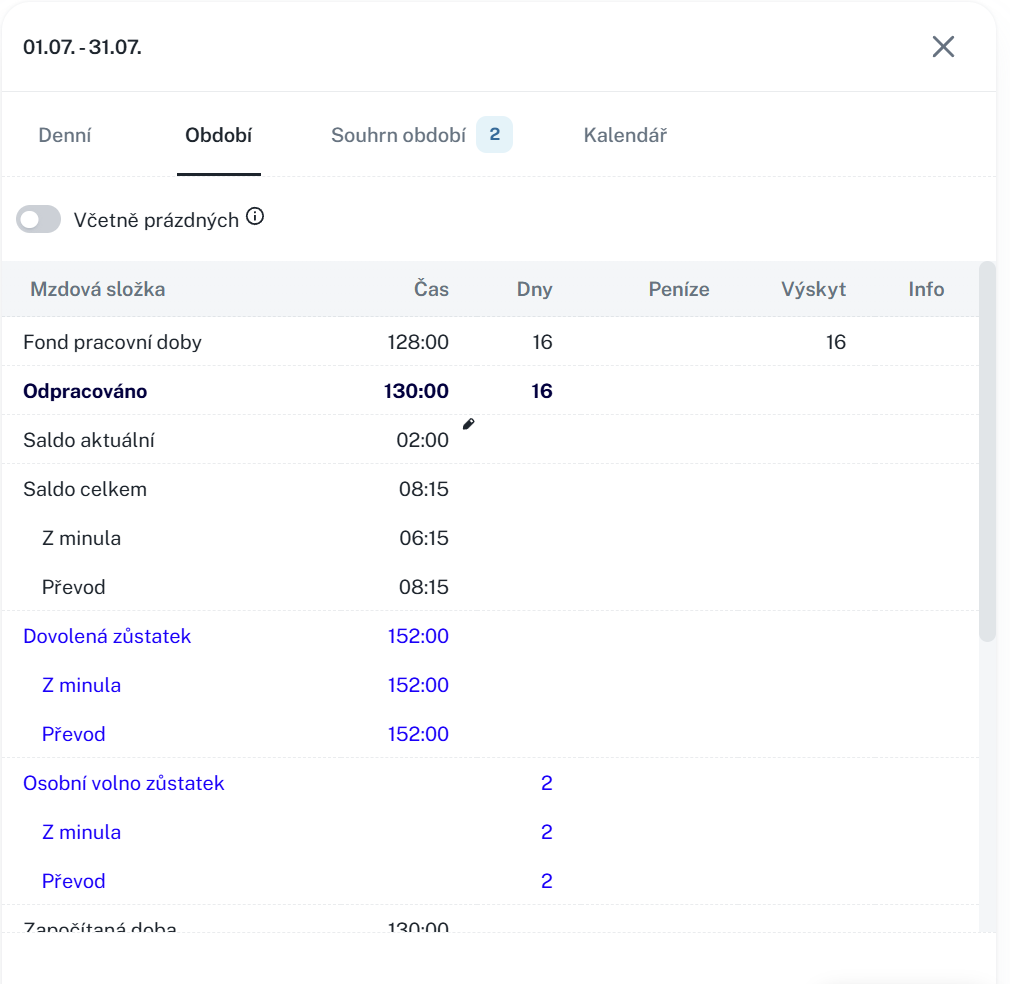
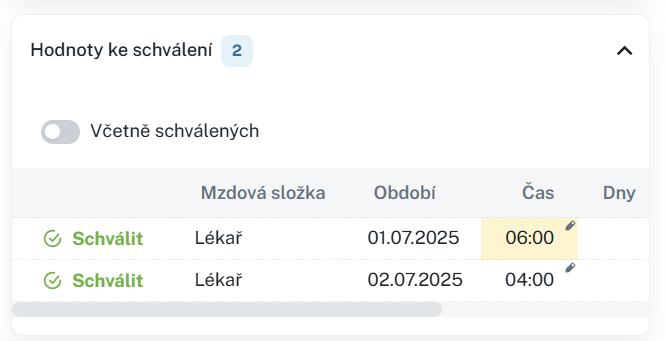
If a value is accompanied by a pencil icon, it means that it is editable. After clicking on the value, an editing form will open.
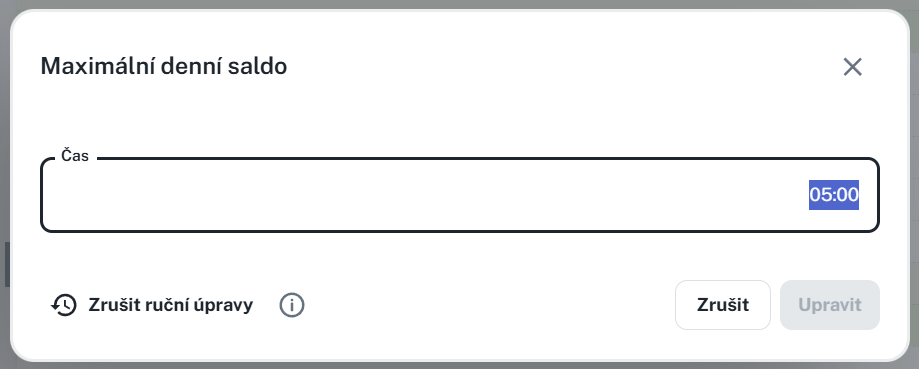
After the adjustment, the value will be highlighted in yellow.

Used for monitoring:
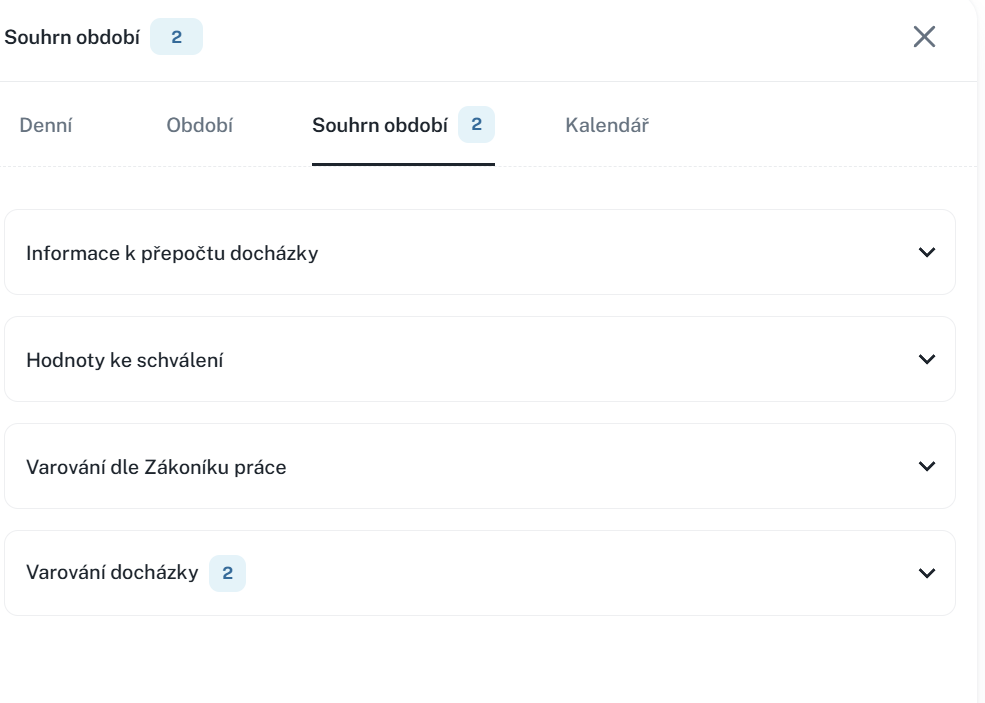
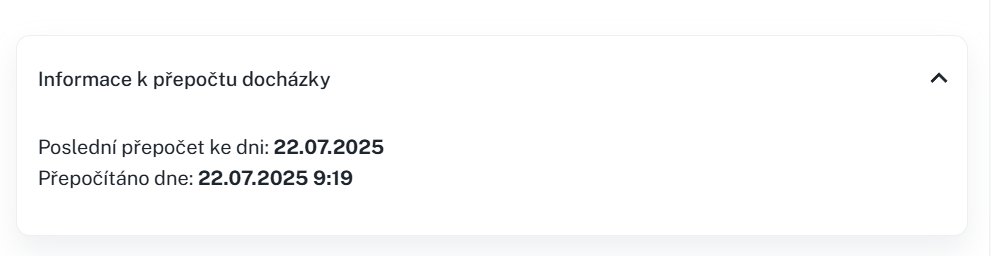
Attendance recalculation - date of the last recalculation together with the date of the attendance recalculation.
Values for approval - used for approving values
Warnings according to the Labour Code - warnings pursuant to the Labour Code, for example failure to comply with uninterrupted rest periods, etc.
Attendance warnings - warnings such as auto-generated passage, unfulfilled schedule, etc.
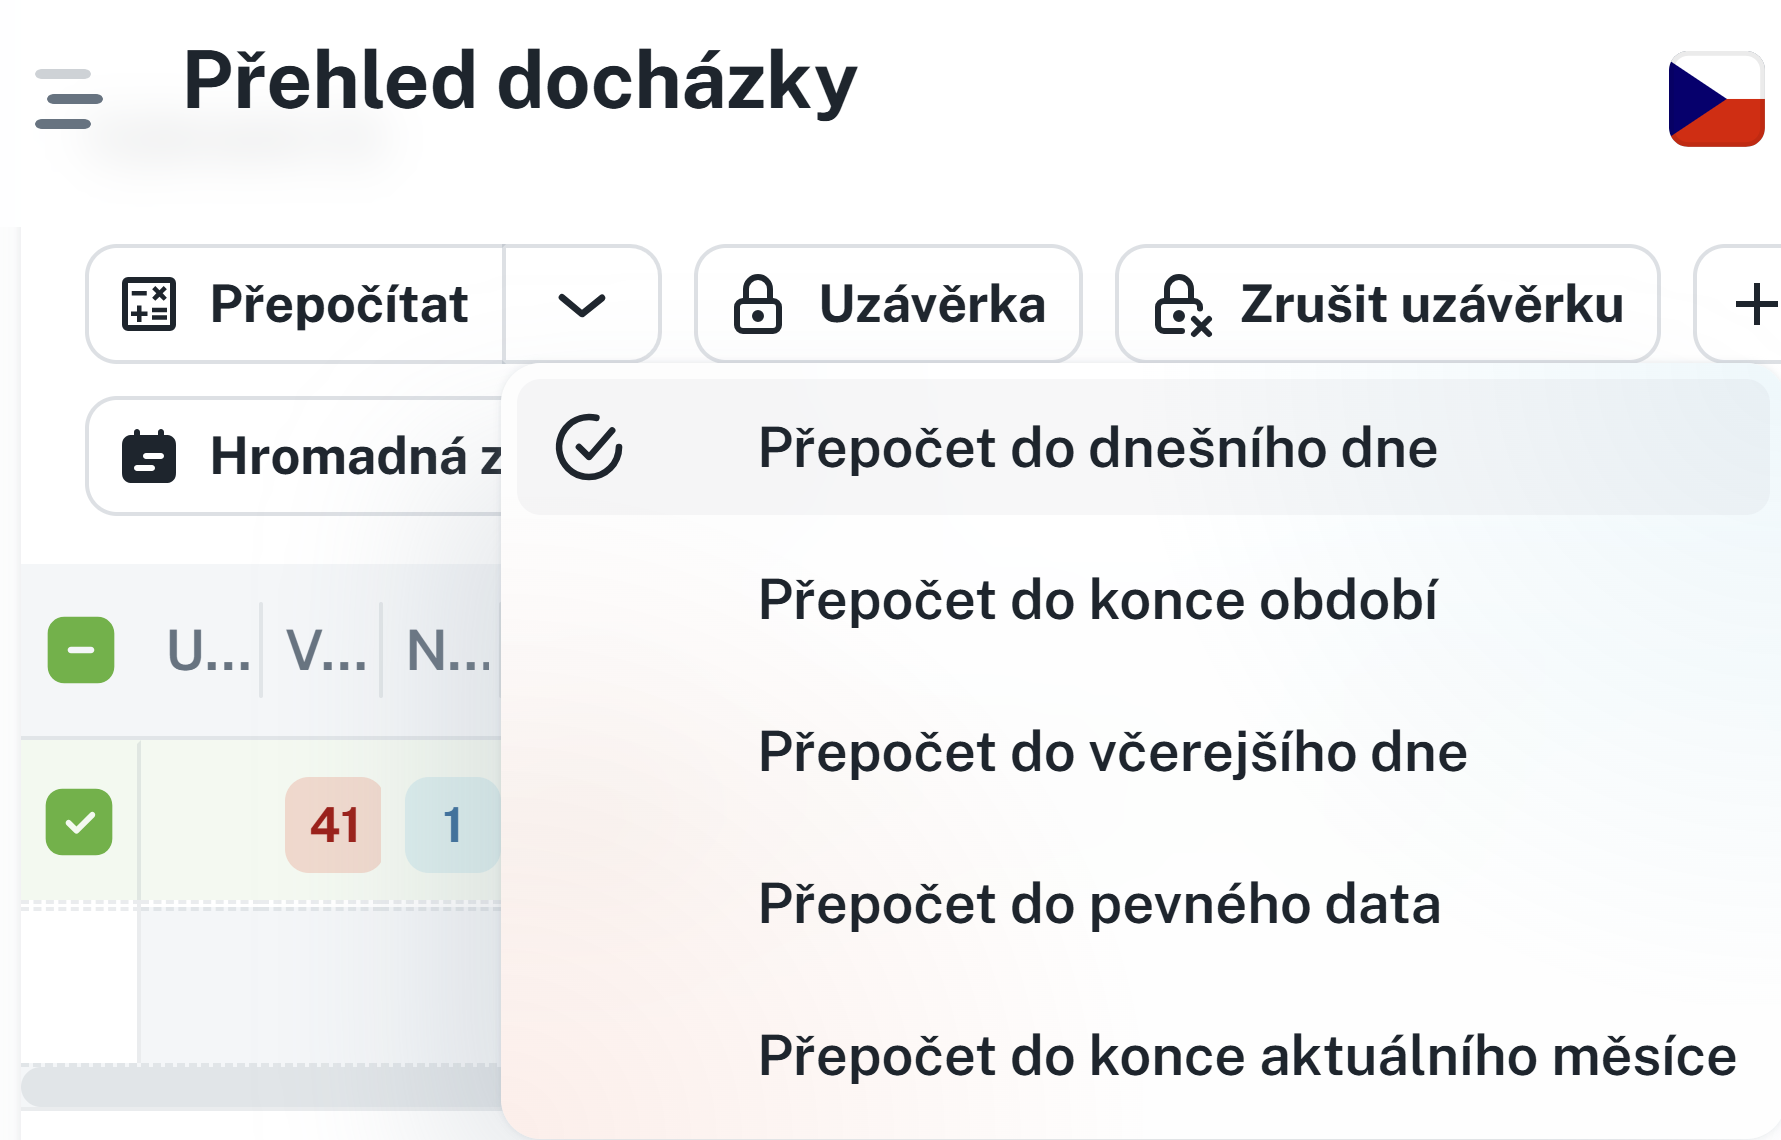
The recalculation of attendance data is performed automatically in the background after each entry of a specific person and after manual addition/editing of entries and saving of changes. It is performed manually by pressing the Recalculate button (Recalculate until the end of the period/Recalculate until today/Recalculate until yesterday).
If you are closing attendance before the end of the period, press the Recalculate until the end of the period button and the person’s attendance data will be recalculated until the end of the current period, i.e. for a monthly period, until the end of the month. Then check whether the data has been calculated also for the last days of the month.
Example of use: The employee has vacation during the last two weeks of the month and you need to close his/her attendance now and process it further before the end of the given period.
If you are closing attendance as of today, press the Recalculate until today button and the entries for this day will be generated according to the employee’s attendance rules. You can then close the attendance and continue working with it.
Example of use: The employee’s attendance schedule is WHC from 7:00 (end 15:30). The employee arrived at work at 7:00, but it is not certain at what time they will leave work, and the accountant already needs to close their attendance today and further process it. Therefore, they use the function Recalculation up to today and the employee’s departure will be generated according to their attendance schedule (15:30). If the employee leaves earlier or later, the balance will be recalculated into the next accounting period.
If you are closing attendance as of yesterday, press the button Recalculation up to yesterday and in the attendance data for closing there will only be the employee’s actual passages. After the recalculation it is possible to close the attendance and further work with it.
Example of use: To close attendance, you need to use only actual data and you do not wish to close the employee’s attendance with passages that would be generated.
Before running the Recalculate function, it is first necessary to select the persons for whom you want to use the function (you can select all at once using the checkbox in the upper left corner of the table).
If you choose Recalculation until the end of the period, the record will be recalculated according to the selected period (for example July 2025).
Select time period.
Mark the person(s) to whom the recalculation applies.
Click the arrow next to the Recalculate button → select Recalculate up to today / Recalculate up to the end of the period / Recalculate up to yesterday.
Click the Recalculate button.

The data are now recalculated and ready for further use (e.g. for closing, export, etc.).
We have 3 types of passages and each of them is specially marked.
The passage is performed through an SW terminal or physical HW, it does not have a flag.

It is created by editing the passage or by adding it manually via a button, it has a little-man icon as a flag.

It is created by additionally generating the passage according to the shift, by generating the start of interruptions into subsequent days, etc., and is characterized by a blue lightning bolt.

Adding a passage and an action is used for manually supplementing data in attendance records (e.g. the employee did not use the attendance terminal, planned vacation).
A passage can be added via the “Add action” button.


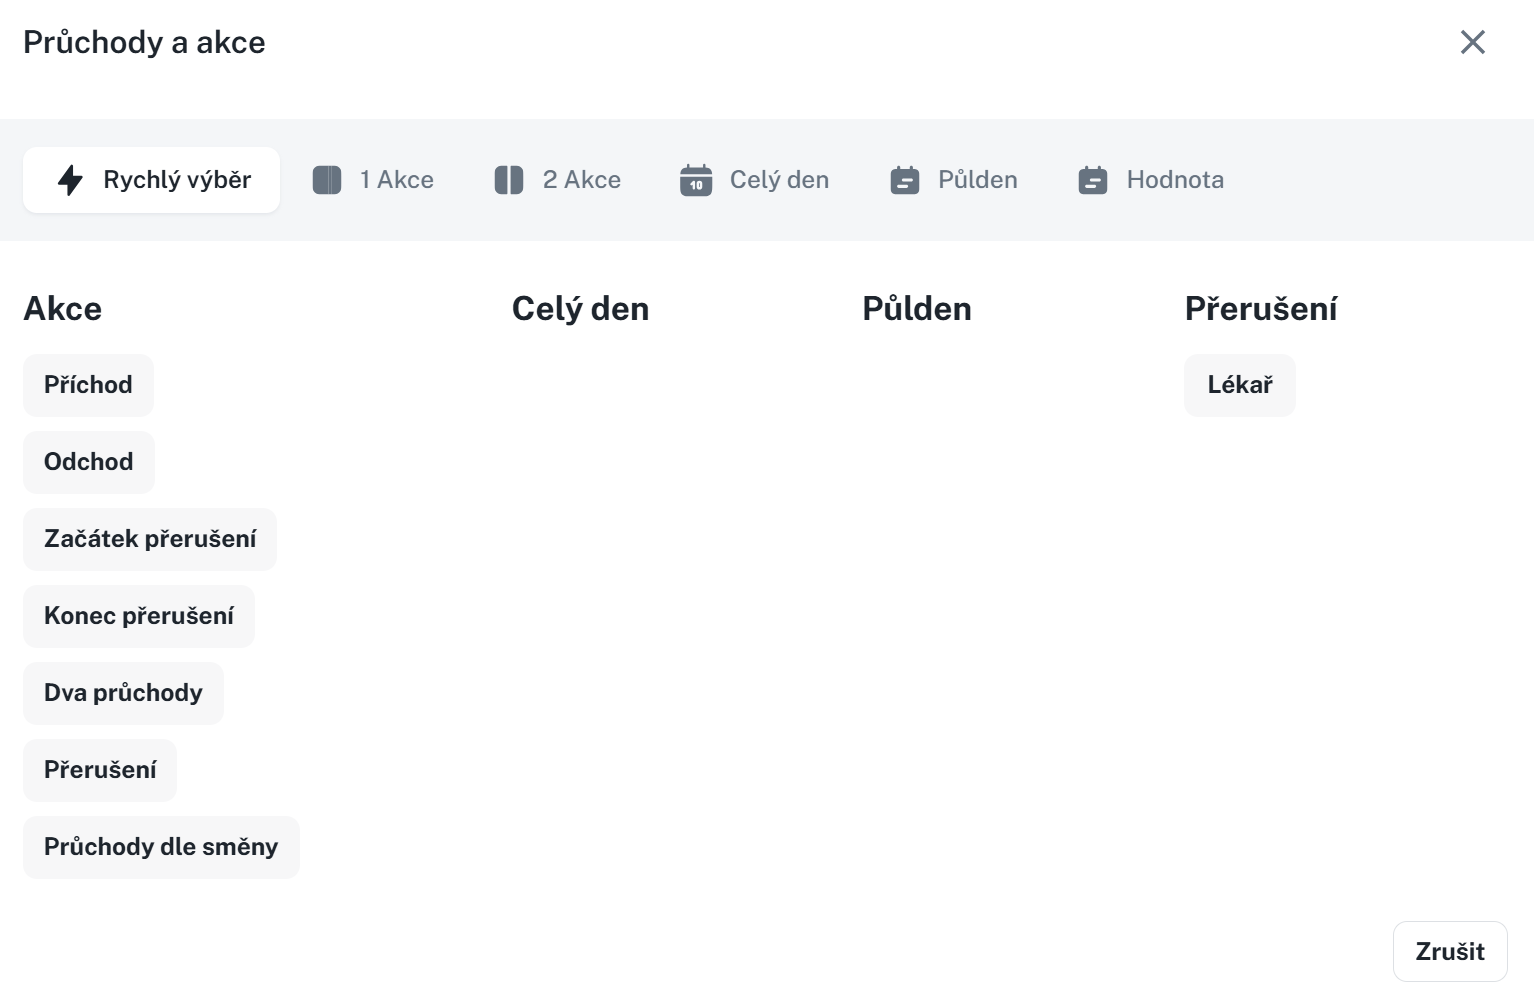
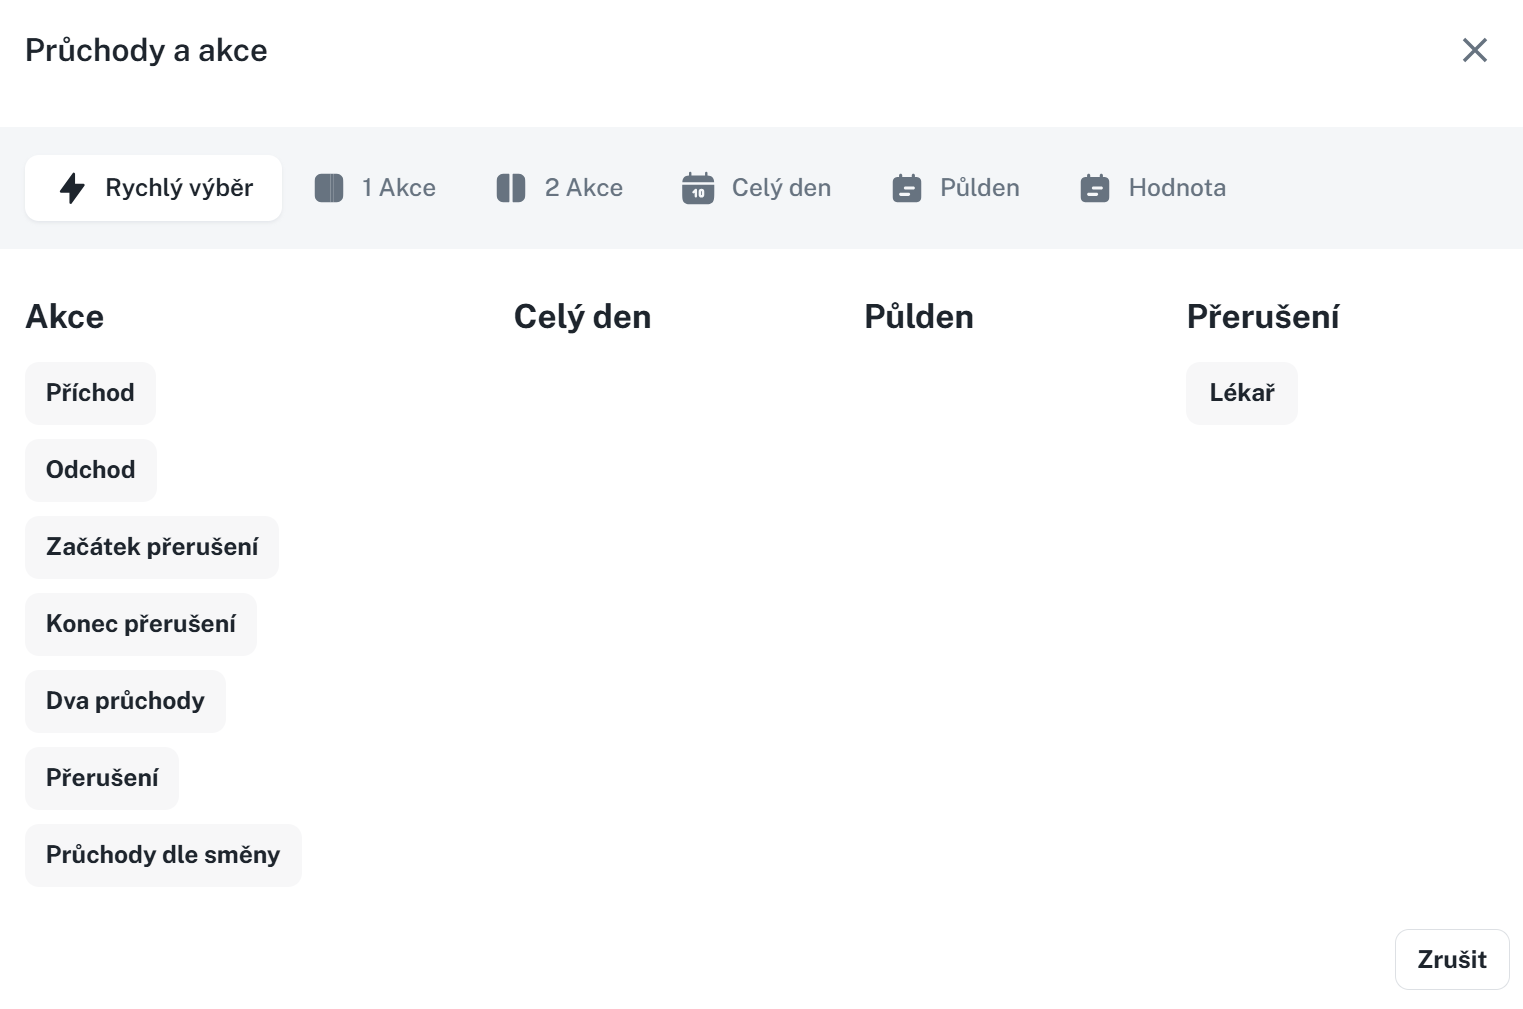
When adding a swipe and an action, a form appears, which consists of five tabs.
Quick selection allows you to quickly choose an action and speeds up the completion of swipes.
1 Action allows you to register only Arrival/Departure/Start of interruption, etc. Suitable, for example, for adding a forgotten swipe.
2 Actions allows you to add two independent swipes. It registers, for example, arrival and at the same time departure at once.
All day concerns all-day events such as Vacation, Business trip, Illness, etc. It is possible to define the interval, from when to when (date), during which the selected all-day event should be entered into the system, or, by using the Generate option, it will be entered automatically until the employee records arrival on the attendance terminal.
Half day registers a half-day event. It can be used in the case of vacation or a combination, for example, of vacation and compensatory time off.
Without distinction – if the direction of the passage is not distinguished, choose this option.
Arrival – for entering the arrival value.
Departure – for entering the departure value.
Start of interruption – enforcing the start of an interruption. The situation is similar to the example below for End of interruption.
End of interruption – enforcing the end of an interruption.
Example: the standard calculation of a business trip is set until 17:00, but it is necessary to end it already at 15:00. With the help of passages, it would be necessary to enter 2 unrealised actions (arrival from the business trip and departure home, respectively departure worked). In this case, it is appropriate to use the End of interruption action at 15:00, which will terminate the generation of the business trip and, at the same time, the attendance for that day.
Ignore rounding + ignore limits - when adding a passage, it immediately sets the passage to ignore one or both of the selected functions.

Presence setting - the passage immediately sets the presence of the given person; the column “Zone” is used to display in which zone the person is located.

Generate according to shift - most often used when adding passages for multiple days; this function ensures that the times are generated according to the pre-planned shift.

Adopt times according to shift - adopts the times according to the planned shift and follows the shift planned for the first action.

Cancel everything else - cancels other passages and actions added on the given day.

Generate into subsequent days - generates an all-day action into multiple days

Approve - if the value is also a value to be approved and you also have the right to approve, this checkbox will appear. Using this option, you will approve the value immediately and it will not be necessary to approve it additionally.

Do not insert on a day with an entered action/passage - does not insert an all-day action if an action is planned or a passage is added for the given day.

Fill in the second half-day as well - also fills in the second half-day for a half-day action

This function allows you to insert an event (e.g. passage) or a value in bulk for multiple persons in the list at once. It can be used, for example, for company-wide vacations, joint business trips, entering vacation entitlements, and medical leave. First, however, it is necessary to select the persons to whom the record insertion will apply.
Select persons by checking the box on the left

Click the button Add action

In the form, select the type of action
Fill in the parameters
Click the button Save and recalculate
This function is used to close (lock) attendance data for one or more persons at once.
For more detailed information, refer to the manual Closure:
Uzávěrka
Tento manuál slouží jako návod k uzávěrce. Vysvětluje typy uzávěrky - Kontrola, Potvrzení, Uzávěrka a jak je nastavit.
It is possible to change employees’ attendance regulations in bulk.
Select person(s)
Click the Bulk schedule change button.

Select the attendance schedule. It is also possible to tick the Custom field and fill in the details manually.
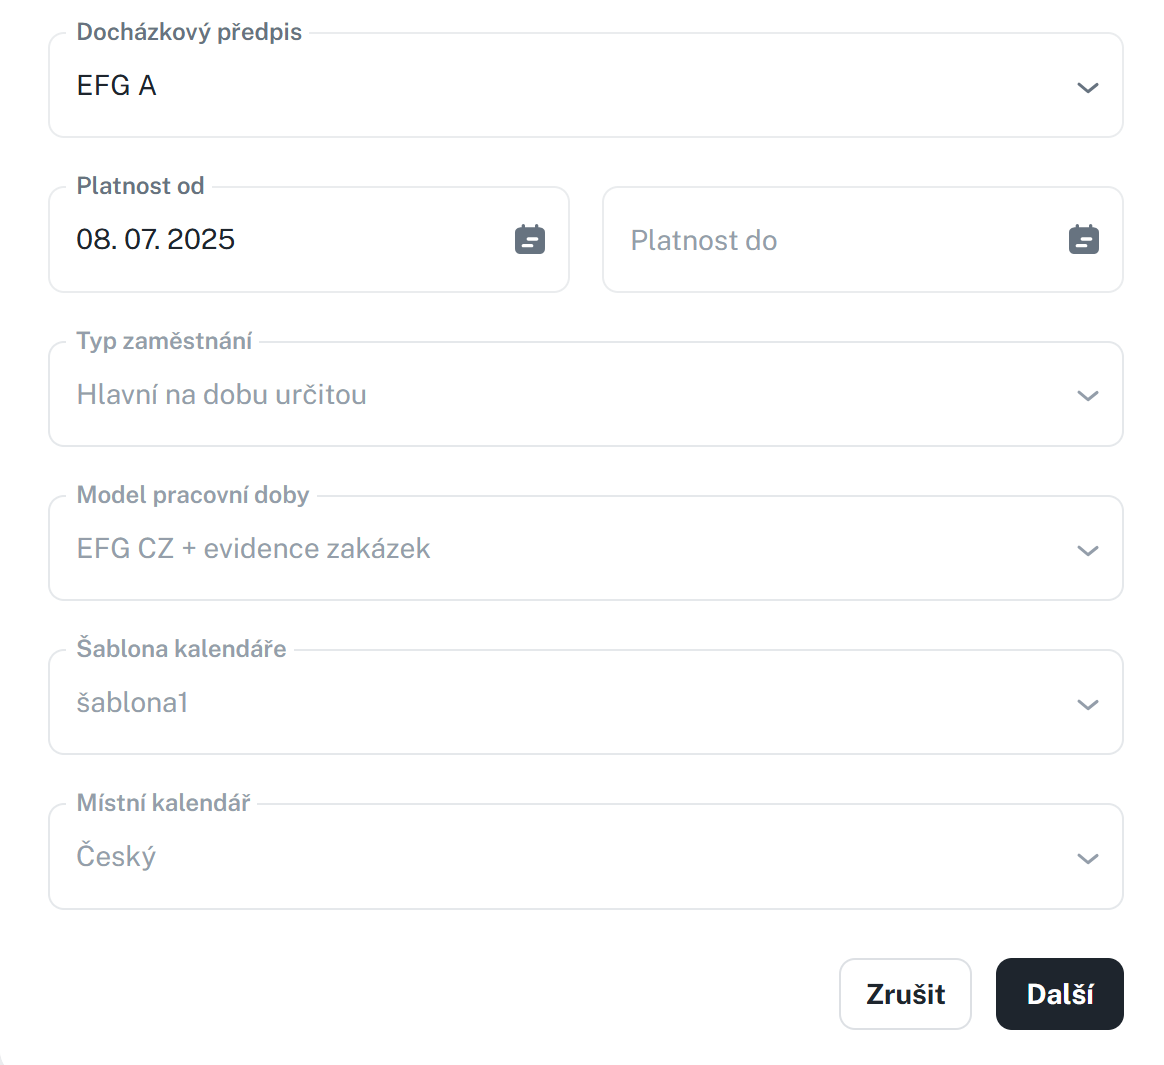
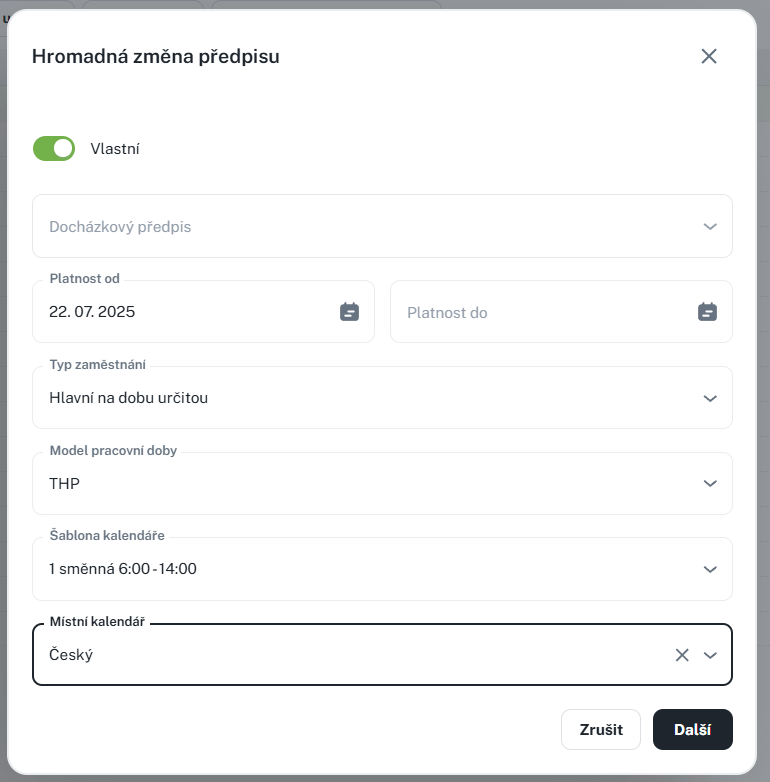
Click Next. The change should be applied immediately.
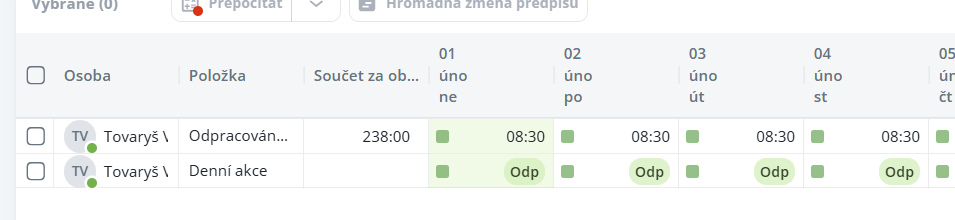
This tab is used to clearly display persons and the values of individual components on specific days. It enables creating bulk totals for individual columns and displaying overall totals for the selected period for a given component. In addition to payroll components, it is also possible to display daily actions, such as the start and end of a shift, in the “Special rows” section.
A new column selection right next to the current one is used to add a component.

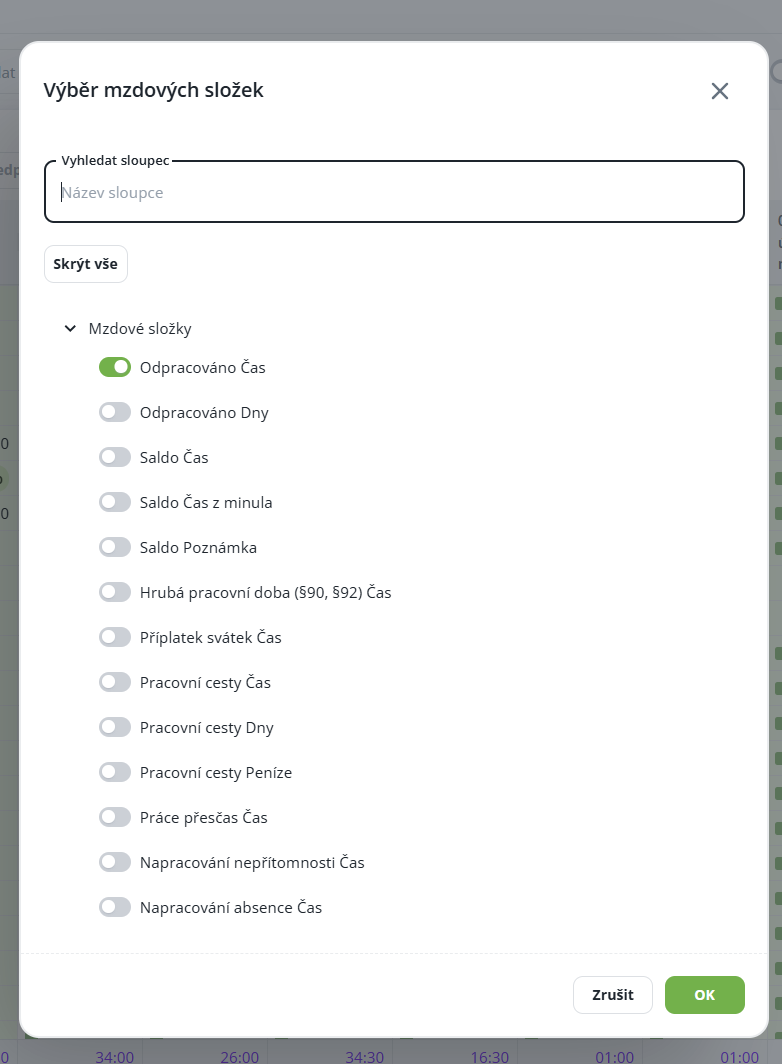
After adding a column, a row with the value of the given component is added for each record. The maximum number of displayed components for one layout is 10.
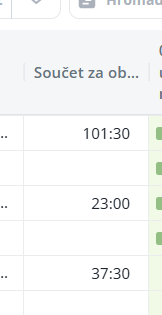
For a simple overview, there is the Total for period column, which displays for each person the overall value of the selected component for the currently displayed period.
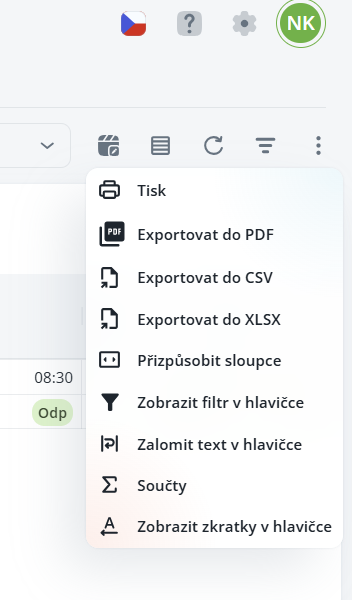
To sum values in columns, it is necessary to open the contextual menu of the agenda and select the option Totals. After activating it, the total configuration will be displayed.
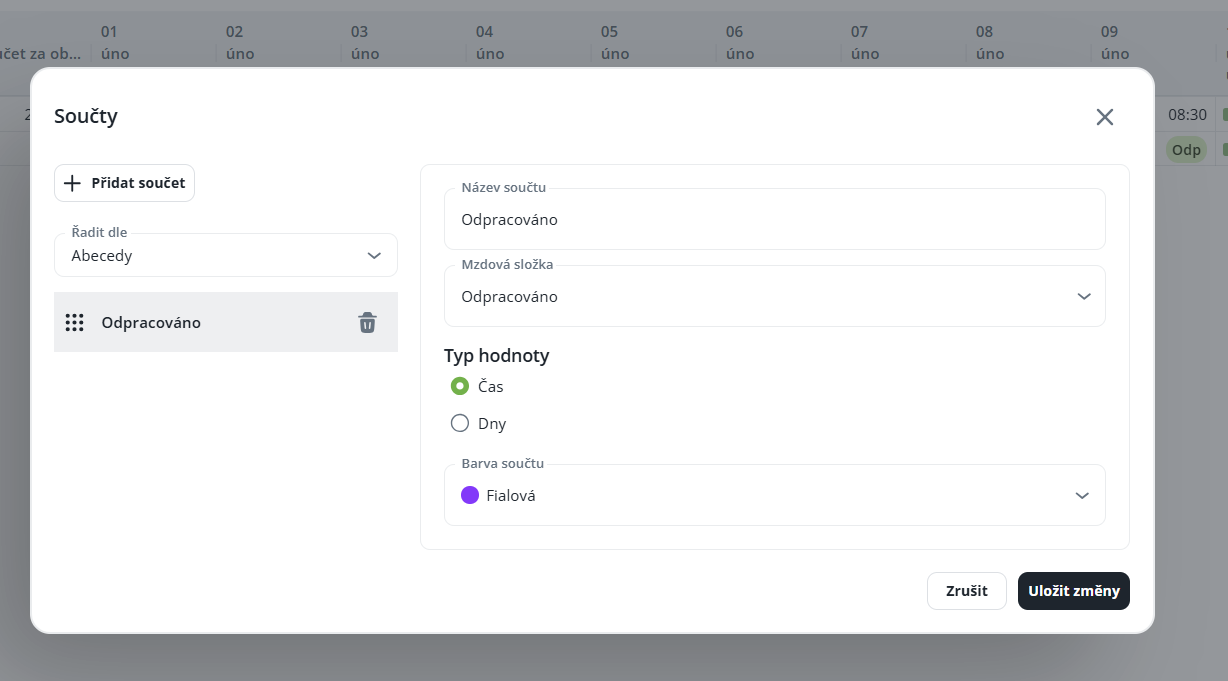
The configuration is simple – select the required folder, value type, and display color, and then save the settings. Totals are always saved according to the specific layout.

Here you have the option to monitor all notifications related to annual overtime, average weekly overtime, uninterrupted rest between shifts, and uninterrupted weekly rest. The notifications themselves will also appear when recalculating attendance data in the Attendance Overview/Attendance Statement agendas and when performing the attendance data closing in the Attendance Overview/Attendance and Closings agendas.
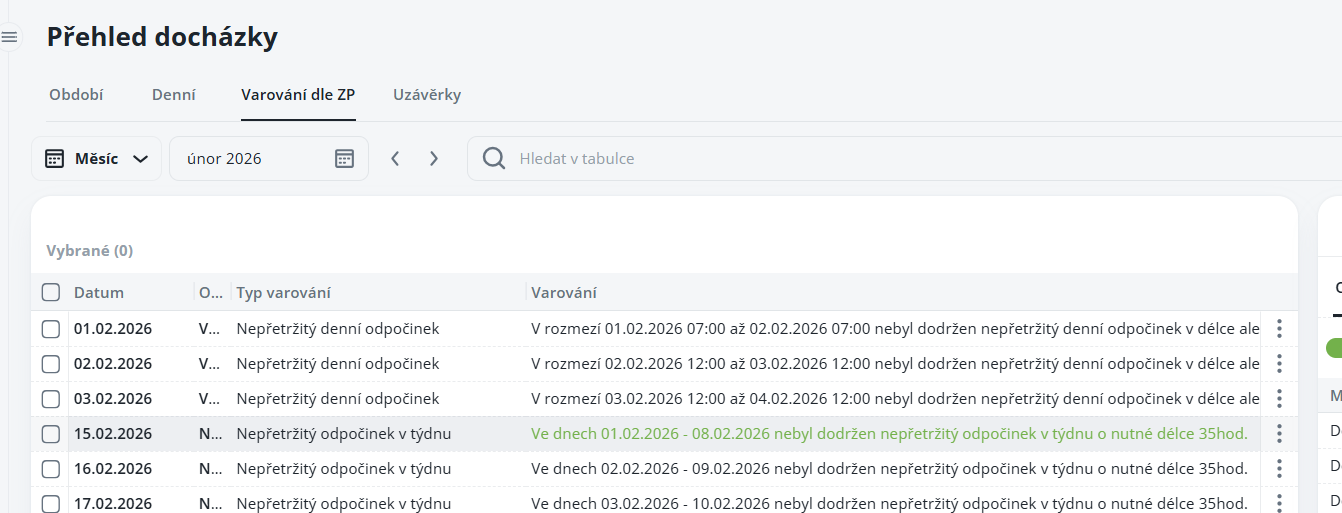
Currently only in the Aktion.NEXT application
The settings are carried out for specific working time models on the Alerts and Warnings tab in the Continuous Rest section by adding checkmarks to the items “Monitor continuous rest” and “Monitor continuous rest in the week”.
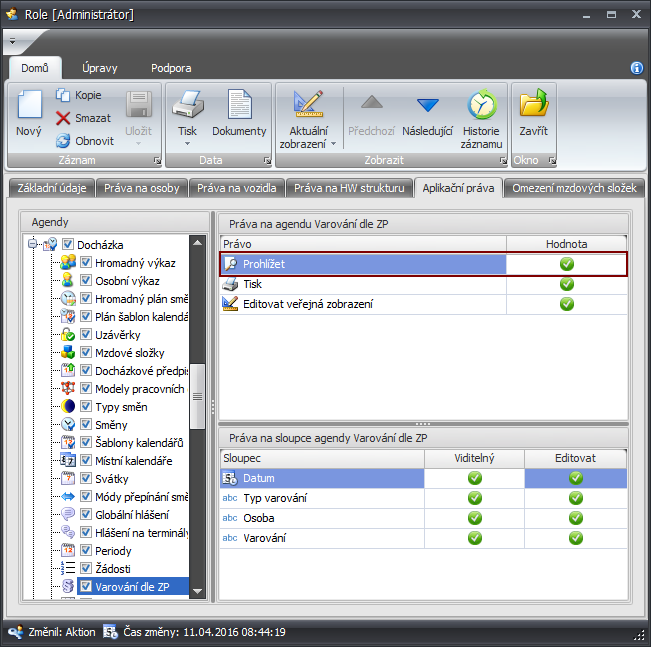
Furthermore, users must have rights to this agenda, preferably via roles, by enabling the right on the Application Rights tab in the Attendance agendas node for the Warning according to the Labour Code agenda, where you should add checkmarks at least for the View right.
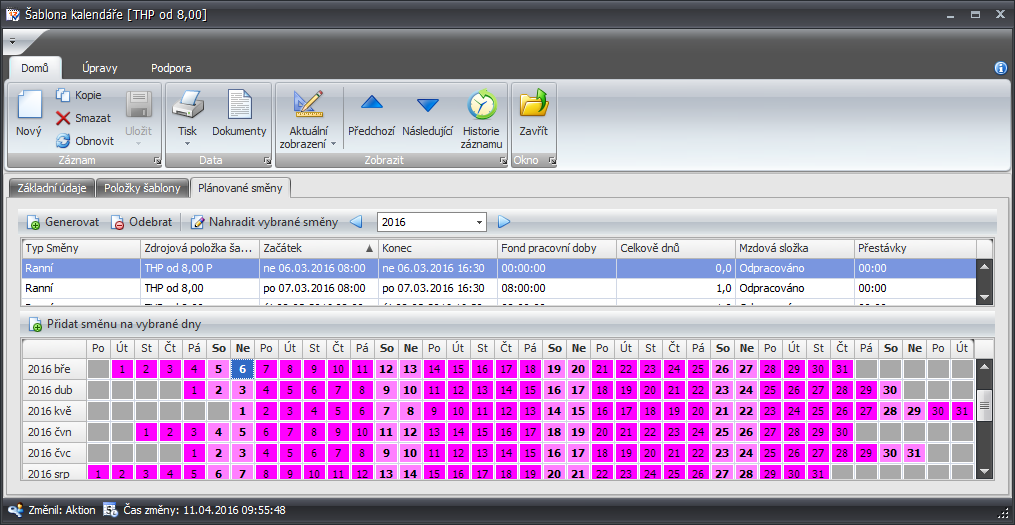
It is also necessary to have overtime shifts entered for weekends, either directly in calendar templates or in models, so that they are inserted when the employee comes to work at the weekend.
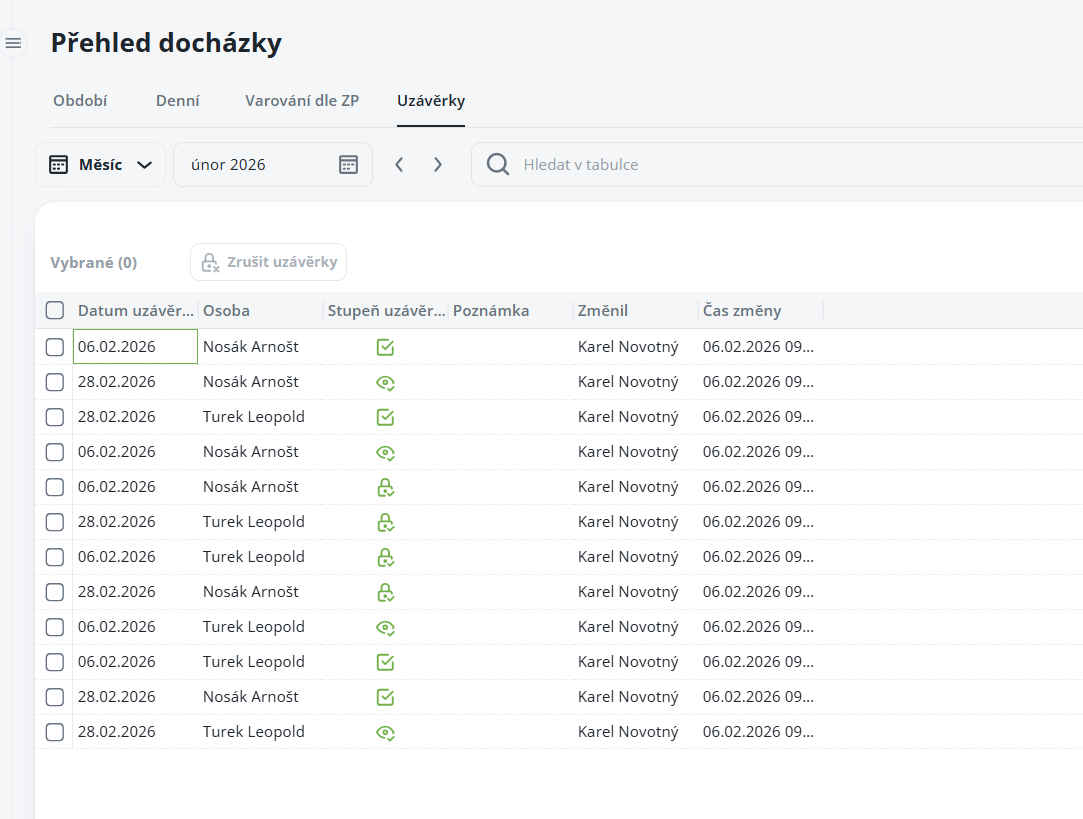
A list of completed closures for individuals; from this agenda it is only possible to cancel closures. More about closures can be found in the closures manual.
Attendance Closure
This manual serves as a clear guide to closures in the system. It explains the individual types of closures – Check, Confirmation, and Closure, including their meaning, order, and practical use. You will learn how to configure closures, run them, correct error states, and how to work with closed data.