You can use a USB card reader or fingerprint scanner connected to your computer directly in eNext to find a person by presenting a card or finger, assign a card to a person, assign cards in bulk, and enter fingerprints. The scanners are managed by the Windows application Aktion eDevice, which runs in the background by the clock. The article Aktion eDevice – installation and use explains how to install it and connect your computer to eNext.
Aktion eDevice – installation and connection of local scanners (USB card and fingerprint readers)
Aktion eDevice is a small Windows application that makes USB scanners connected to your computer (card scanner, fingerprint scanner) available to eNext. With it, you can find a person in eNext by presenting a card, assign them a card, or enter fingerprints.
When you have a computer connected, a round local scanners icon appears in the eNext header next to the language selector. Click it to see the connected scanners and their status.
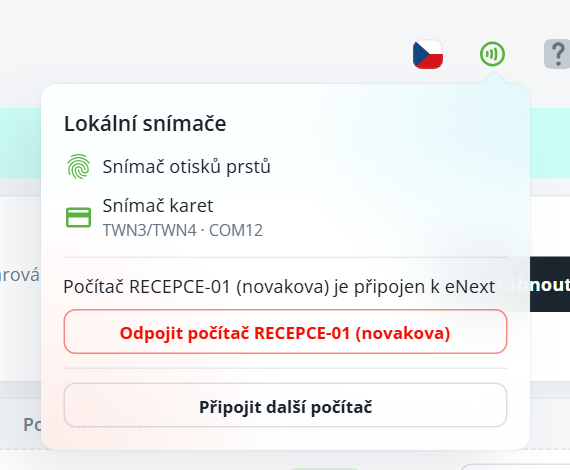
Sensor icon color | Meaning |
|---|---|
Green | The sensor is connected and ready. |
Gray with a yellow dot | The sensor was disconnected (e.g. unplugged from USB). It will return on its own once plugged in. |
Orange with a dot | The sensor is connected but cannot be used – another application is holding the port, the fingerprint sensor driver is missing, or the fingerprint sensor is asleep. The reason is shown on the right. |
A dot on the header icon indicates that a sensor needs attention. The panel also contains:
Disconnect computer – disconnects the computer from eNext; the sensors will stop working in eNext, and you can reconnect it at any time.
Connect another computer – download the installer or connect the running application on another computer.
Turn on again – for a fingerprint sensor put to sleep from the Aktion eDevice application.
Start Aktion eDevice – when the application is not running on the computer.
On the list of people, hold the card up to the reader. The person will be highlighted in the list, and a message with their name will appear; if the person has multiple rows, they will all be highlighted. If the person is outside the current filter, “Person is not in the current list” will appear. This also works in other lists of people (e.g. Attendance Overview, Shift Plan, Requests, Training).
In the person’s details, the attached card offers the option to assign the card to that person.
Only users with access to the Identifiers agenda can see the card number; users without access to both the People and Identifiers agendas will see only “Card read”.
Only the active eNext window always responds to a card being presented.
Unknown card. If the card is not in the records and you have permission to create identifiers, eNext offers a New identifier with the number and technology pre-filled.
Unlike a card reader, the fingerprint scanner is not always lit. It lights up only on screens that can process fingerprints (person lists)—a lit scanner means “place your finger.” Once the registered finger is placed on the scanner, the person is highlighted (“Person found by fingerprint”).
When you switch to another screen or tab, the scanner turns off and turns on again when you return.
If you place your finger lightly, leave it there; after repeated weak samples, “Poor-quality sample … – place your finger again” will appear.
After 10 minutes of reading, the app will ask at the clock “Fingerprint scanner is still reading” – Keep reading or Sleep. You can turn a sleeping scanner back on in the local scanners panel by selecting Turn on again.
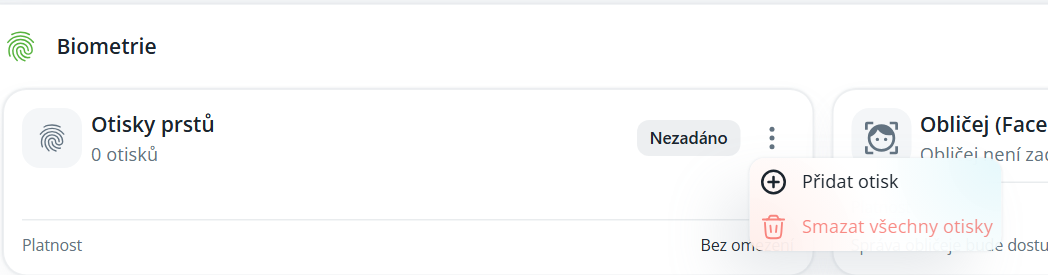
Open the person’s details, the Access tab, and the Identifiers and biometrics subtab.
On the Fingerprints card, click ⋮ and select Add fingerprint.
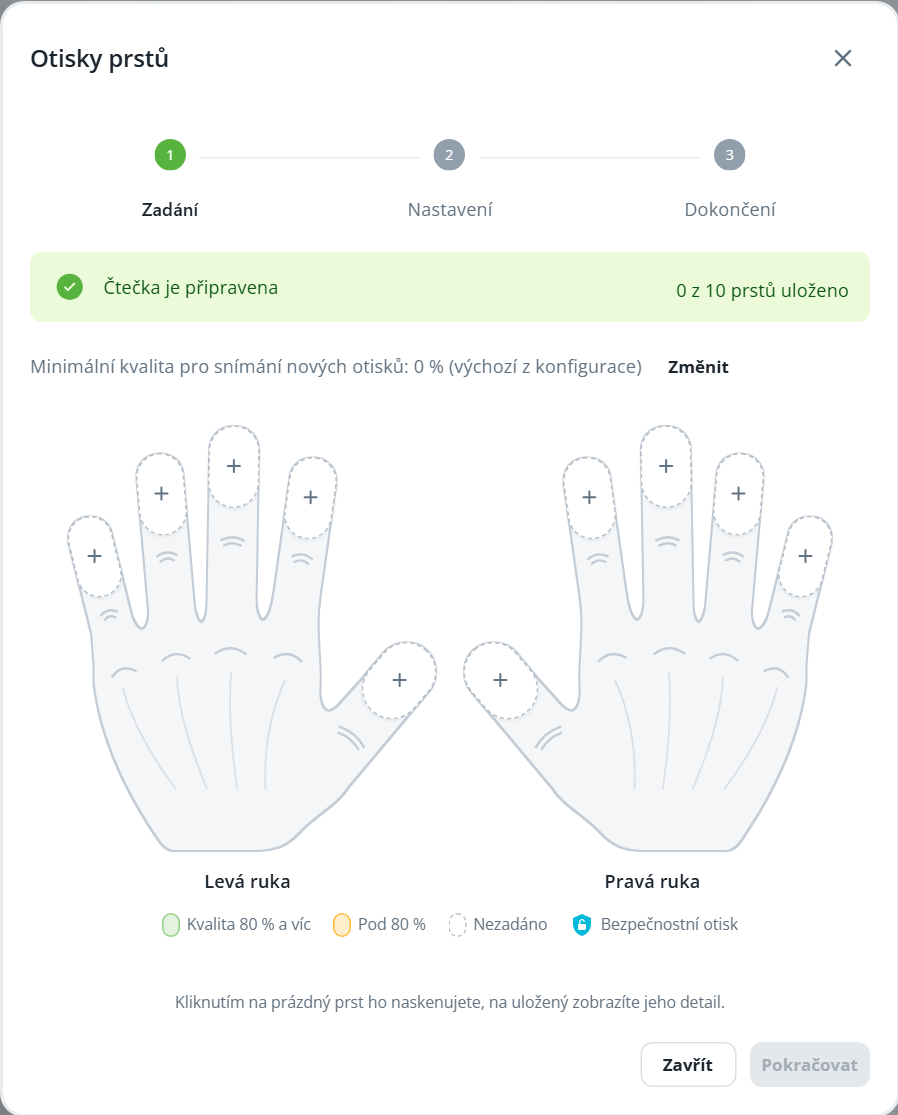
The wizard will show the reader status (“Reader is ready”). Click the empty finger you want to scan.
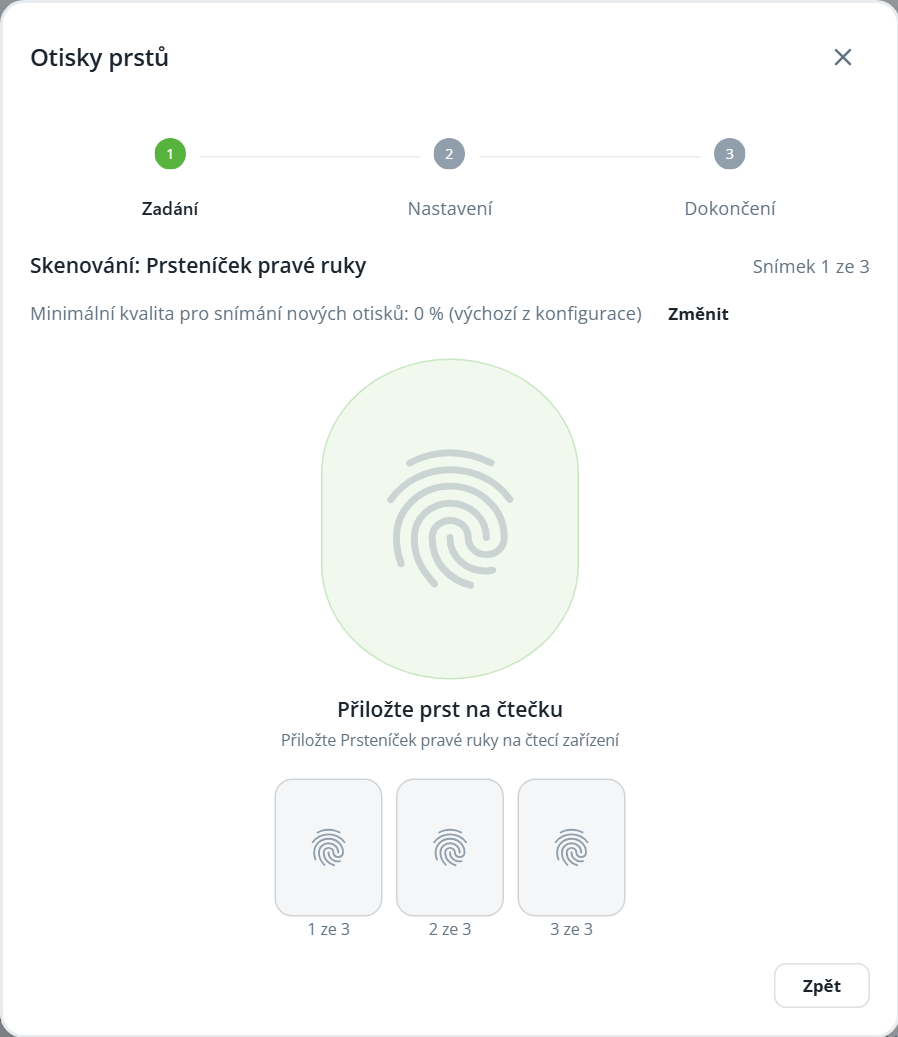
Place your finger on the scanner three times in a row, lifting it between scans. Progress is shown by the three boxes below the image.
Optionally, enter additional fingers and click Continue through the Settings step until you reach Completion.
In the list of people, select the checkboxes next to the people and click Assign cards.
In the Card Assignment Settings window, select the Default technology (used only for cards whose technology the reader cannot read), validity period and, if needed, Registration number = personal number and Default for holder when the person has no other identifier. Click Start.
Present the cards. Each card is assigned to the person currently next in the list; after it is saved, the turn advances. Skip person skips the current person, and End ends the assignment process.
At the end, a summary is displayed: “Assigned … skipped …”. A person whose access you are not authorized to edit is skipped; a blocked card is not assigned.
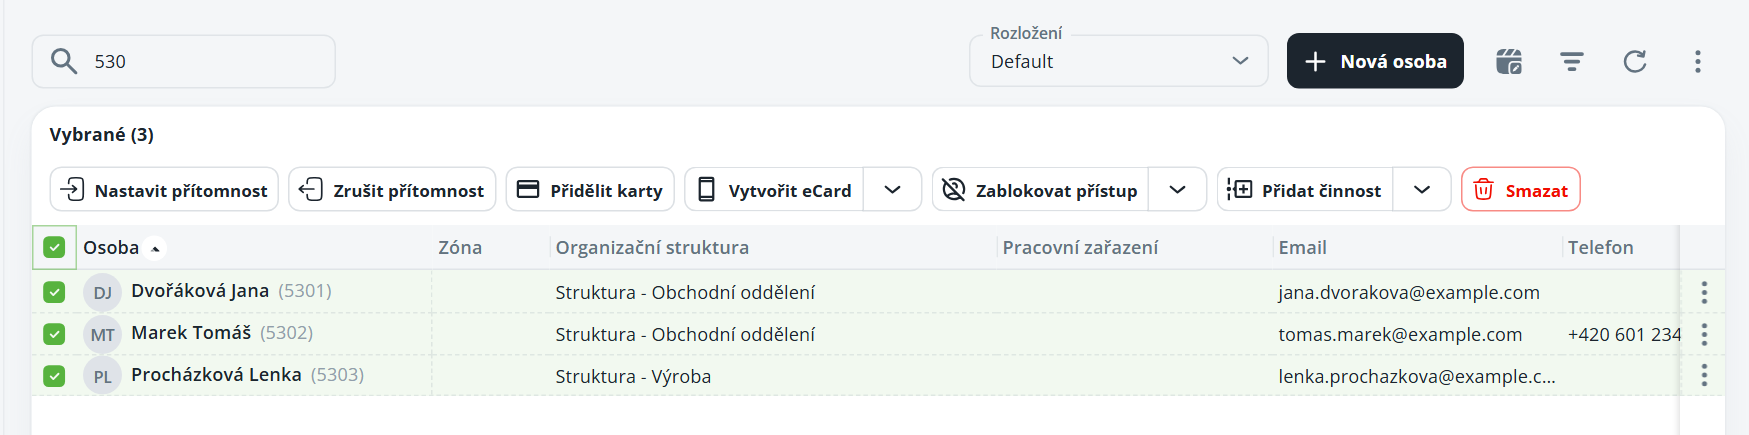
Figure 5: List of people with selected people and the Assign cards button (05-ls-osoby-vyber.png)
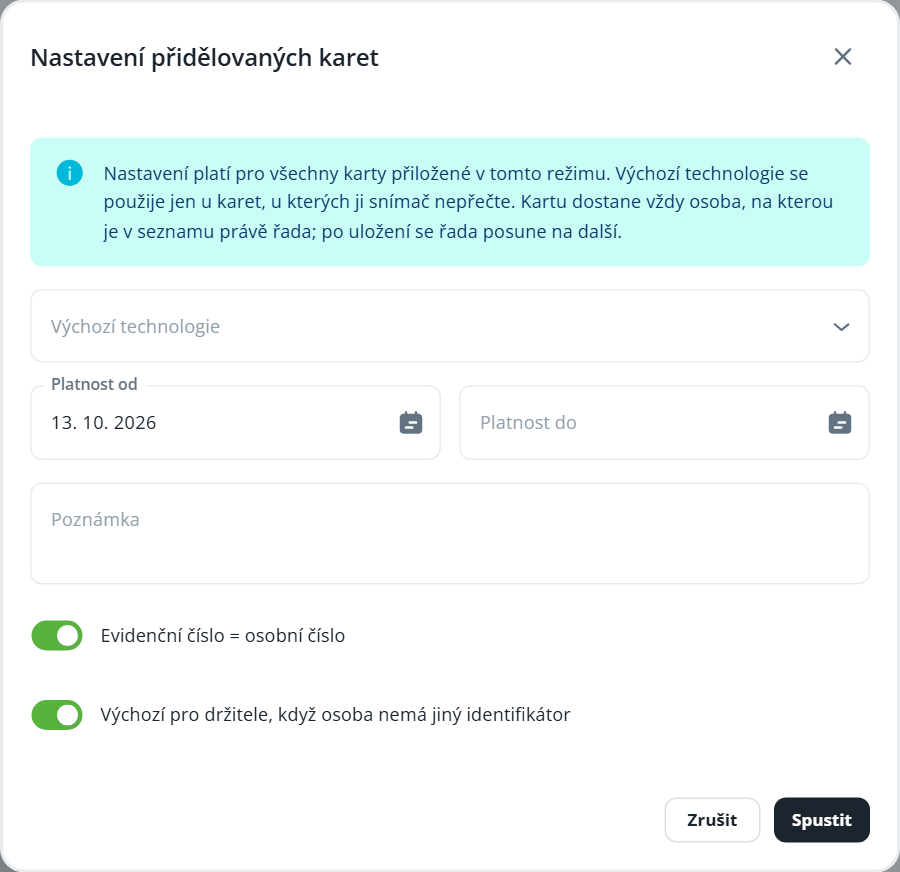
Bez připojené aplikace Aktion eDevice je tlačítko Přidělit karty neaktivní; nápověda u něj vyzve ke stažení aplikace.
Agenda Lokální snímače (Administrace → HW zařízení) ukazuje počítače s nainstalovanou aplikací Aktion eDevice. Vidí ji jen uživatel s právem Správa lokálních snímačů.
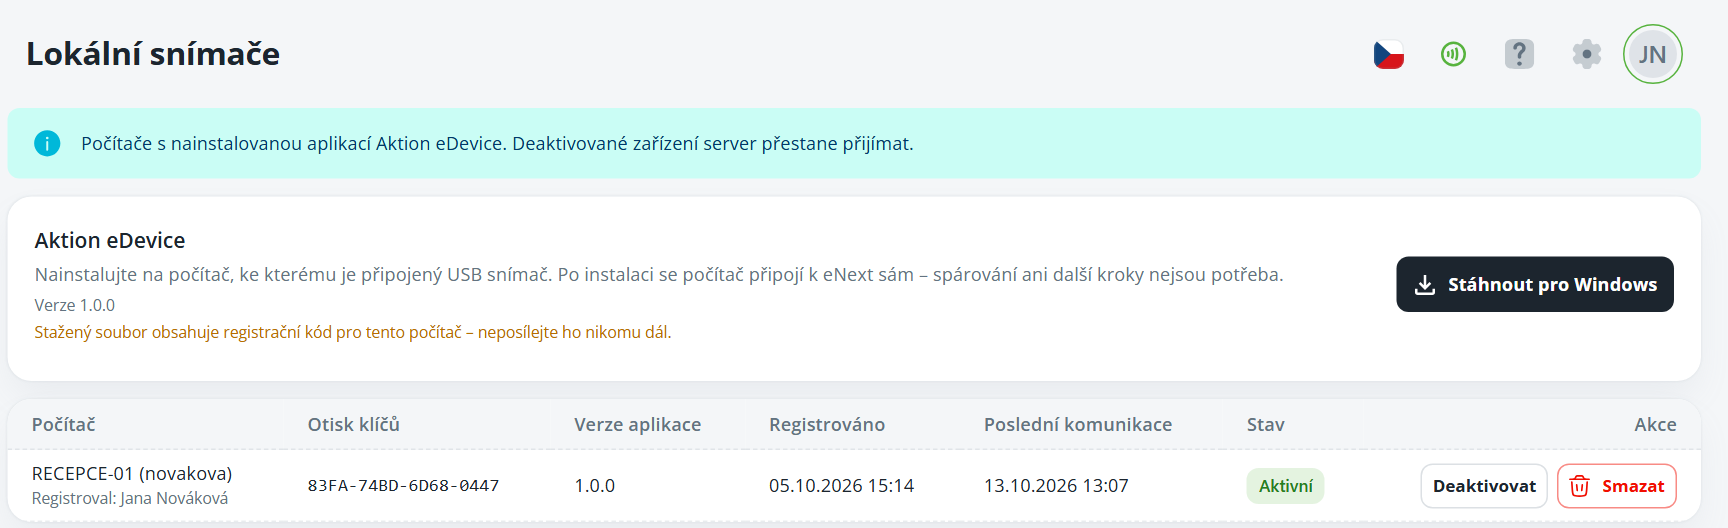
Column | Meaning |
|---|---|
Computer | computer name and Windows user, with the person who registered the computer shown below |
Key fingerprint | fingerprint of the key the application uses to authenticate itself to the server |
Application version | Aktion eDevice version at the last connection |
Registered | when the computer was connected |
Last communication | when the application last checked in |
Status | Active / deactivated |
Action | Deactivate (Activate), Delete |
Download for Windows – installer with a registration code for another computer.
Deactivate – the server will immediately stop accepting the computer (e.g. if it is lost or stolen). Only the local sensor administrator can reactivate it using the Activate button; the computer will then connect within a minute.
Delete – registration is canceled and the computer is disconnected; to use the sensors again, it must be connected again.
