Planning and management - In the calendar, you can add or remove shifts, events and requests, including approving and filtering by type or time period
Requests and actions - Actions (without approval) and requests (with approval) are differentiated. Both have their own way of planning, editing and cancelling.
Summary and permissions - You can access the calendar of colleagues, but different features require specific permissions (e.g. creating a request, shifts management).

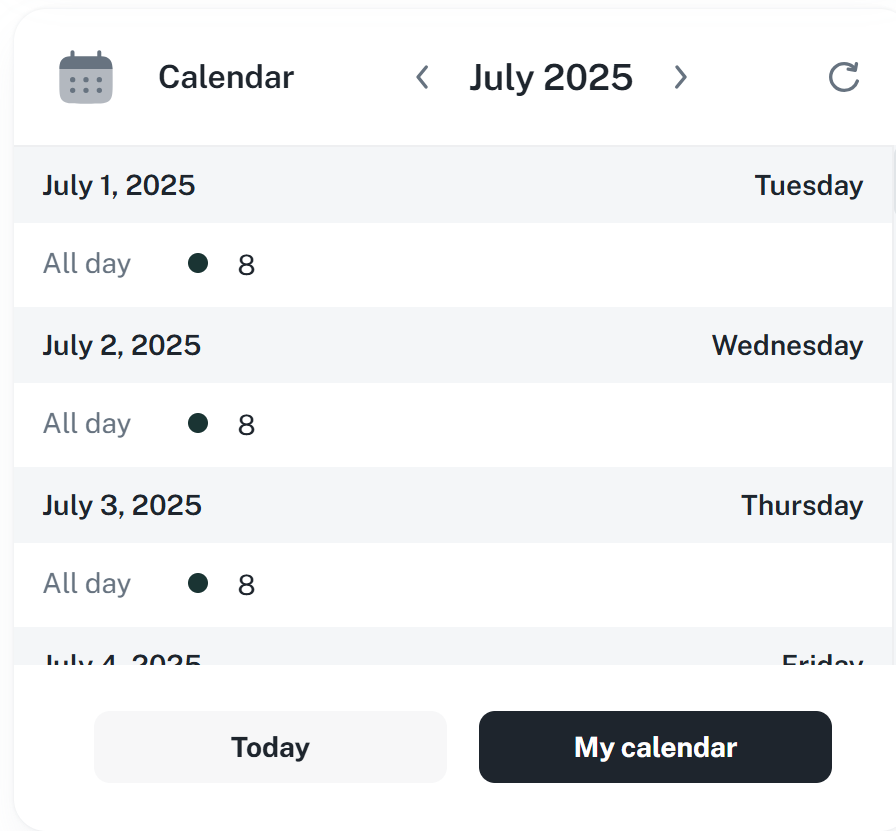
The calendar is your main tool for creating requests for leave and other work events. Thanks to it, you can easily see your planned hsifts, you can create vacation requests, report absence or plan business trips. Furthermore, you can check the calendar of your colleagues, to have an overview of their availability.
Actions are events that do not have to be approved by your superior, e.g. an illness, business trip or training. They can be added easily and are set immediately.
Requests on the other hand are events that have to be approved by your superior. These include holiday, home office or other planned absence.
For more information, click the link below.
Requests
This manual serves as a guide for managing requests. It contains instructions on editing requests and filtering.
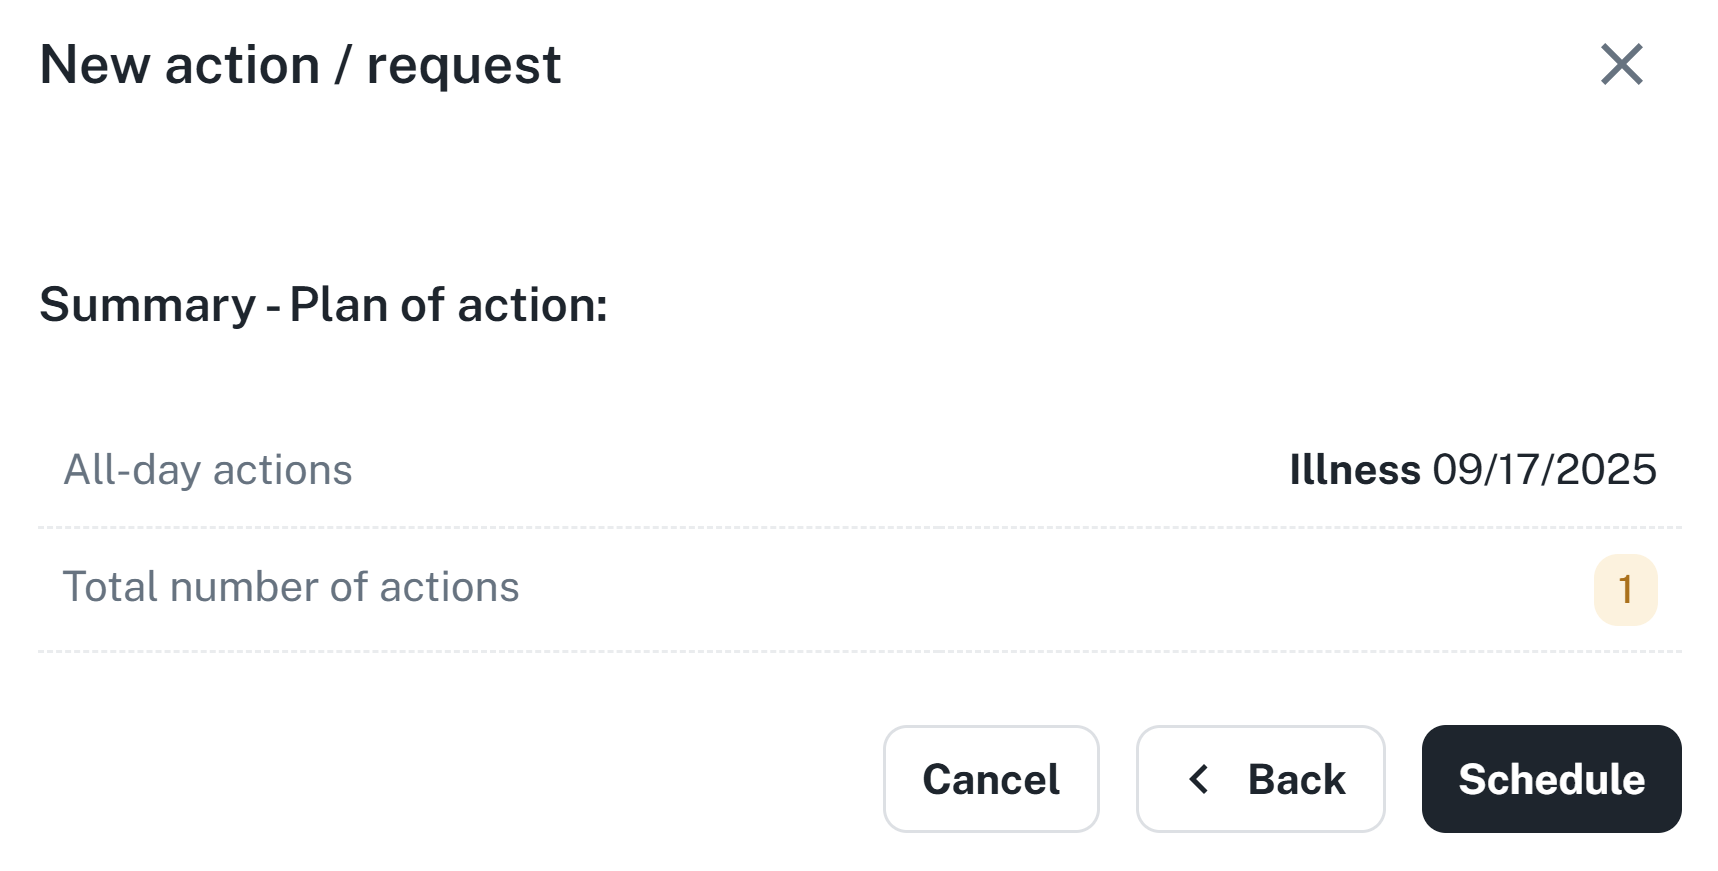
The procedure for creating a request and action is the same, the difference is in the summary and final preservation of the event in attendance, as explained above.

After selecting a day in the calendar, click the Add event button located in the upper right corner.

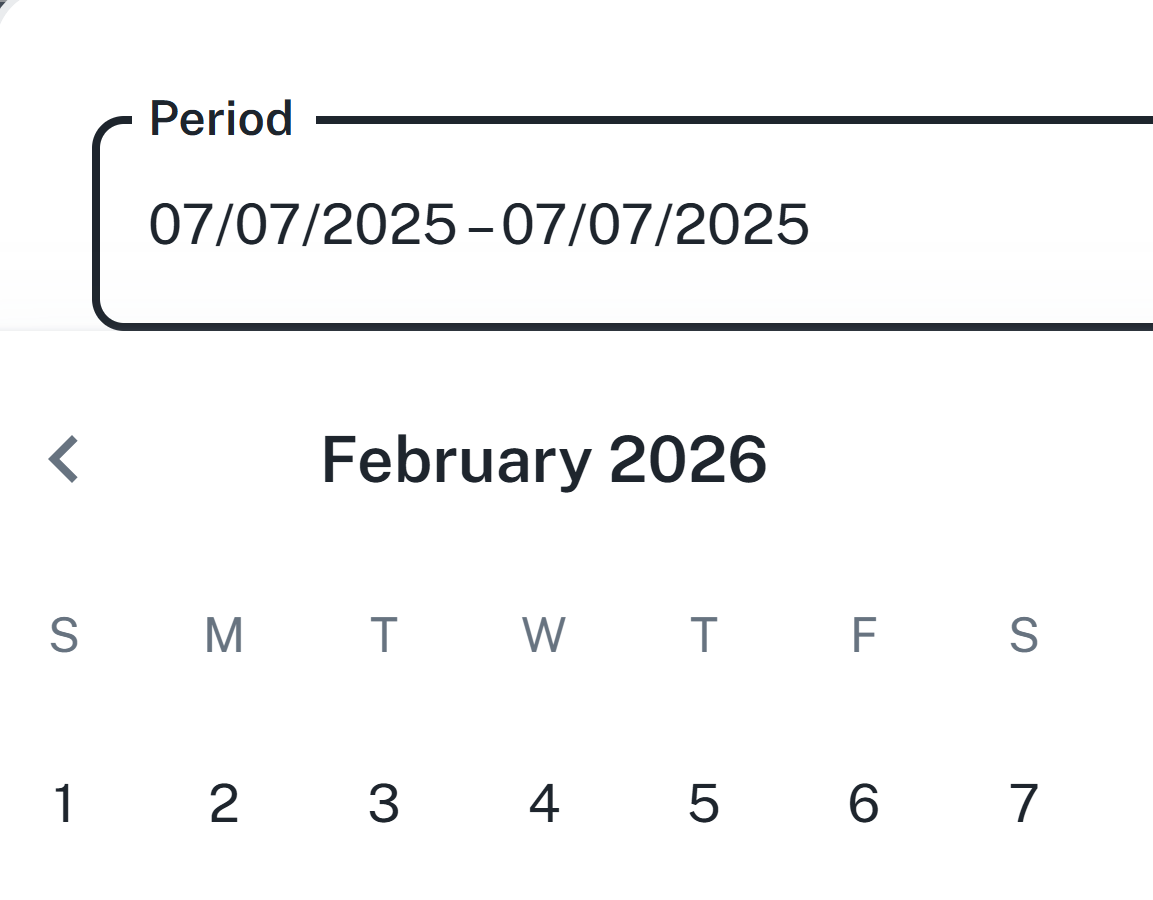
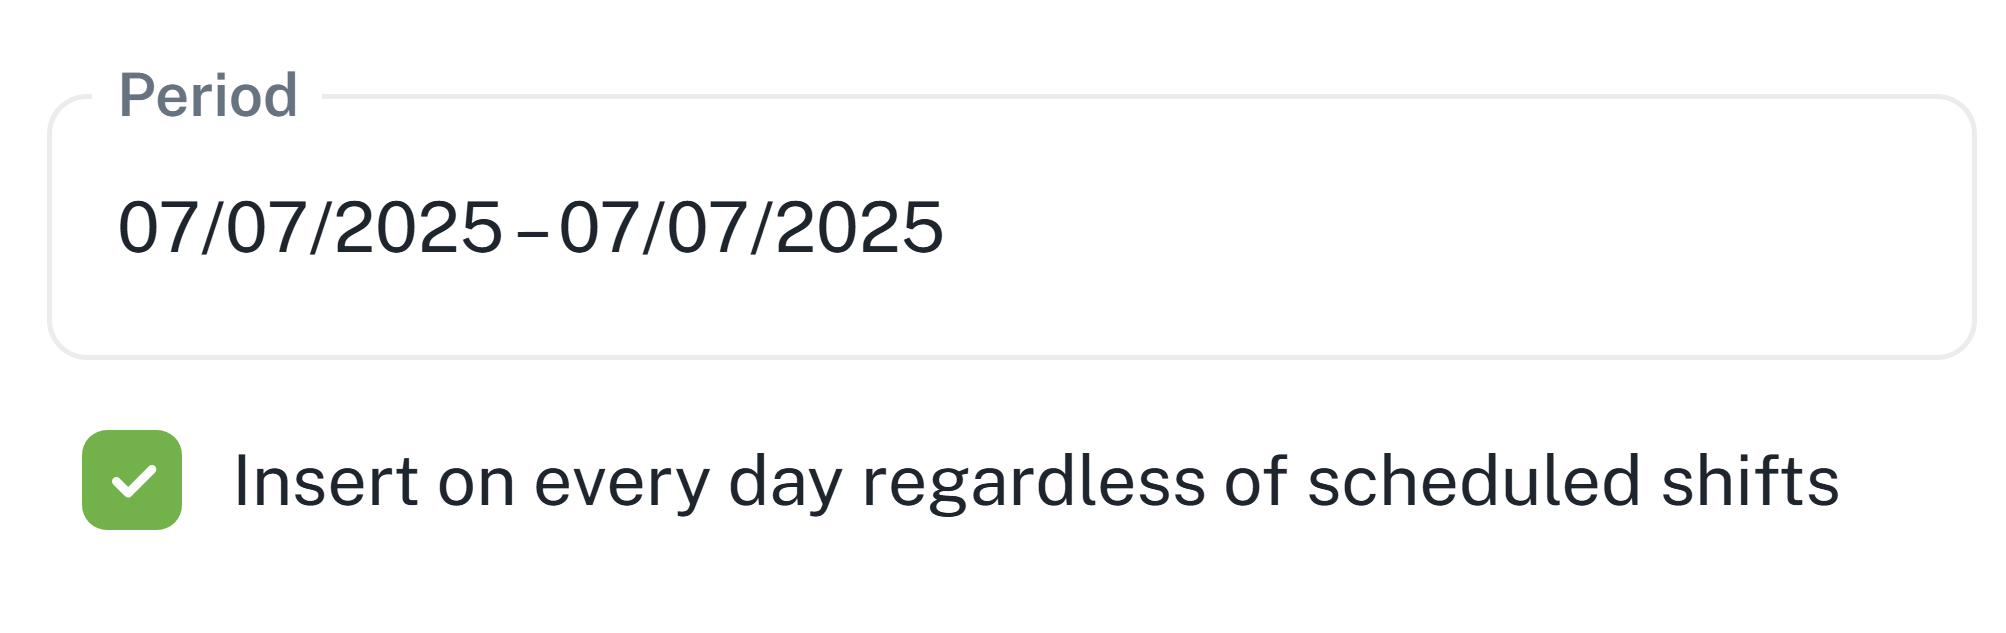
Select the time period in which the event is to take place.
Warning: To plan an action, you have to have a planned shift for the chosen time period. If you do not have a planned shift, check the Insert on every day regardless of scheduled shifts checkbox.
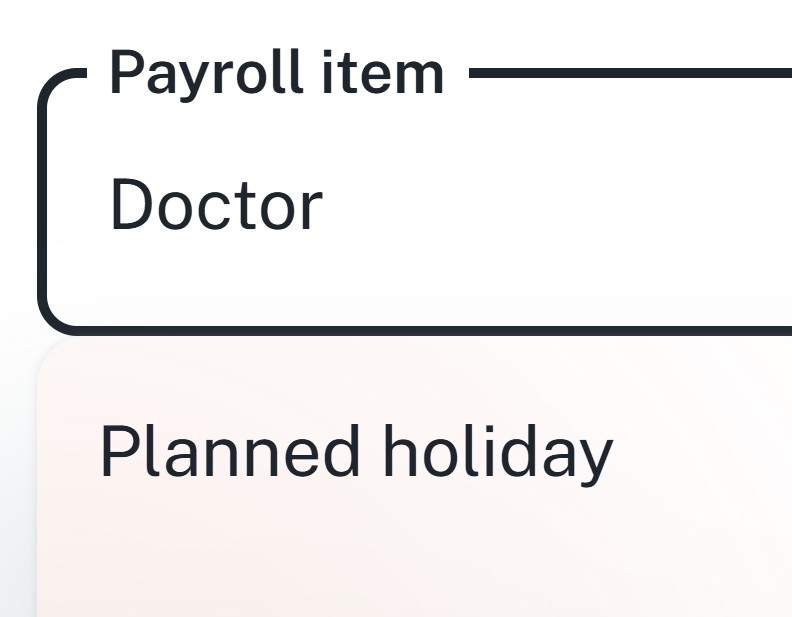
Select the payroll item related to the event. Additional approval may be required for certain payroll items – an event duration value will be generated. If you have the Approve permission, you can check the Approve box, and the value will be approved without additional steps.
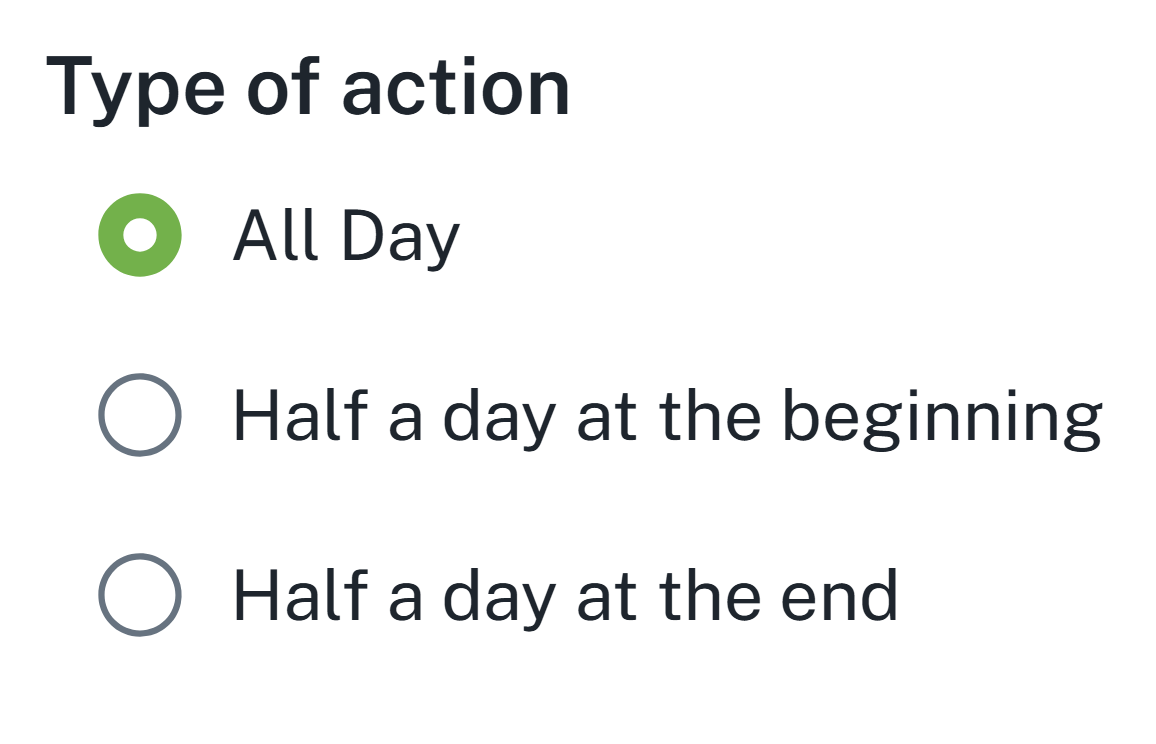
Select the type of event (all day/half a day)
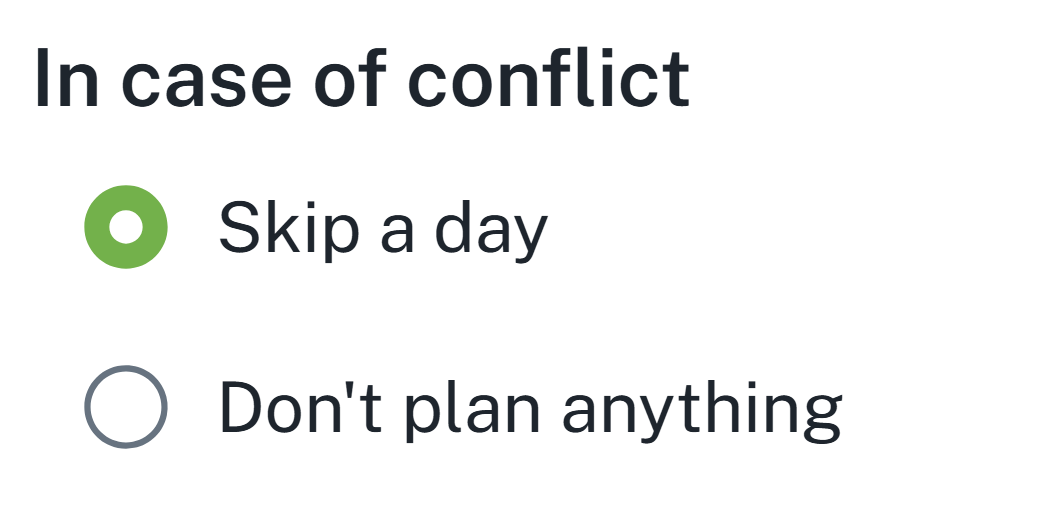
In case of a conflict with another event, e.g. when you have an action planned during the same day, the system will notify you and offer options to deal with the conflict — you can choose to Skip a day, or Not plan the event at all.

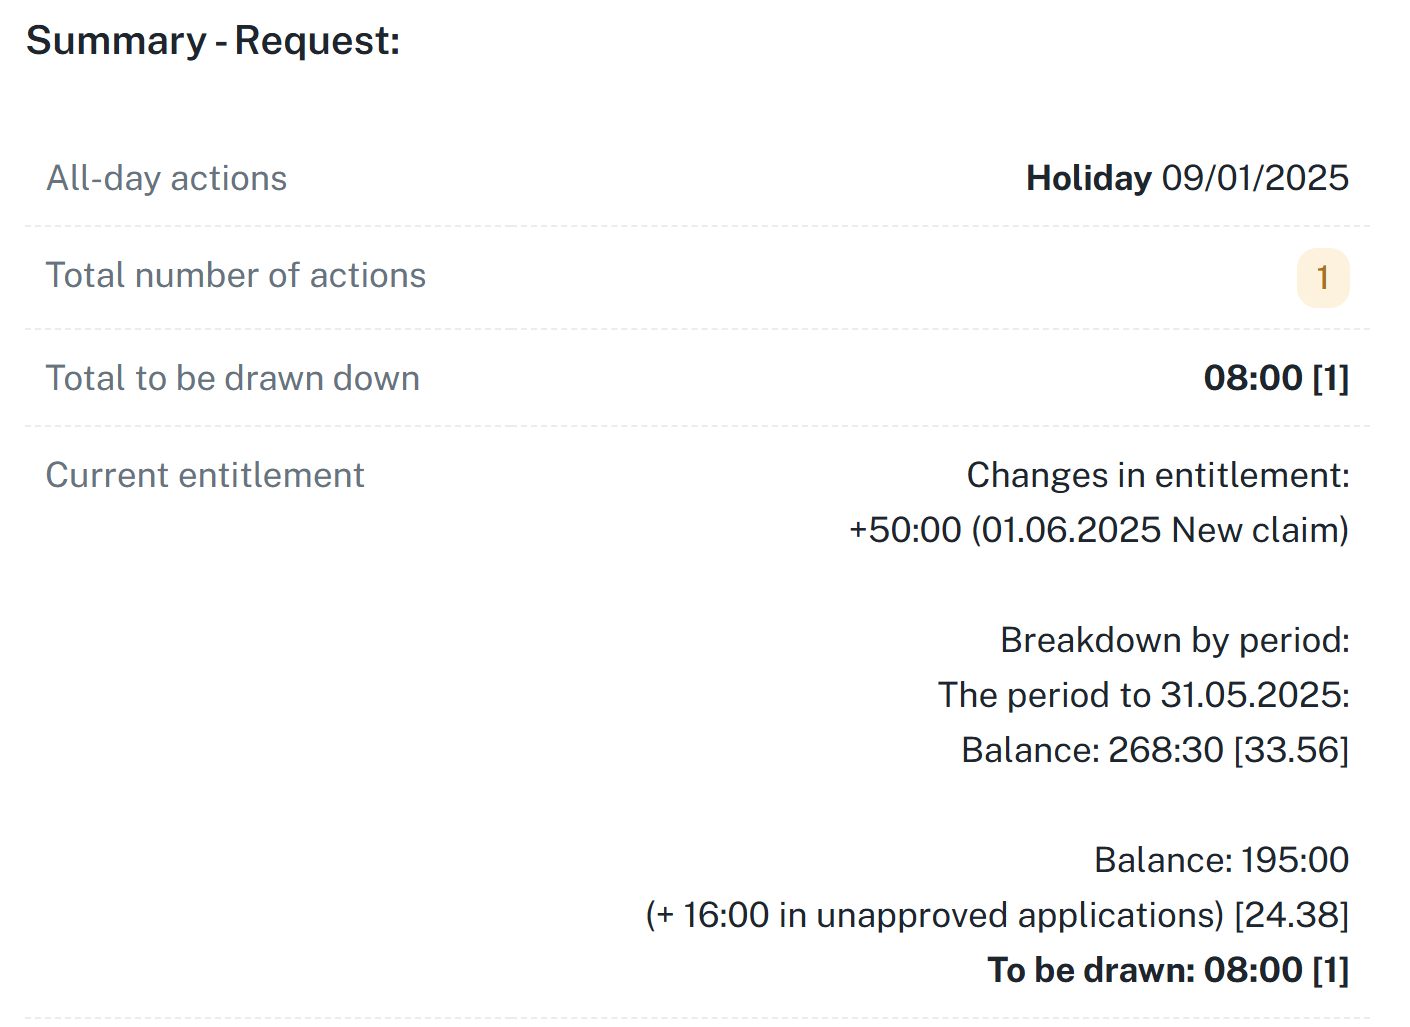
After clicking the Next button, a summary of your request with all information will be displayed. When utilizing the entitlement, an additional section Current Entitlement will be displayed, where you can see:
How many hours you will utilize
How many hours and days remain in your current entitlement
How many hours you have in unapproved requests
Below the displayed information, the approver selection of the request will appear.

The resulting request may appear as follows:
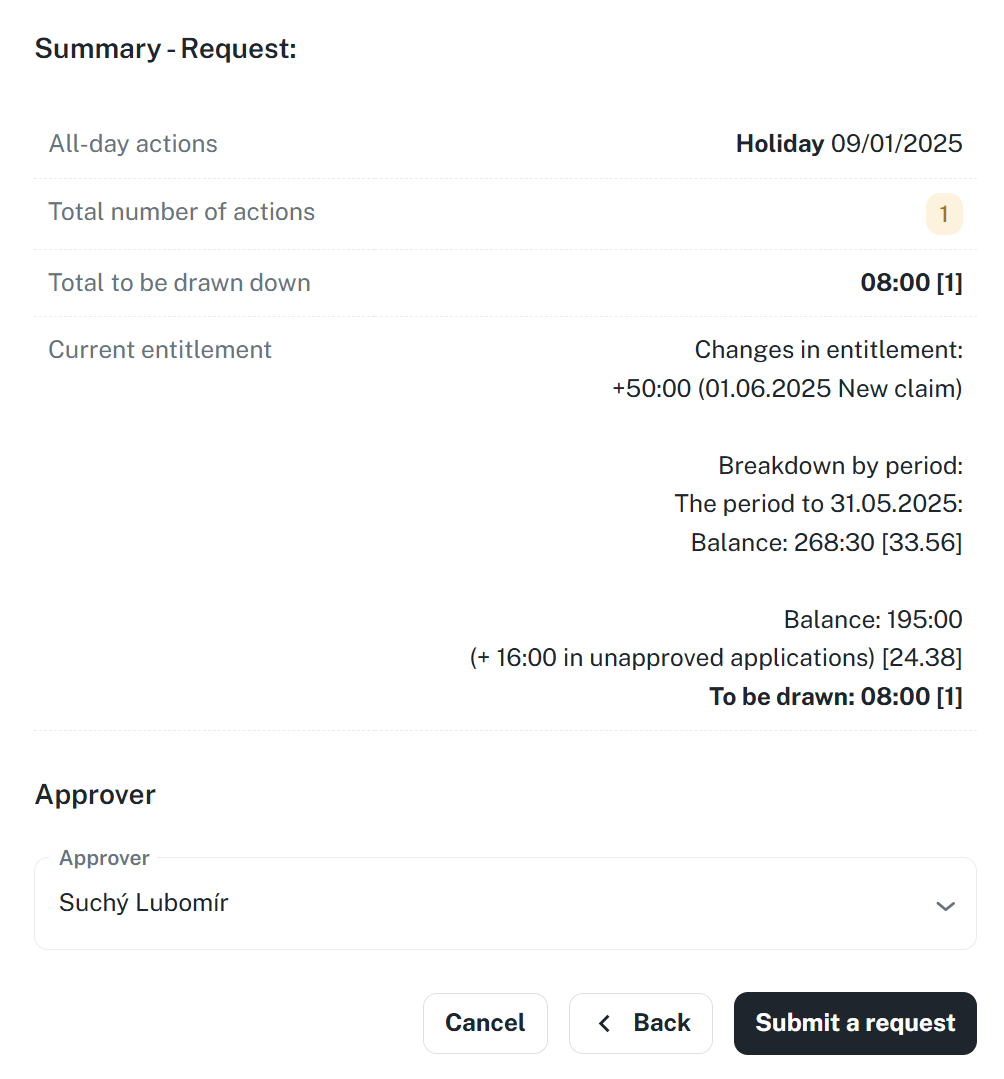
Then click Submit Request.

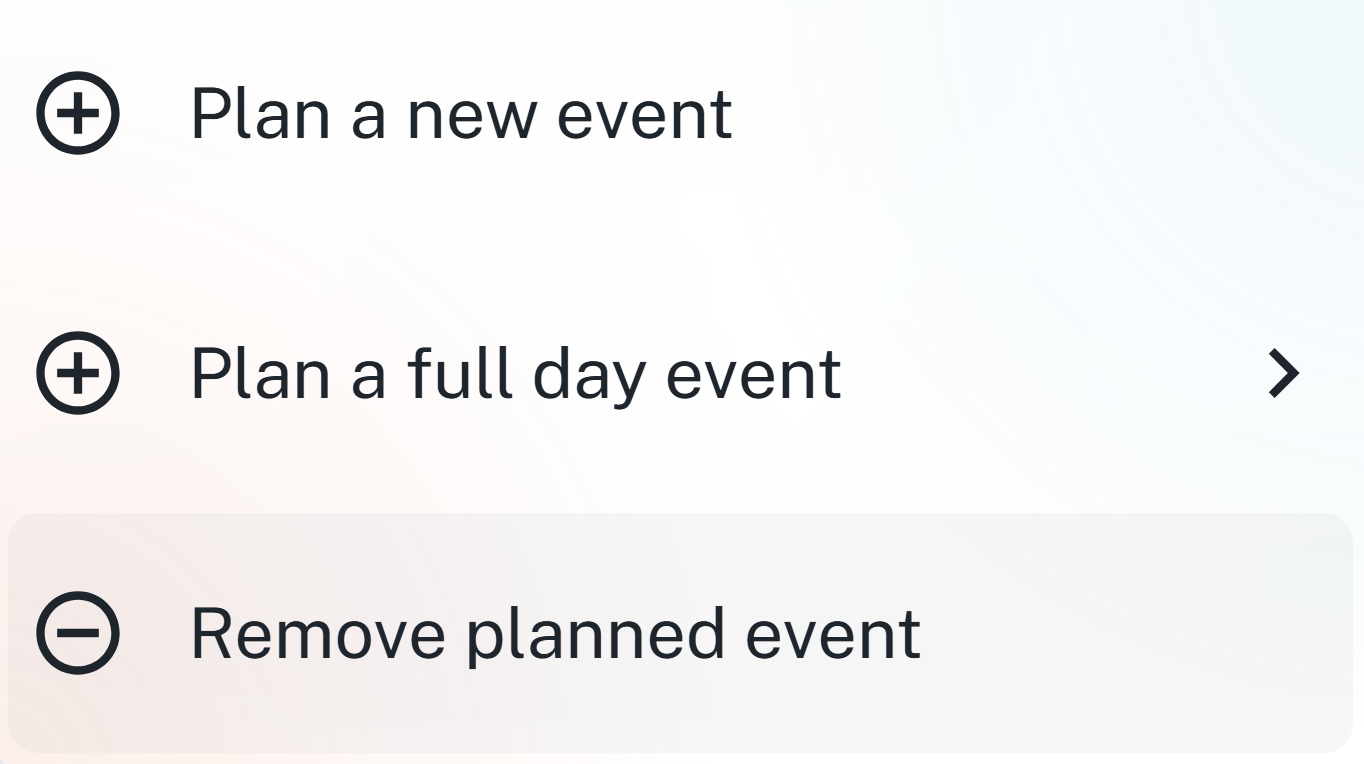
You may plan actions in the same manner by right clicking a specific day in the calendar.
An action differs from requests in that they do not have an approver, thus they are scheduled directly.
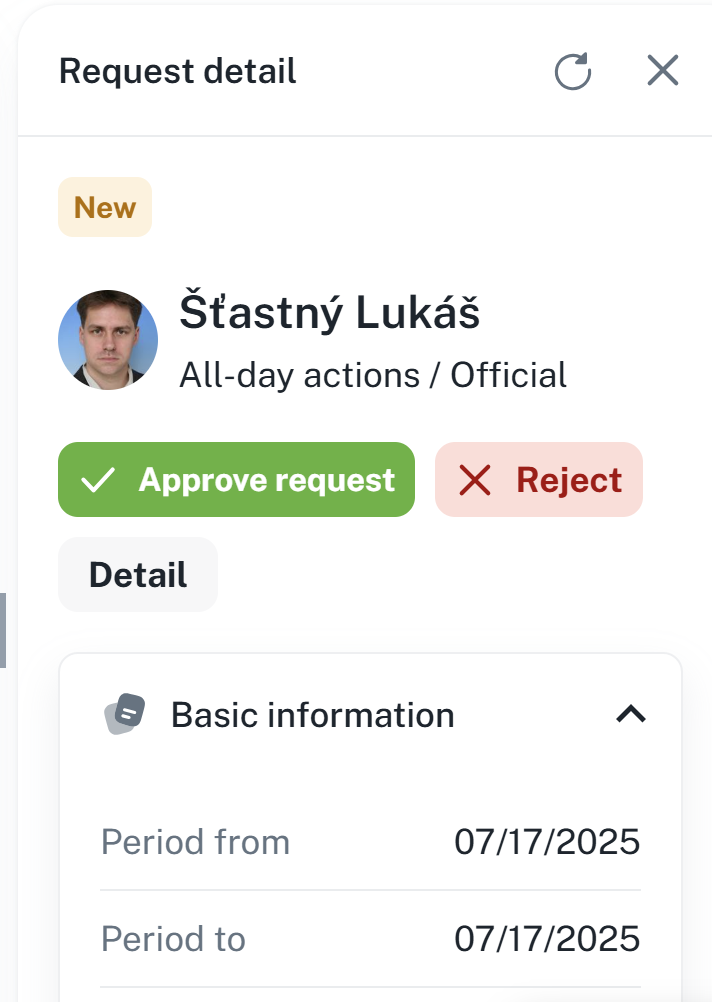
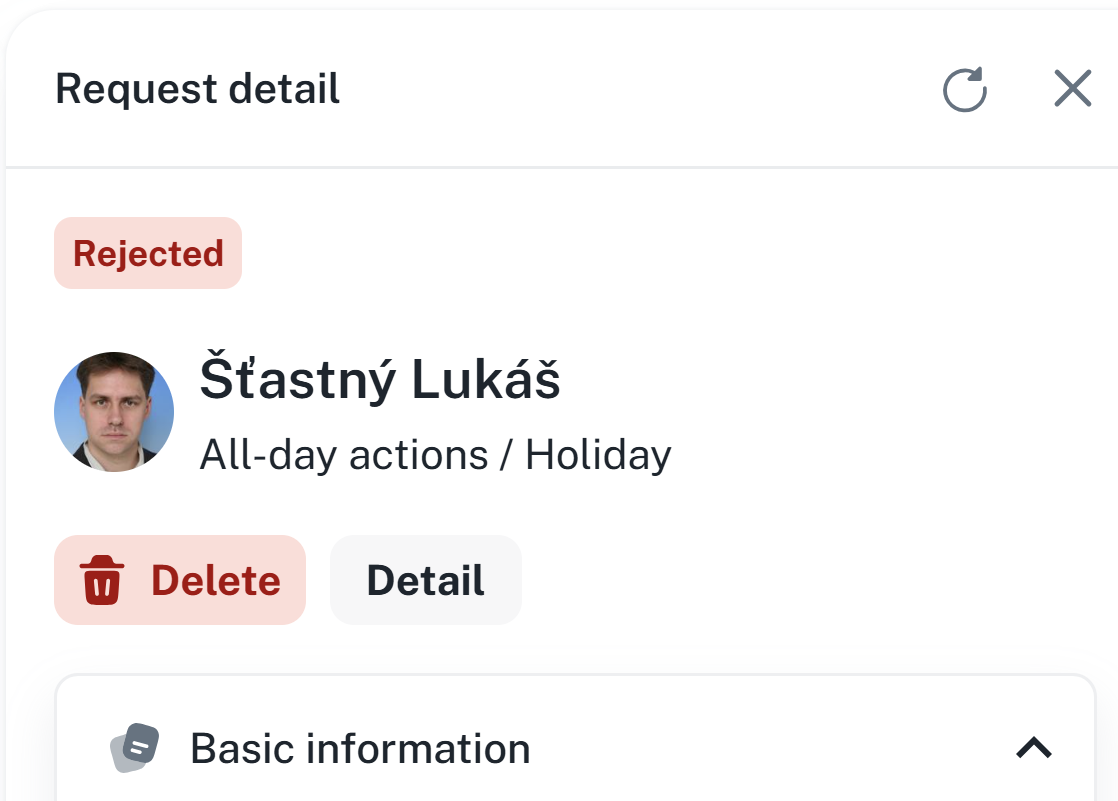
Status New is always assigned to newly created requests with no history.

A request that is New can be approved or rejected using the buttons in the Quick Actions section of the table.

By clicking the icon in the upper right corner, a side panel will open up. Clicking the request will then load information about the request, just like the request detail tab.
You can also process the request with a single click on a specific request. A side panel will open with the request details, where you will see the basic information, identical to the Detail window.

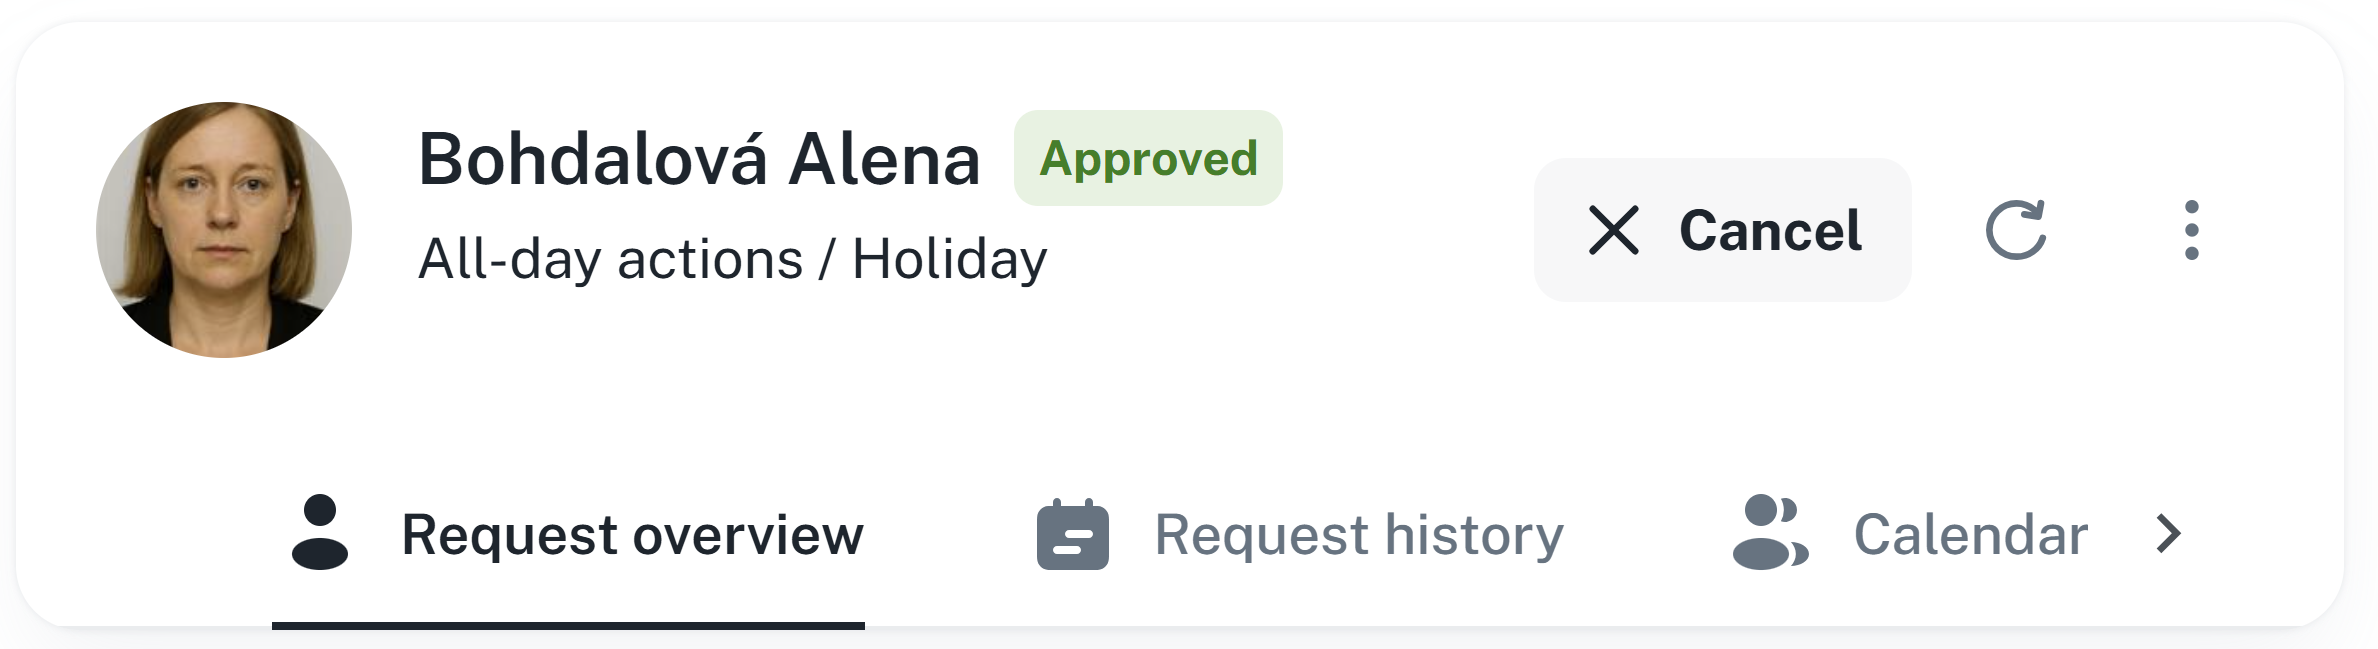
A request changes its status to Approved / Rejected based on the performed action.


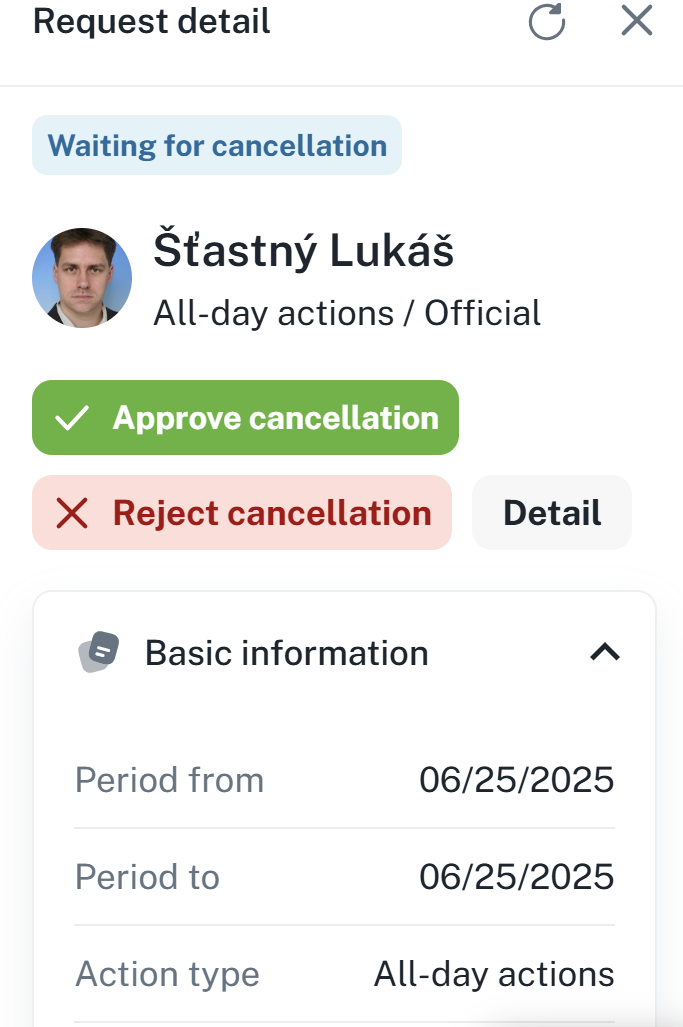
If you want to cancel the request, you can ask for it — The request will be marked as Waiting for cancellation and will be waiting for confirmation.

You process cancellation requests in the same way as approval requests: using the buttons in the Quick Actions section of the table.

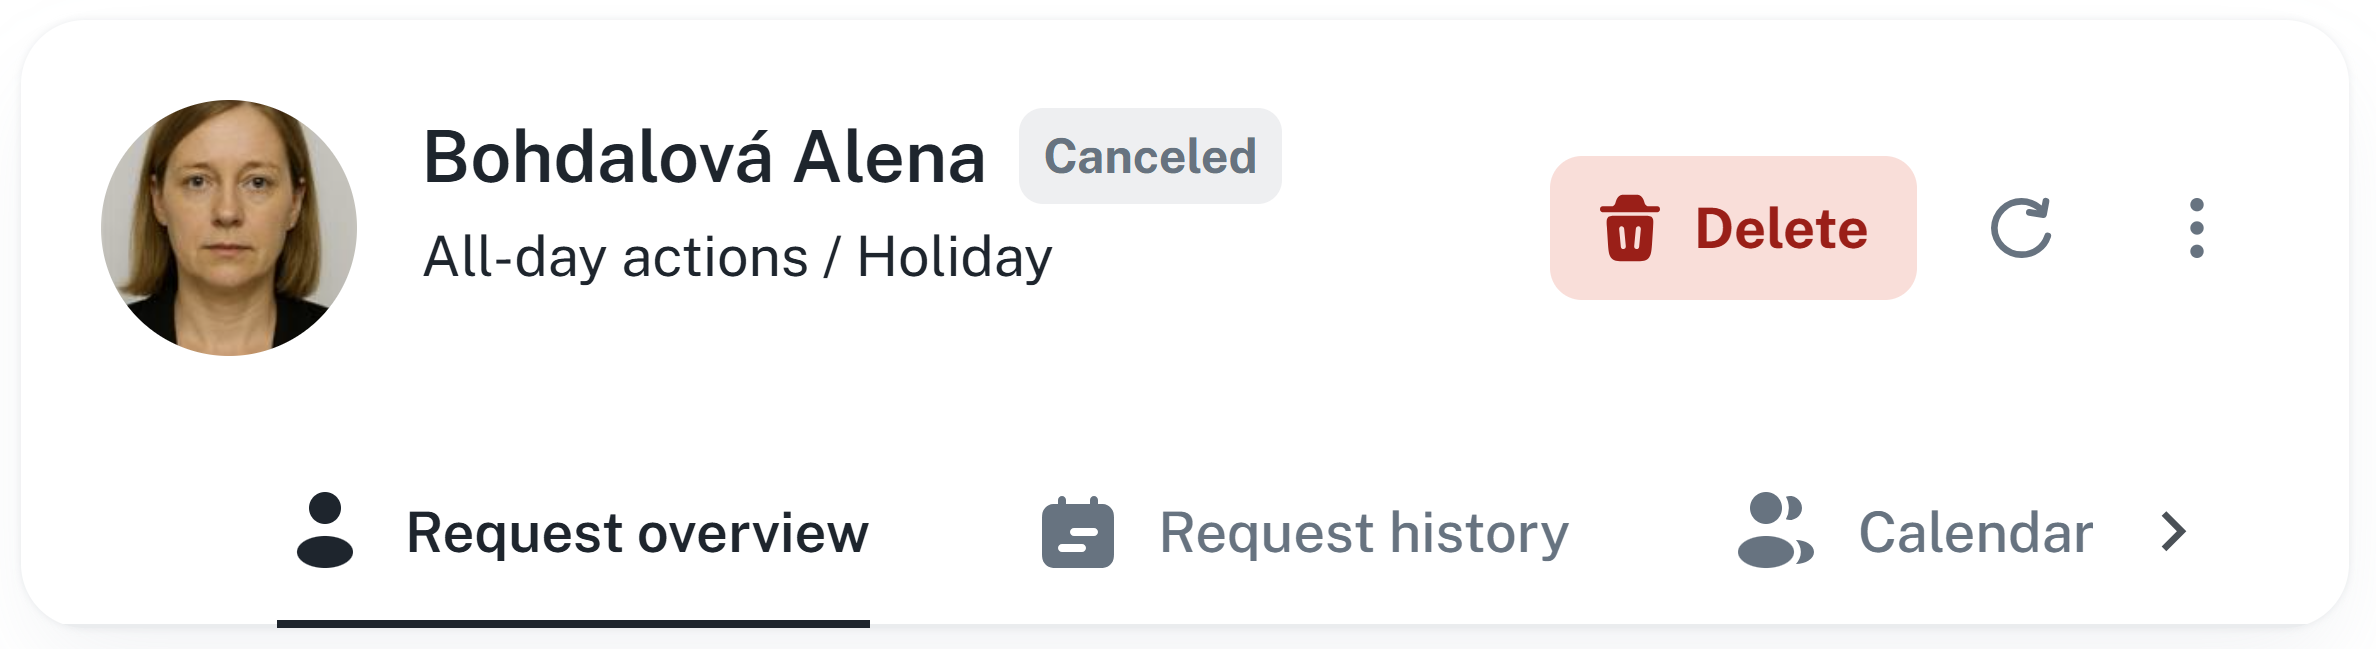
A request is marked as Cancelled either after the approval of its cancellation, or after cancelling the original request before it is approved.

You can delete a request after it is cancelled or rejected.

By clicking on a specific request in the calendar, you can access the request details.
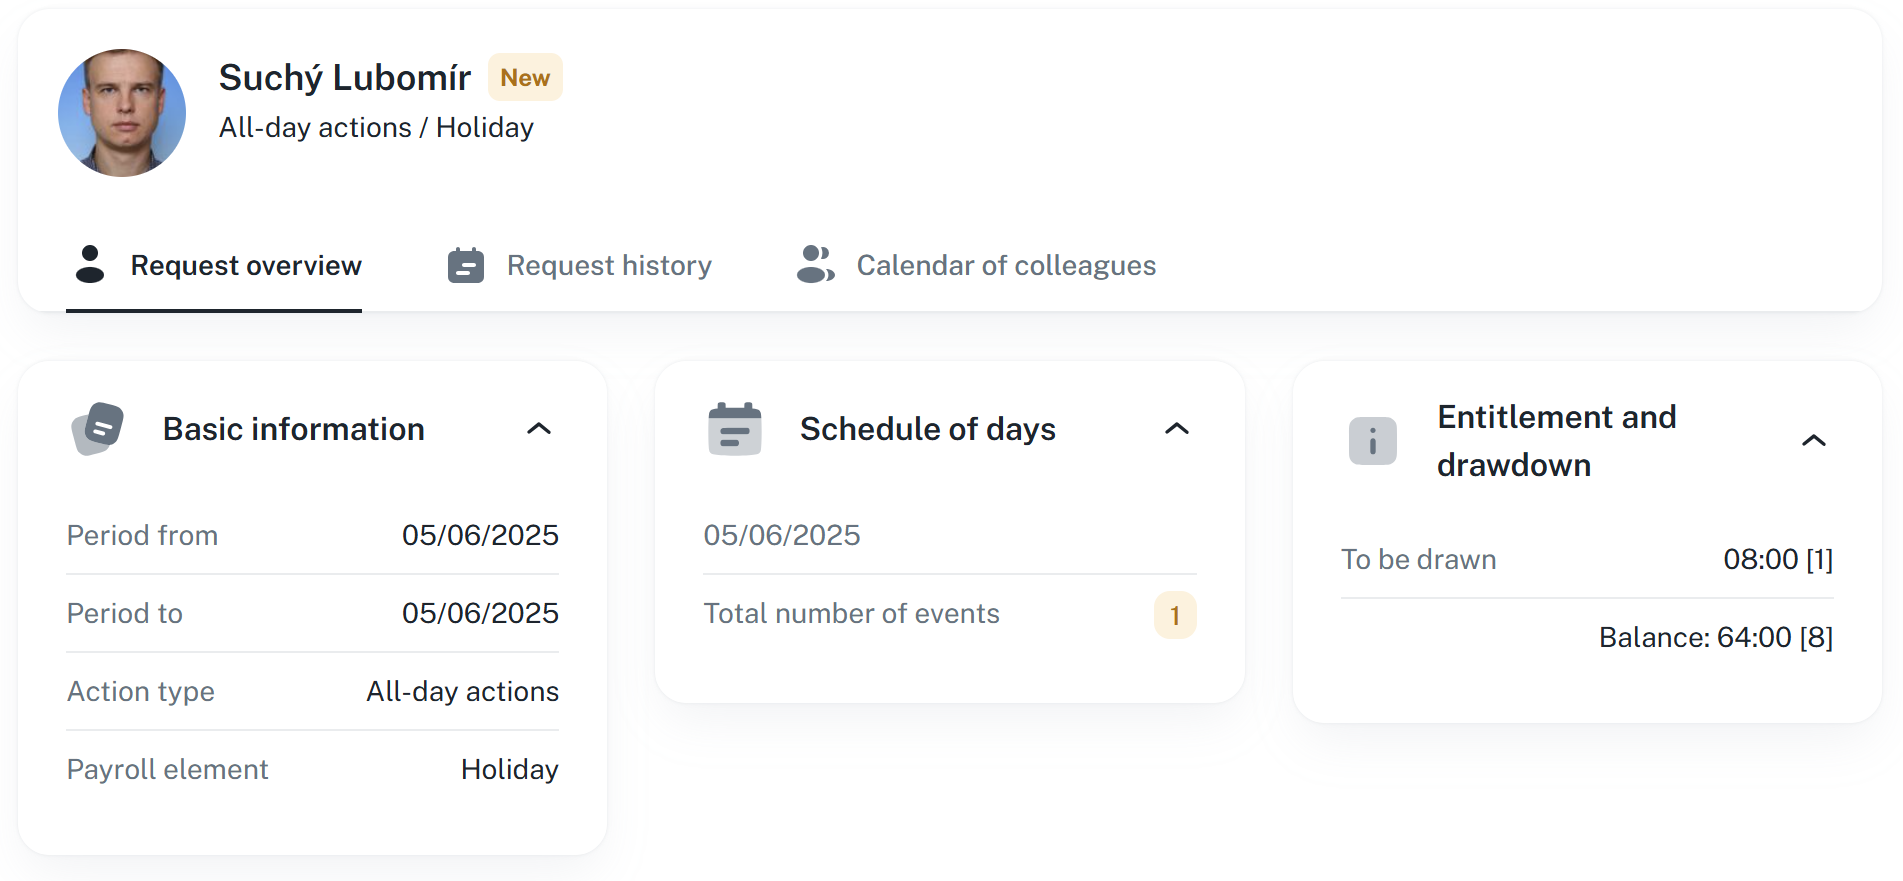
Basic information - Contains information about the application time period and wage component
Schedule of days - Contains information about the days on which the application is to take place
Entitlement and drawdown - Contains information regarding the usage of the remaining balance
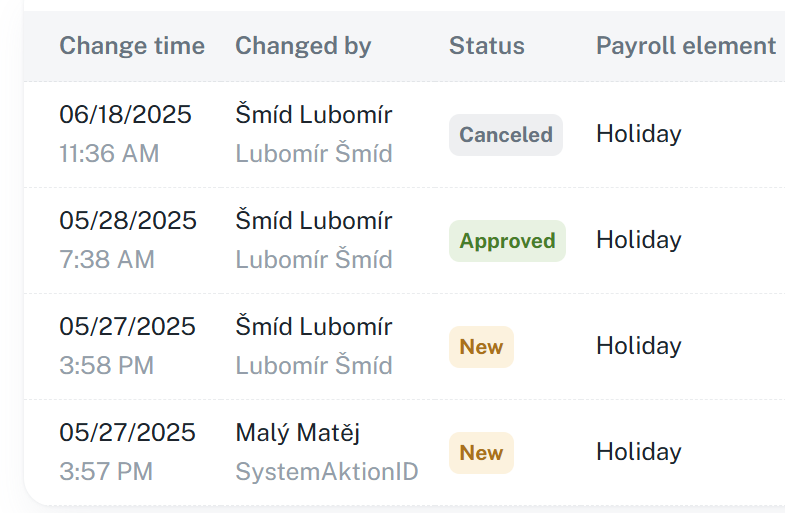
By clicking on Request history, the history of application statuses with the necessary details is available to you.
More information is under the same header name below. The description fits the individual tab aswell as the tab in request details.
By right-clicking the action you wish to remove and clicking the Remove planned event button.
By clicking on a specific request and in the Detail section and clicking Request cancellation. In the case of an action, the button in the Detail section is named Delete.
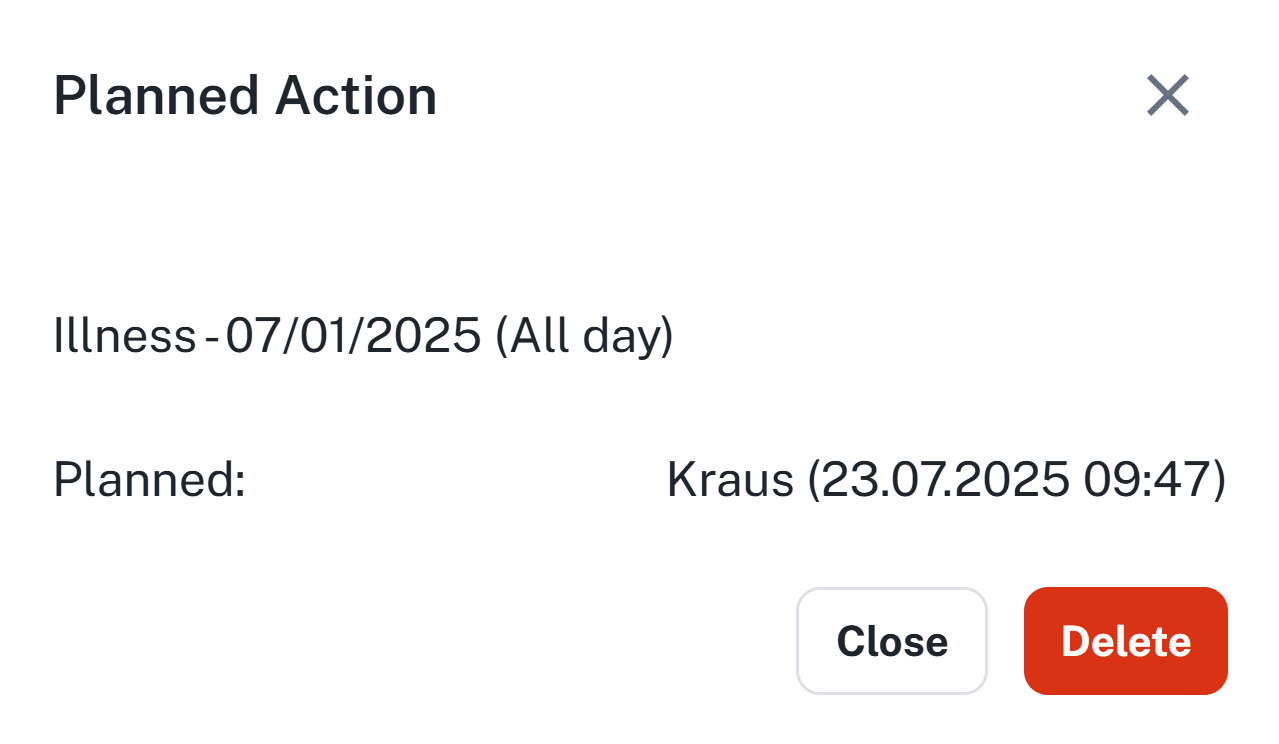
If the action is pending approval or cancellation, it can be canceled immediately. If the action is canceled, it can be deleted.
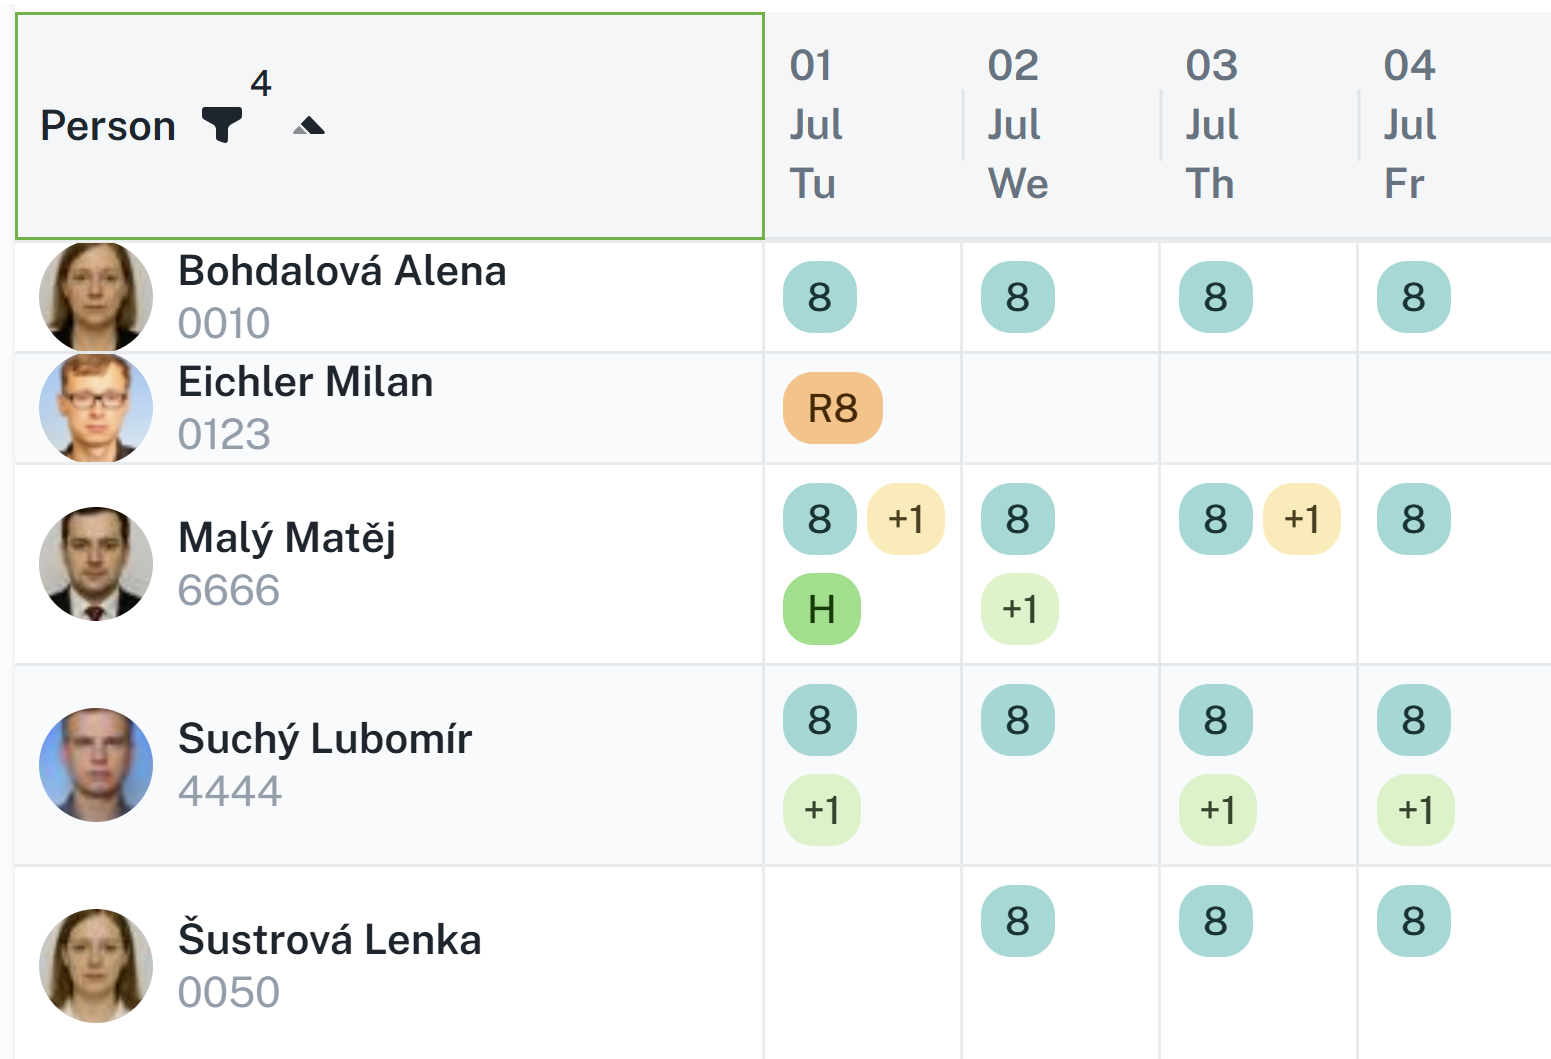
Allows you to manage shifts / emergencies / actions and persons’ requests. The options are in calendar aswell but only for the logged in user. For modifying multiple persons, you need to switch to the agenda Shifts schedule.
For more information, please click on the link below.
Shifts schedule
This manual serves as a guide for planning employee shifts. It contains instructions for adding, removing, and replacing shifts, bulk management, event planning, and filtering.
By right-clicking on a specific day in the calendar, you will open a context menu with shift management options:
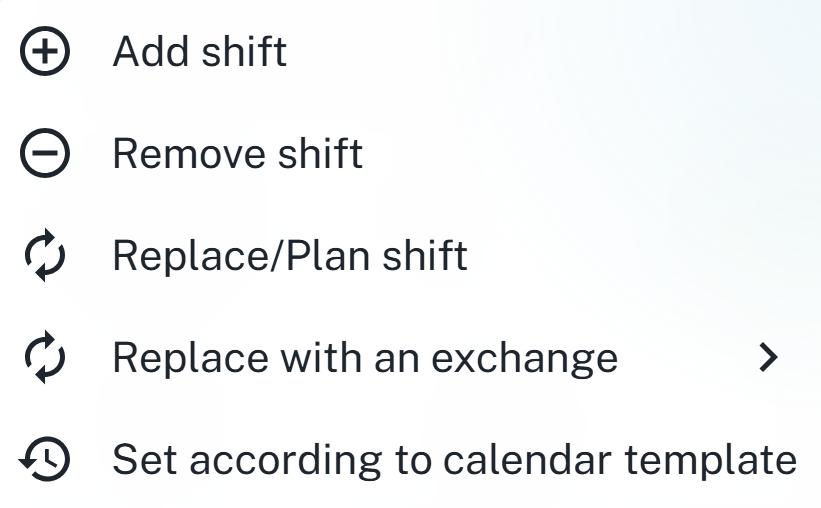
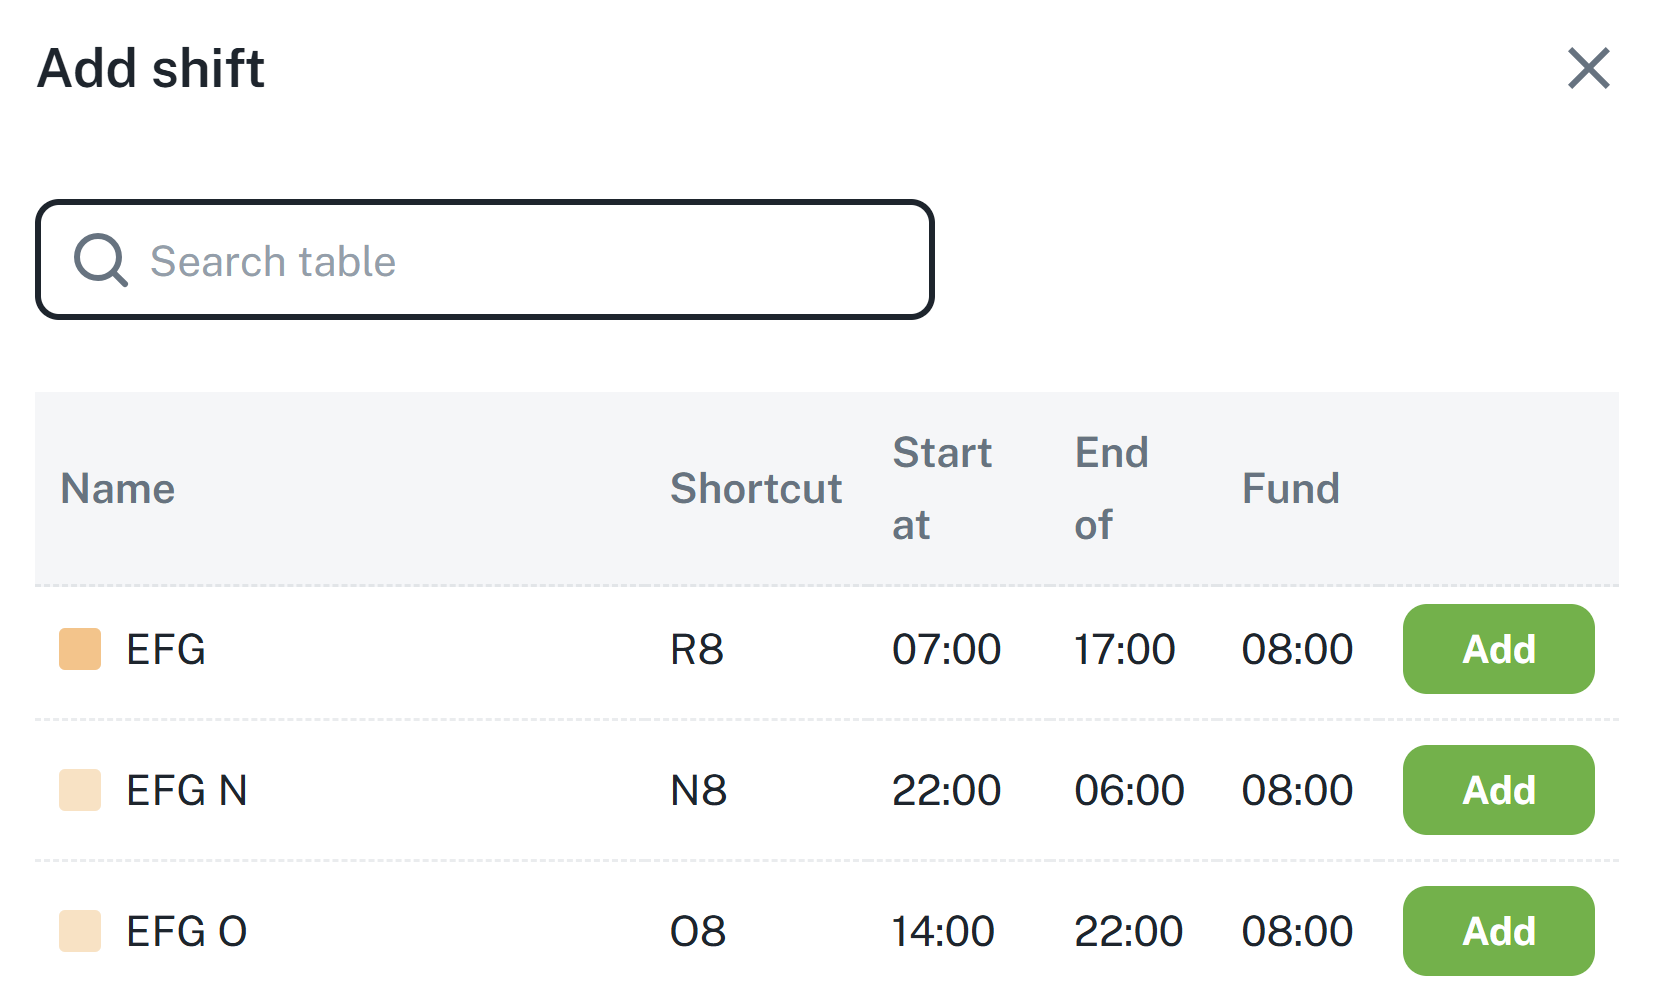
Add Shift - Opens a table with a filter for shifts that you can add. The filter applies to all columns.
Remove shift - Removes the selected shift
Replace/Plan Shift - Functions the same as Add Shift, but replaces the existing shift
Replace with an exchange - Quick selection of shifts from calendar template items
Set according to calendar template - Sets the default shift from the calendar template for the attendance regulation
Add On-call - Adds an on-call shift. Selected individuals are on the hotline
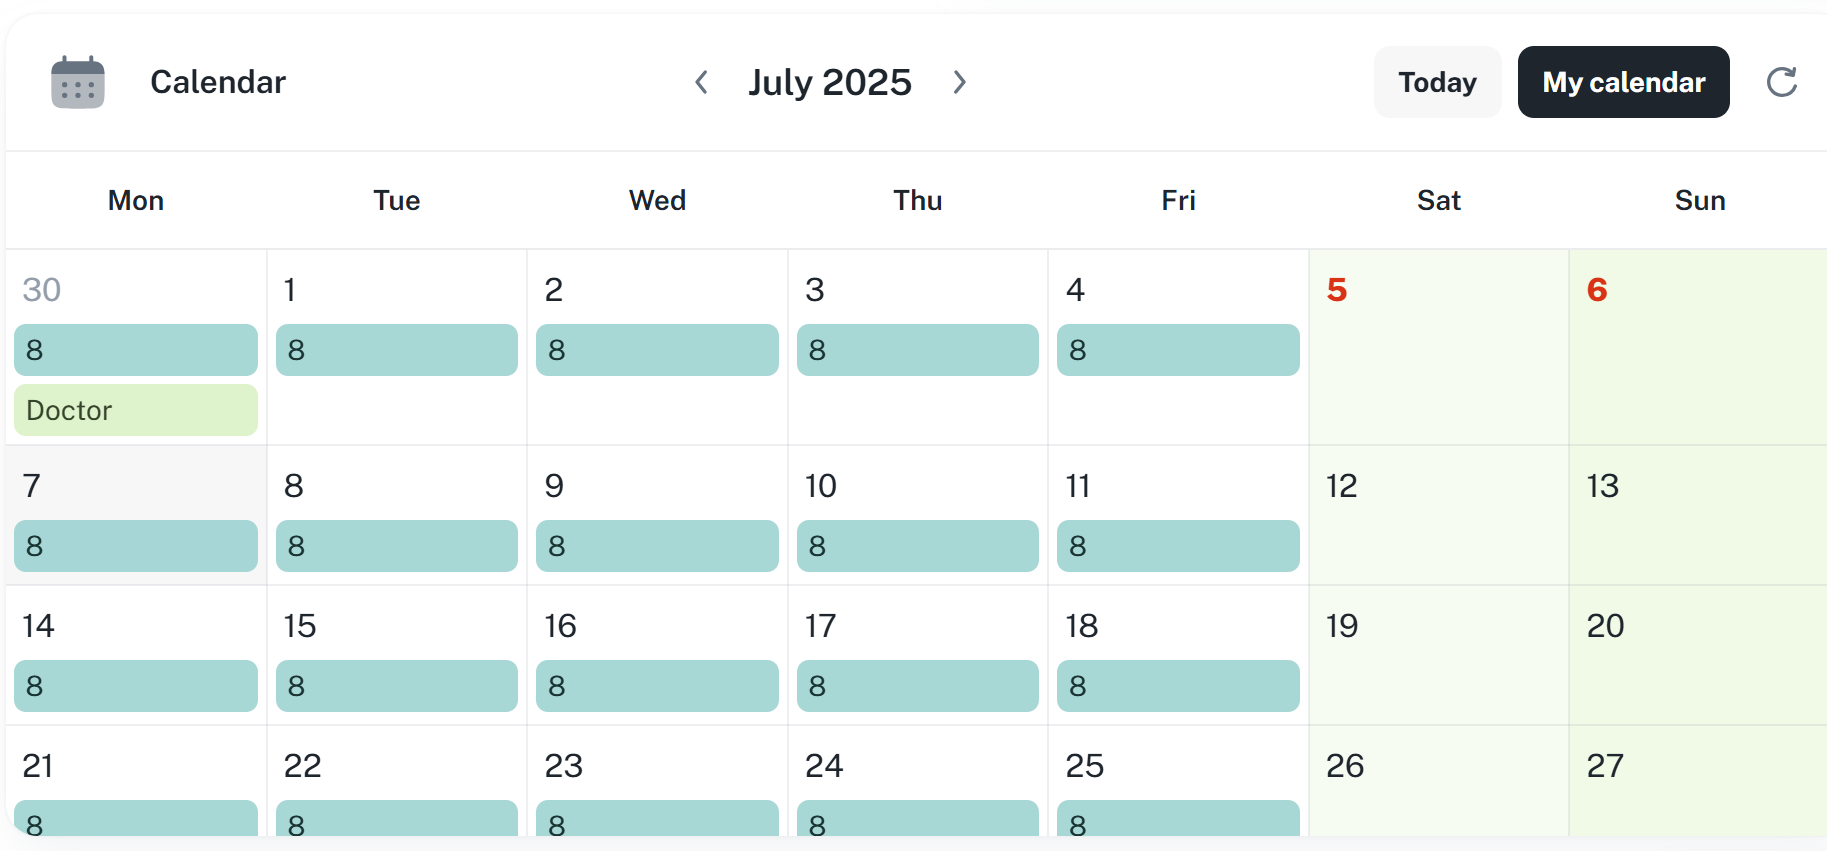
Calendar filtering can be controlled using the toggles located at the top center of the calendar. These allow you to show/hide types of events.

Shifts - Shows/hides scheduled shifts
Planned Events - Shows/hides planned events
On-call - Shows/hides on-call shifts
Dishes - Shows/hides ordered meals
Visits - Shows/hides scheduled visits
It is also possible to change the layout and month/year. The layout control buttons can be found in the upper left corner.
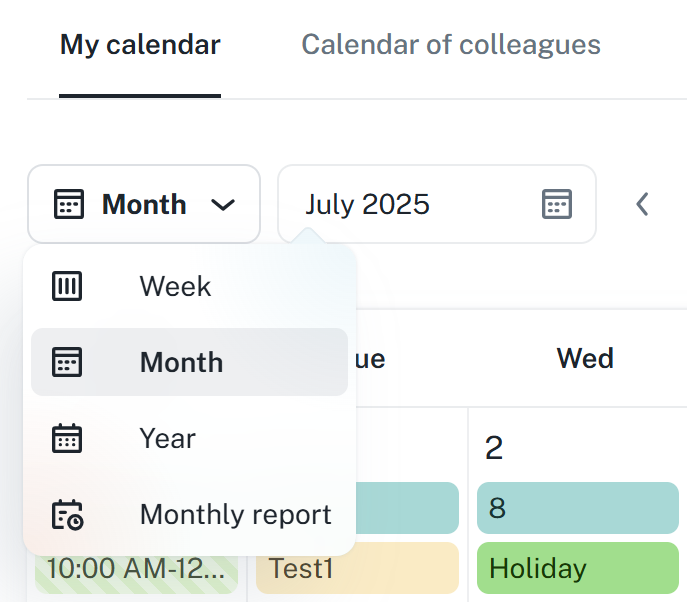
The Monthly Statement option switches the calendar to a tabular view, just like the Calendar widget in size S
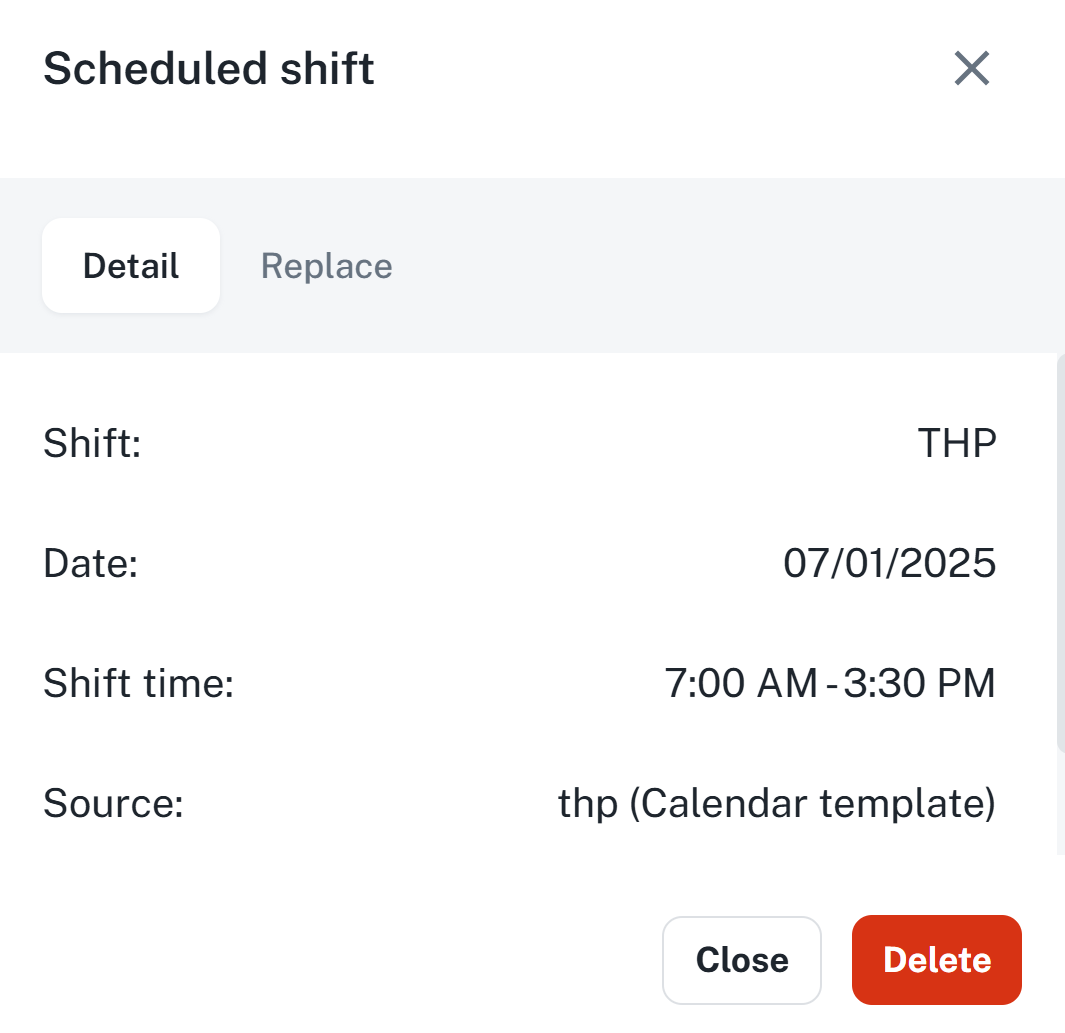
Information regarding a specific event, request, or exchange can be displayed by clicking on the given event.
The dashboard offers the Calendar widget, available in various sizes.
Size S
Size M
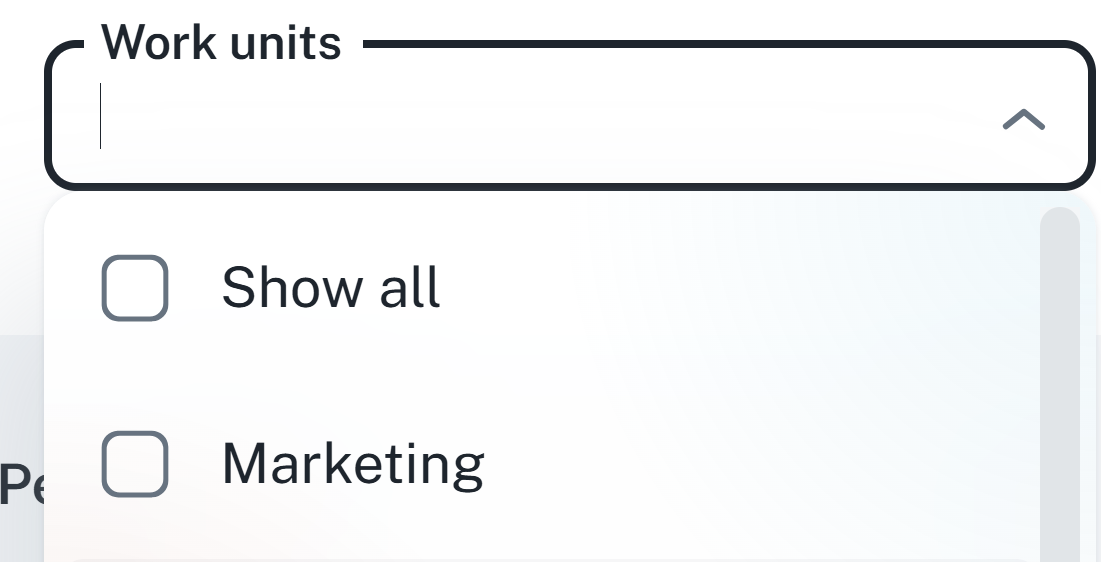
In the calendar of colleagues, you can view the calendars of other individuals in your work unit.
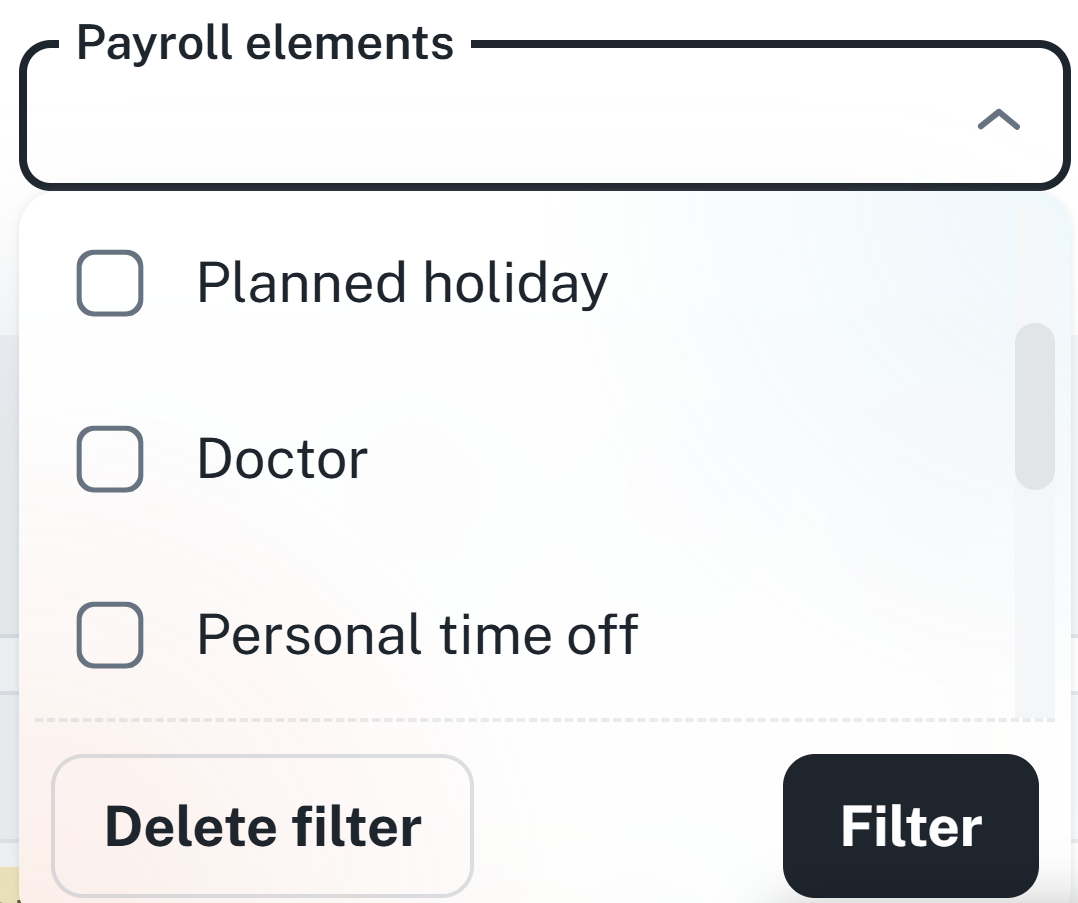
For a clearer way of searching for employees, you can filter by work unit or by payroll item. It allows e.g. searching a specific department or filtering by planned holidays.